Seat Belt Replacement - Rear
SEAT BELT REPLACEMENT - REAR
REMOVAL PROCEDURE
1. Remove the rear seat assembly.
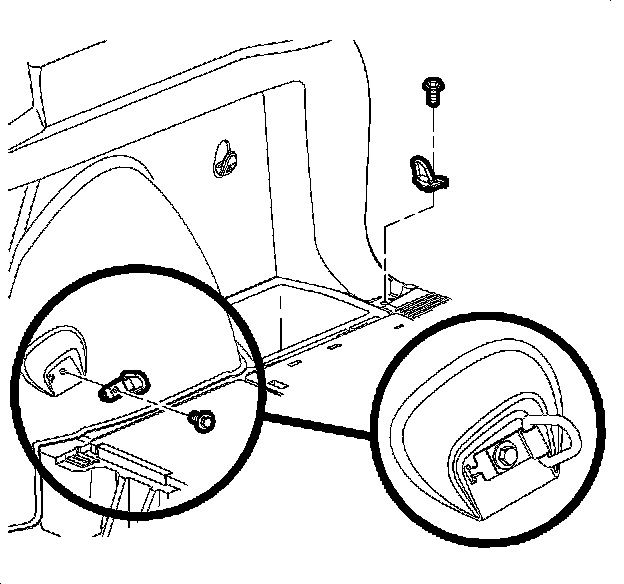
2. Remove the cargo hooks.
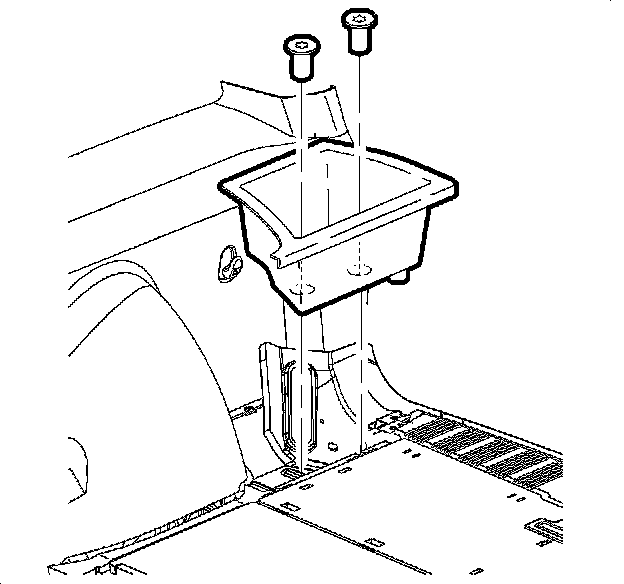
3. On the driver side, remove the load floor storage bin.
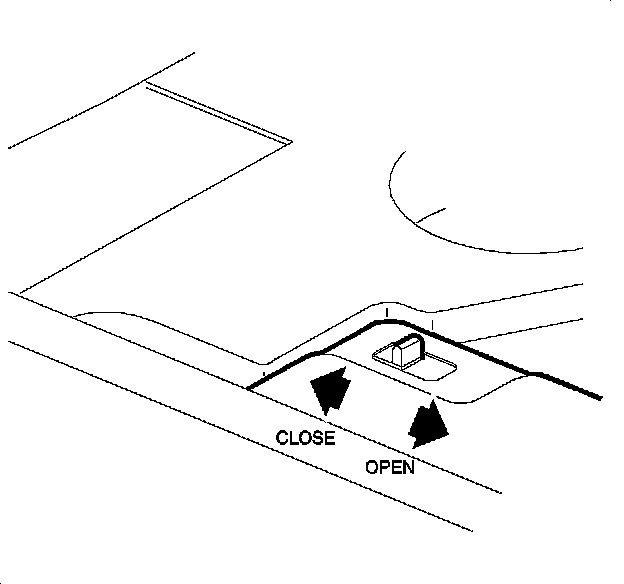
4. Remove the rear load floor. If the vehicle is equipped with a lock lever, move the lever inboard and lift up on the load floor.
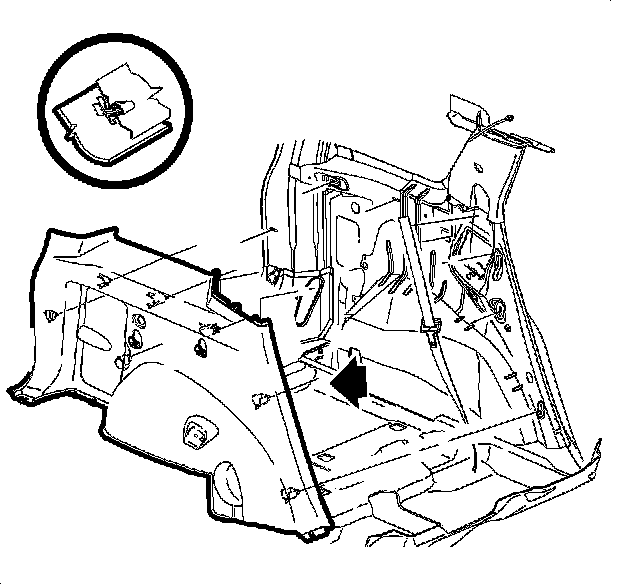
5. Remove the rear wheel quarter trim panel by pulling at the attaching clip locations.
6. On the driver side, disconnect the auxiliary plug wire harness connection.
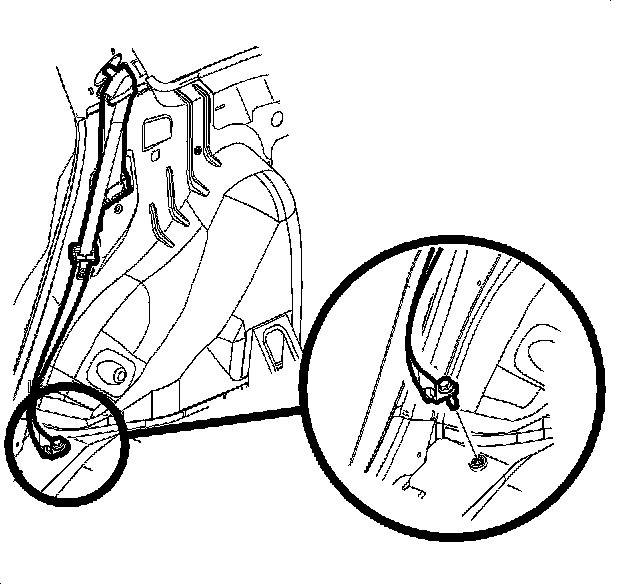
7. Remove the shoulder belt fastener at the floor.
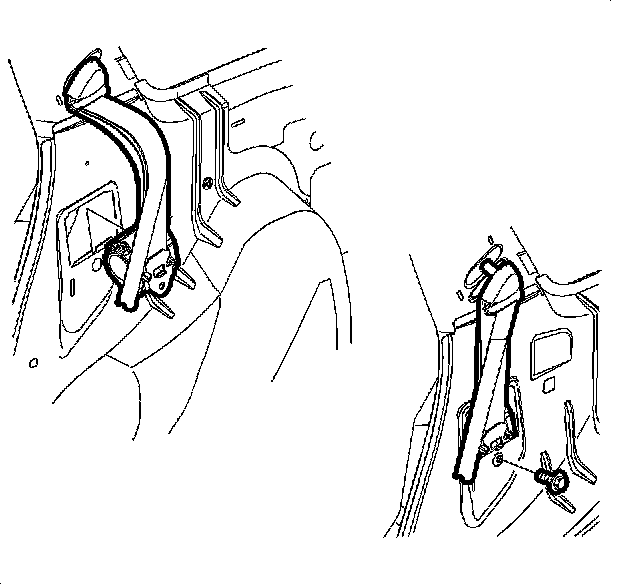
8. Remove the retractor fastener and remove the retractor.
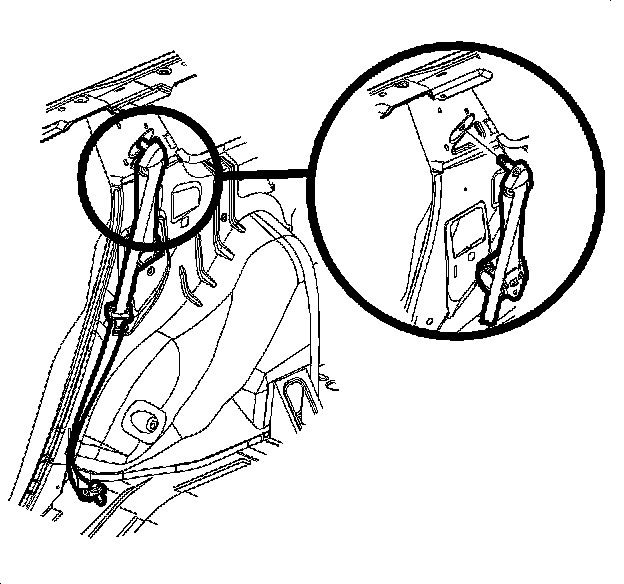
9. Unsnap the upper fastener cover and remove the shoulder belt upper fastener. Remove the shoulder belt assembly.
INSTALLATION PROCEDURE
1. Position the retractor into the structure. Verify that the locking tabs are in place. Install the fastener.
NOTE: Refer to Fastener Notice in Service Precautions.
IMPORTANT: Apply Permatex(R) 24200 on all restraint fasteners prior to installation.
Tighten the fastener to 45 N.m (33 lb ft).
2. Install the shoulder belt upper fastener.
Tighten the fastener to 45 N.m (33 lb ft).
3. Snap the fastener cover closed.
4. Install the shoulder belt to the floor with the fastener.
IMPORTANT: Verify that the belt is not twisted during installation.
Tighten the fastener to 45 N.m (33 lb ft).
5. On the driver side, connect the auxiliary plug connection.
6. Position the rear wheel quarter trim panel to the vehicle. Push at the clip location to install.
7. Install the rear load floor and, if equipped, lock in place by sliding the lock lever outward.
8. Install the load floor bin.
9. Install the cargo hooks.
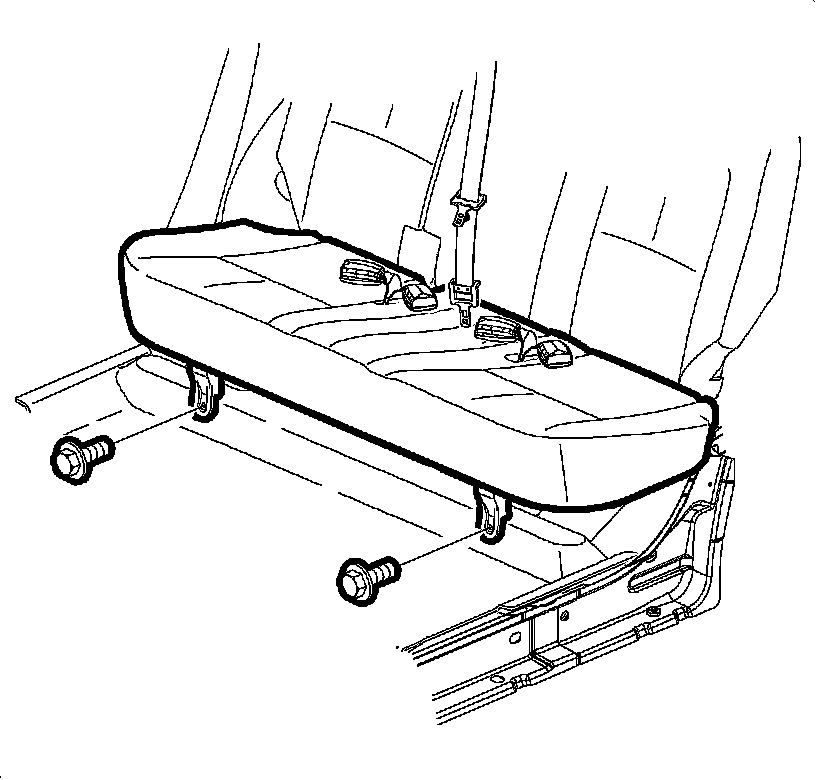
10. Position the rear seat assembly in the vehicle. Install the forward fasteners.
Tighten the fasteners to 20 N.m (15 lb ft).
11. Install the rear seat assembly.
12. Install the rear seat fasteners.
Tighten the fasteners to 50 N.m (37 lb ft).
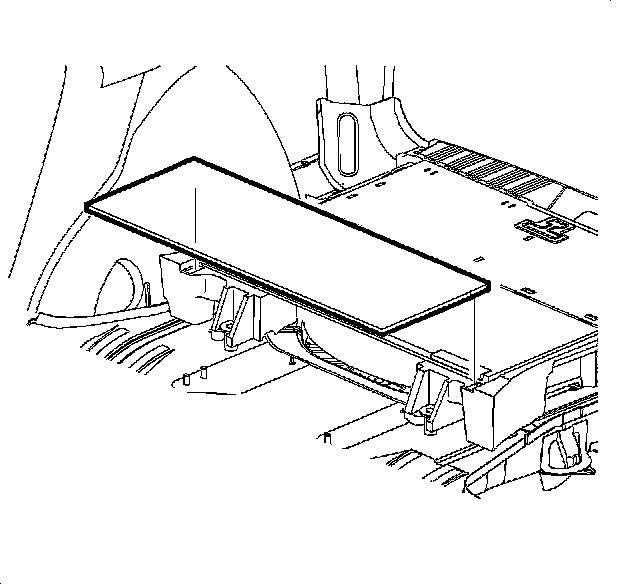
13. Position the load floor forward cover to the vehicle. Push down at the Velcro(R) location to secure the load floor to the vehicle.
14. Operate the shoulder belt to ensure proper installation.