Clutch Pedal Assembly: Service and Repair
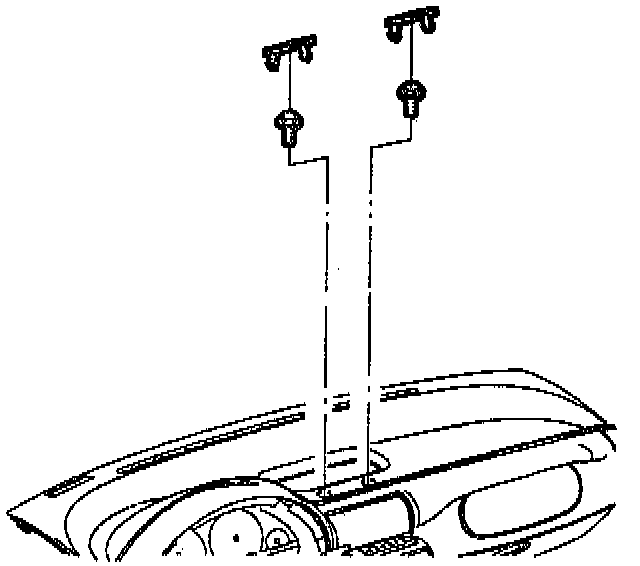
REMOVAL
IMPORTANT: Record preset radio stations and clock time. Disconnect negative battery cable.
1. Remove upper trim panel screw caps by carefully prying up with a small screwdriver.
2. Remove upper trim panel screws.
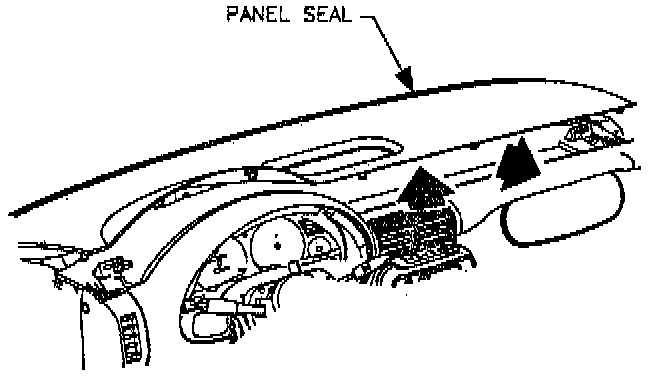
3. Lift upper trim panel at clip locations on rear edge to disengage clips.
4. Pull panel rearward out of clips at bottom of windshield.
IMPORTANT: Be careful when removing or replacing upper trim panel not to damage VIN plate.
5. Remove upper trim panel.
IMPORTANT: Be careful when removing upper trim panel not to damage the trim panel seal.
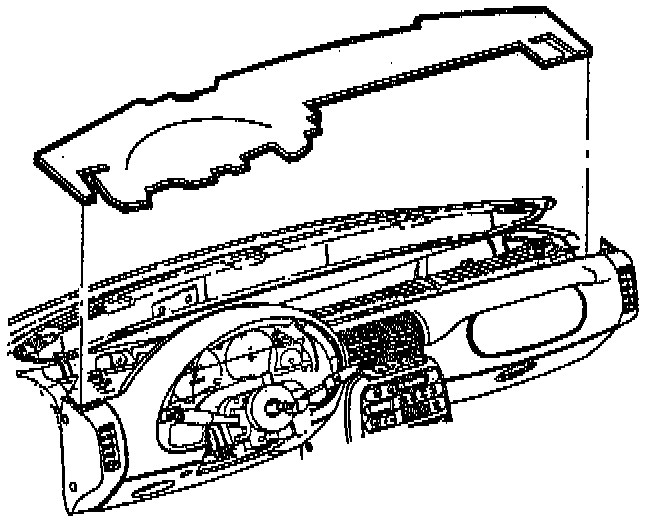
6. Remove upper trim panel insulator.
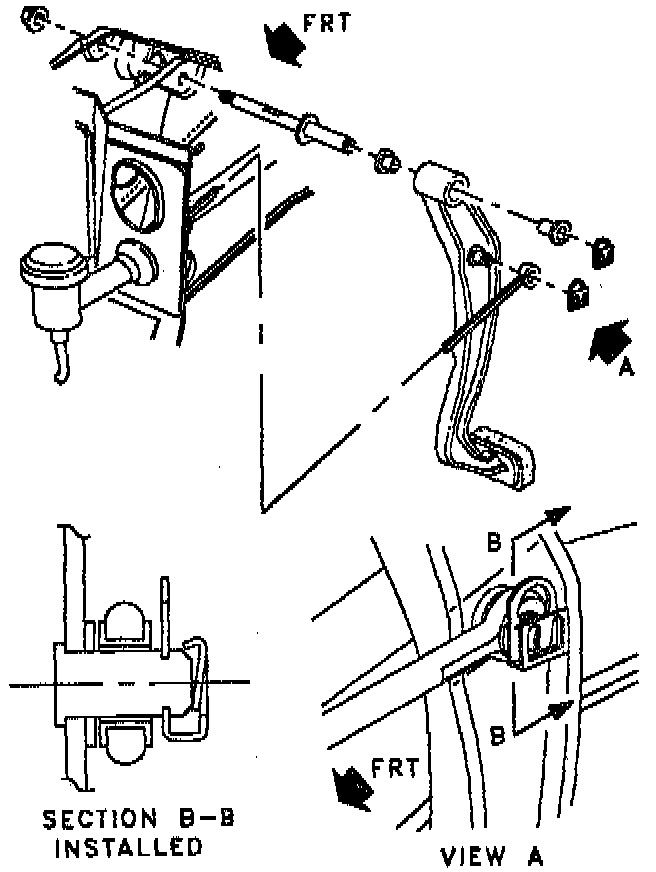
7. Remove clutch pushrod retainer and remove pushrod from clutch pedal.
8. If replacing clutch pedal assembly:
a. Remove clutch pedal pivot shaft nut.
b. Remove clutch pedal assembly.
9. If replacing pivot bushings:
a. Remove clutch pedal pivot shaft retainer.
b. Remove clutch pedal.
c. Remove clutch pedal bushings.
INSTALLATION
1. If replacing pivot bushings:
a. Install new bushings.
b. Lubricate inside diameter of bushings.
c. Install clutch pedal onto pivot and install retainer.
2. If replacing clutch pedal assembly:
a. Install pedal assembly.
b. Install pivot shaft nut and tighten.
- Torque: 17 Neon (151 inch lbs.).
3. Grease clutch pedal pushrod pin and install pushrod onto pedal.
4. Install pushrod retainer.
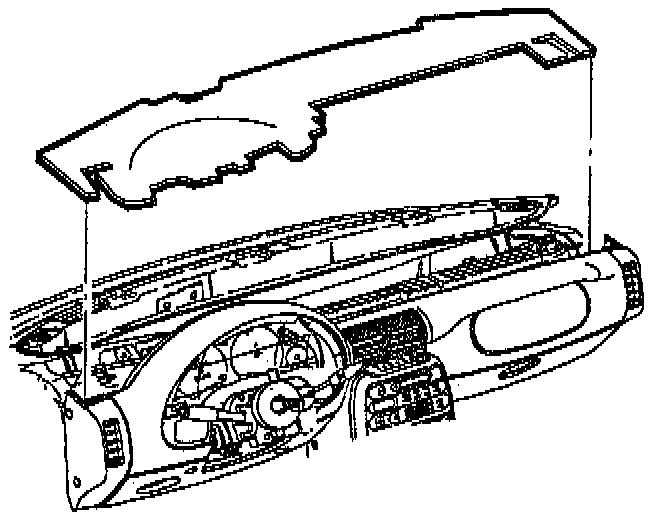
5. Install upper trim panel insulator.
IMPORTANT: Make sure to tuck in all flaps.
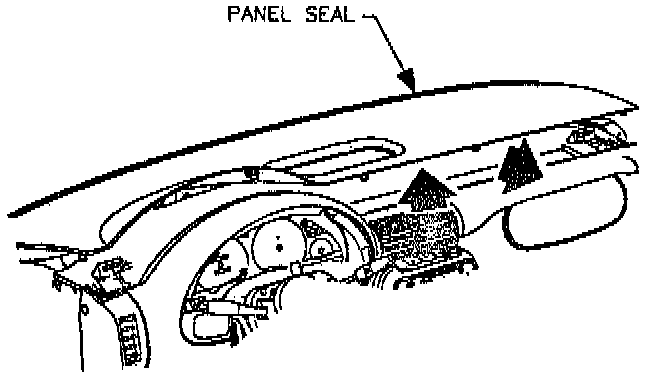
IMPORTANT: Be sure upper trim panel is correctly seated on forward edge before installing upper trim panel.
6. Install upper trim panel into clips at base of windshield.
7. Lower panel making sure upper trim panel alignment tabs interlock with windshield garnish slot.
8. Push down at clip locations to secure.
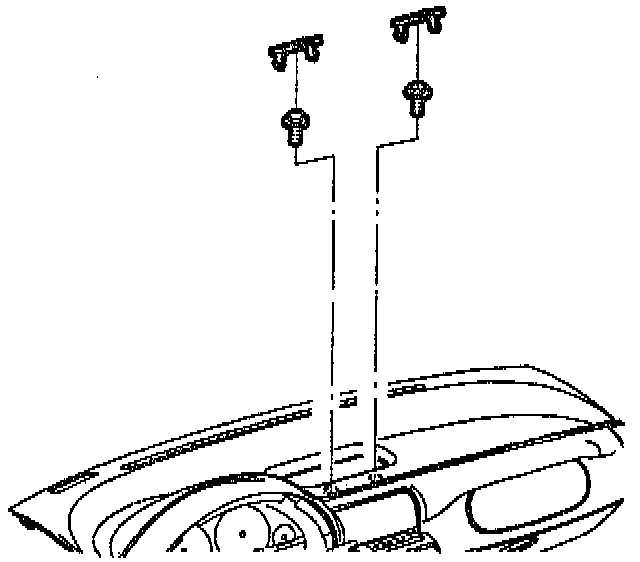
9. Install and tighten screws.
- Torque: 2.3 N.m (20 inch lbs.).
10. Install screw caps.
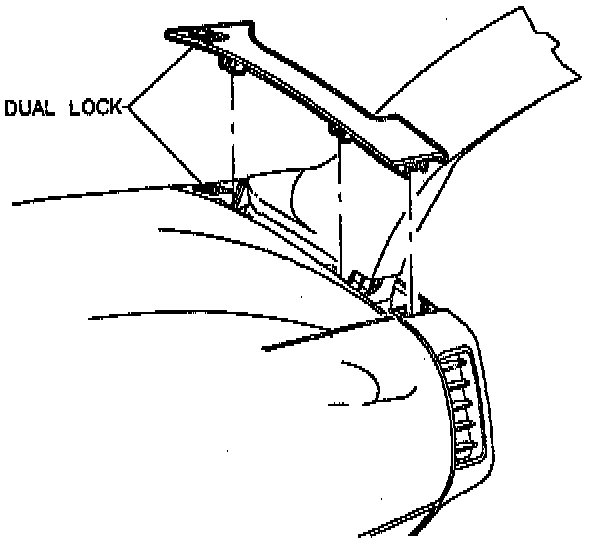
11. Install upper trim panel extensions by pushing down at clip and dual-lock locations