Installation
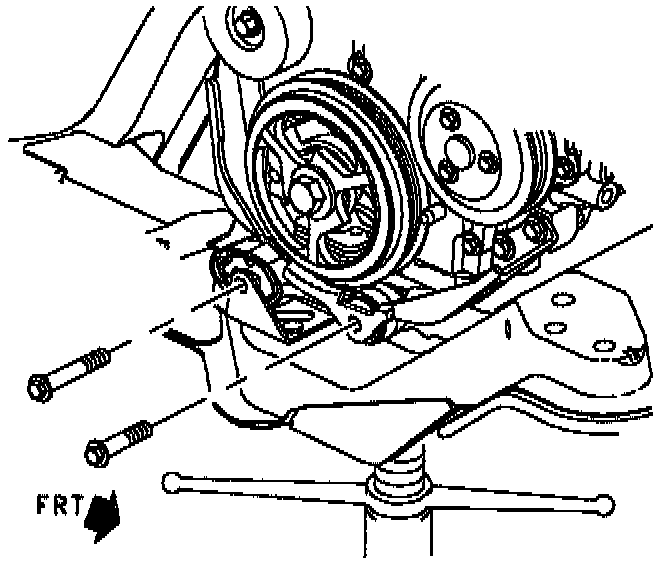
1. Position the bracket to the cradle.
IMPORTANT: Be sure that the small ear on the small end of the strut is facing up towards the accessory drive belt.
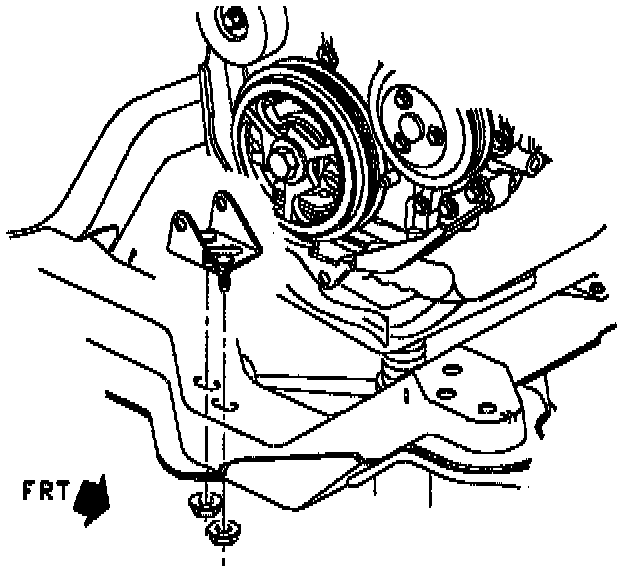
2. Position the engine strut and install strut-to-cradle bracket and strut-to-engine bracket fasteners.
IMPORTANT: Do not tighten fasteners at this time.
3. Install new cradle bracket-to-cradle nuts.
4. Lower the powertrain completely.
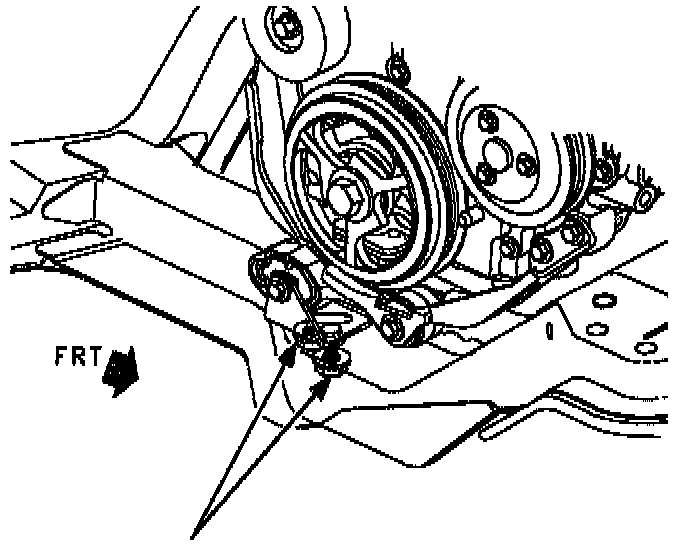
5. Tighten the engine strut-to-cradle bracket fastener and the engine strut-to-engine bracket fastener.
- Torque: 70 Nm (52 ft. lbs.)
6. Tighten the engine strut bracket to cradle fasteners.
- Torque: 50 Nm (37 ft. lbs.)
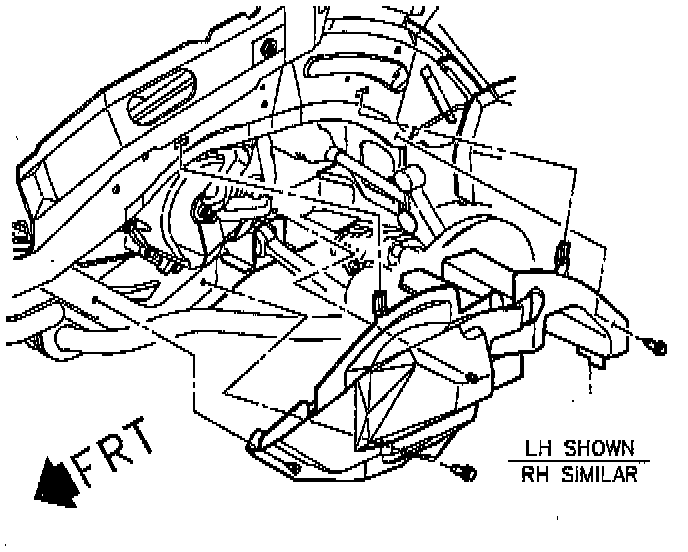
7. Install the wheelhouse splash shield.
IMPORTANT: Install front section of shield first, then rear.
8. Install tabs in body cut-out.
9. Align molded-in shield fasteners with holes in cradle. Push straight in to install.
10. Install push pins.
IMPORTANT: Make sure shield flaps are tucked in at body locations.
NOTICE: Before installing wheels, remove rust or corrosion from wheel mounting surfaces and brake rotors/drums. Failure to do so can cause wheel lug nuts to loosen in service.
11. Position the right front wheel onto the hub.
12. Install the wheel nuts and tighten in a crisscross pattern. Repeat tightening pattern to be sure torque is correct.
- Torque: 140 Nm (103 ft. lbs.)
13. Lower vehicle from hoist.