Rear outer wheel housing: Fitting
 Courtesy of SAAB-SCANIA OF AMERICA, INC.
- Knock out the bottom edge of the reinforcement enough to be able to insert the spare part in under it.
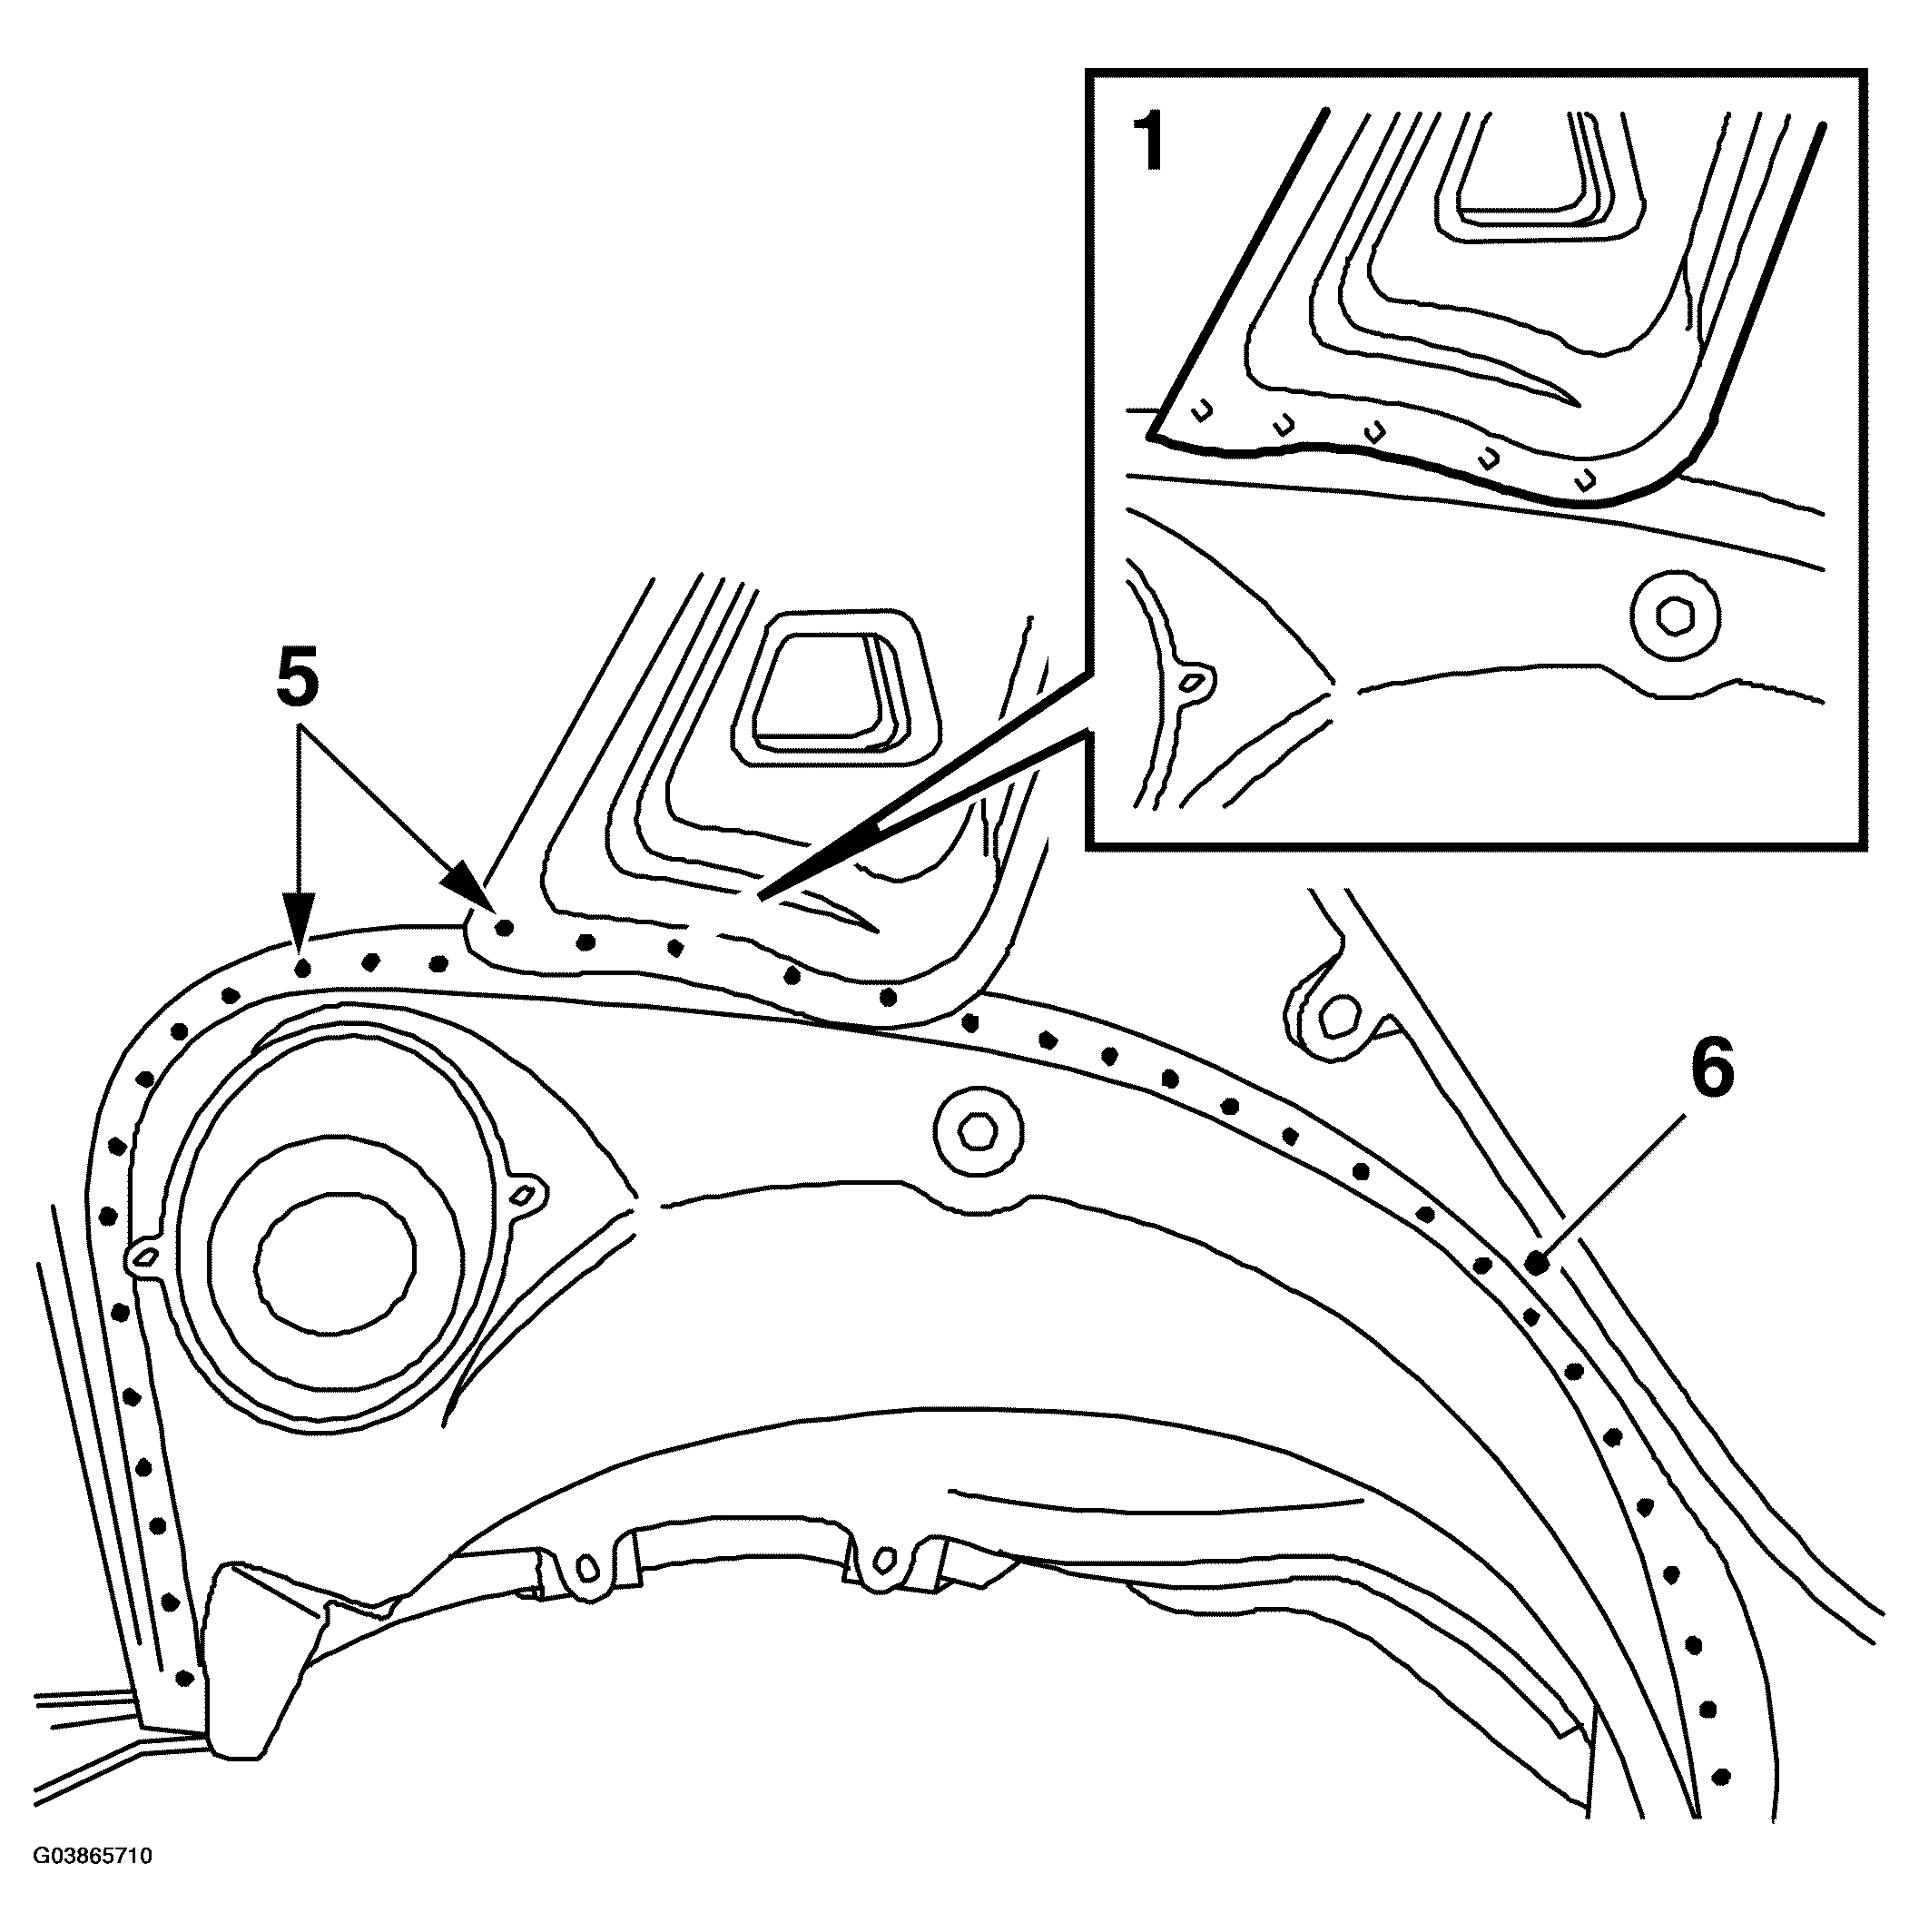
- Mark out the spare part and cut it a short way above the wheel housing so that it can be plug and spot-welded to the inner side panel.
- Grind clean the surfaces of the body and the spare part that are to be welded, not forgetting the inside of the body.
- Apply welding primer to the surfaces that are to be plug and spot-welded.
- Position the spare part and insert it under the reinforcement. Fix it with a few welding clamps.
- Plug and spot-weld the wheel housing.
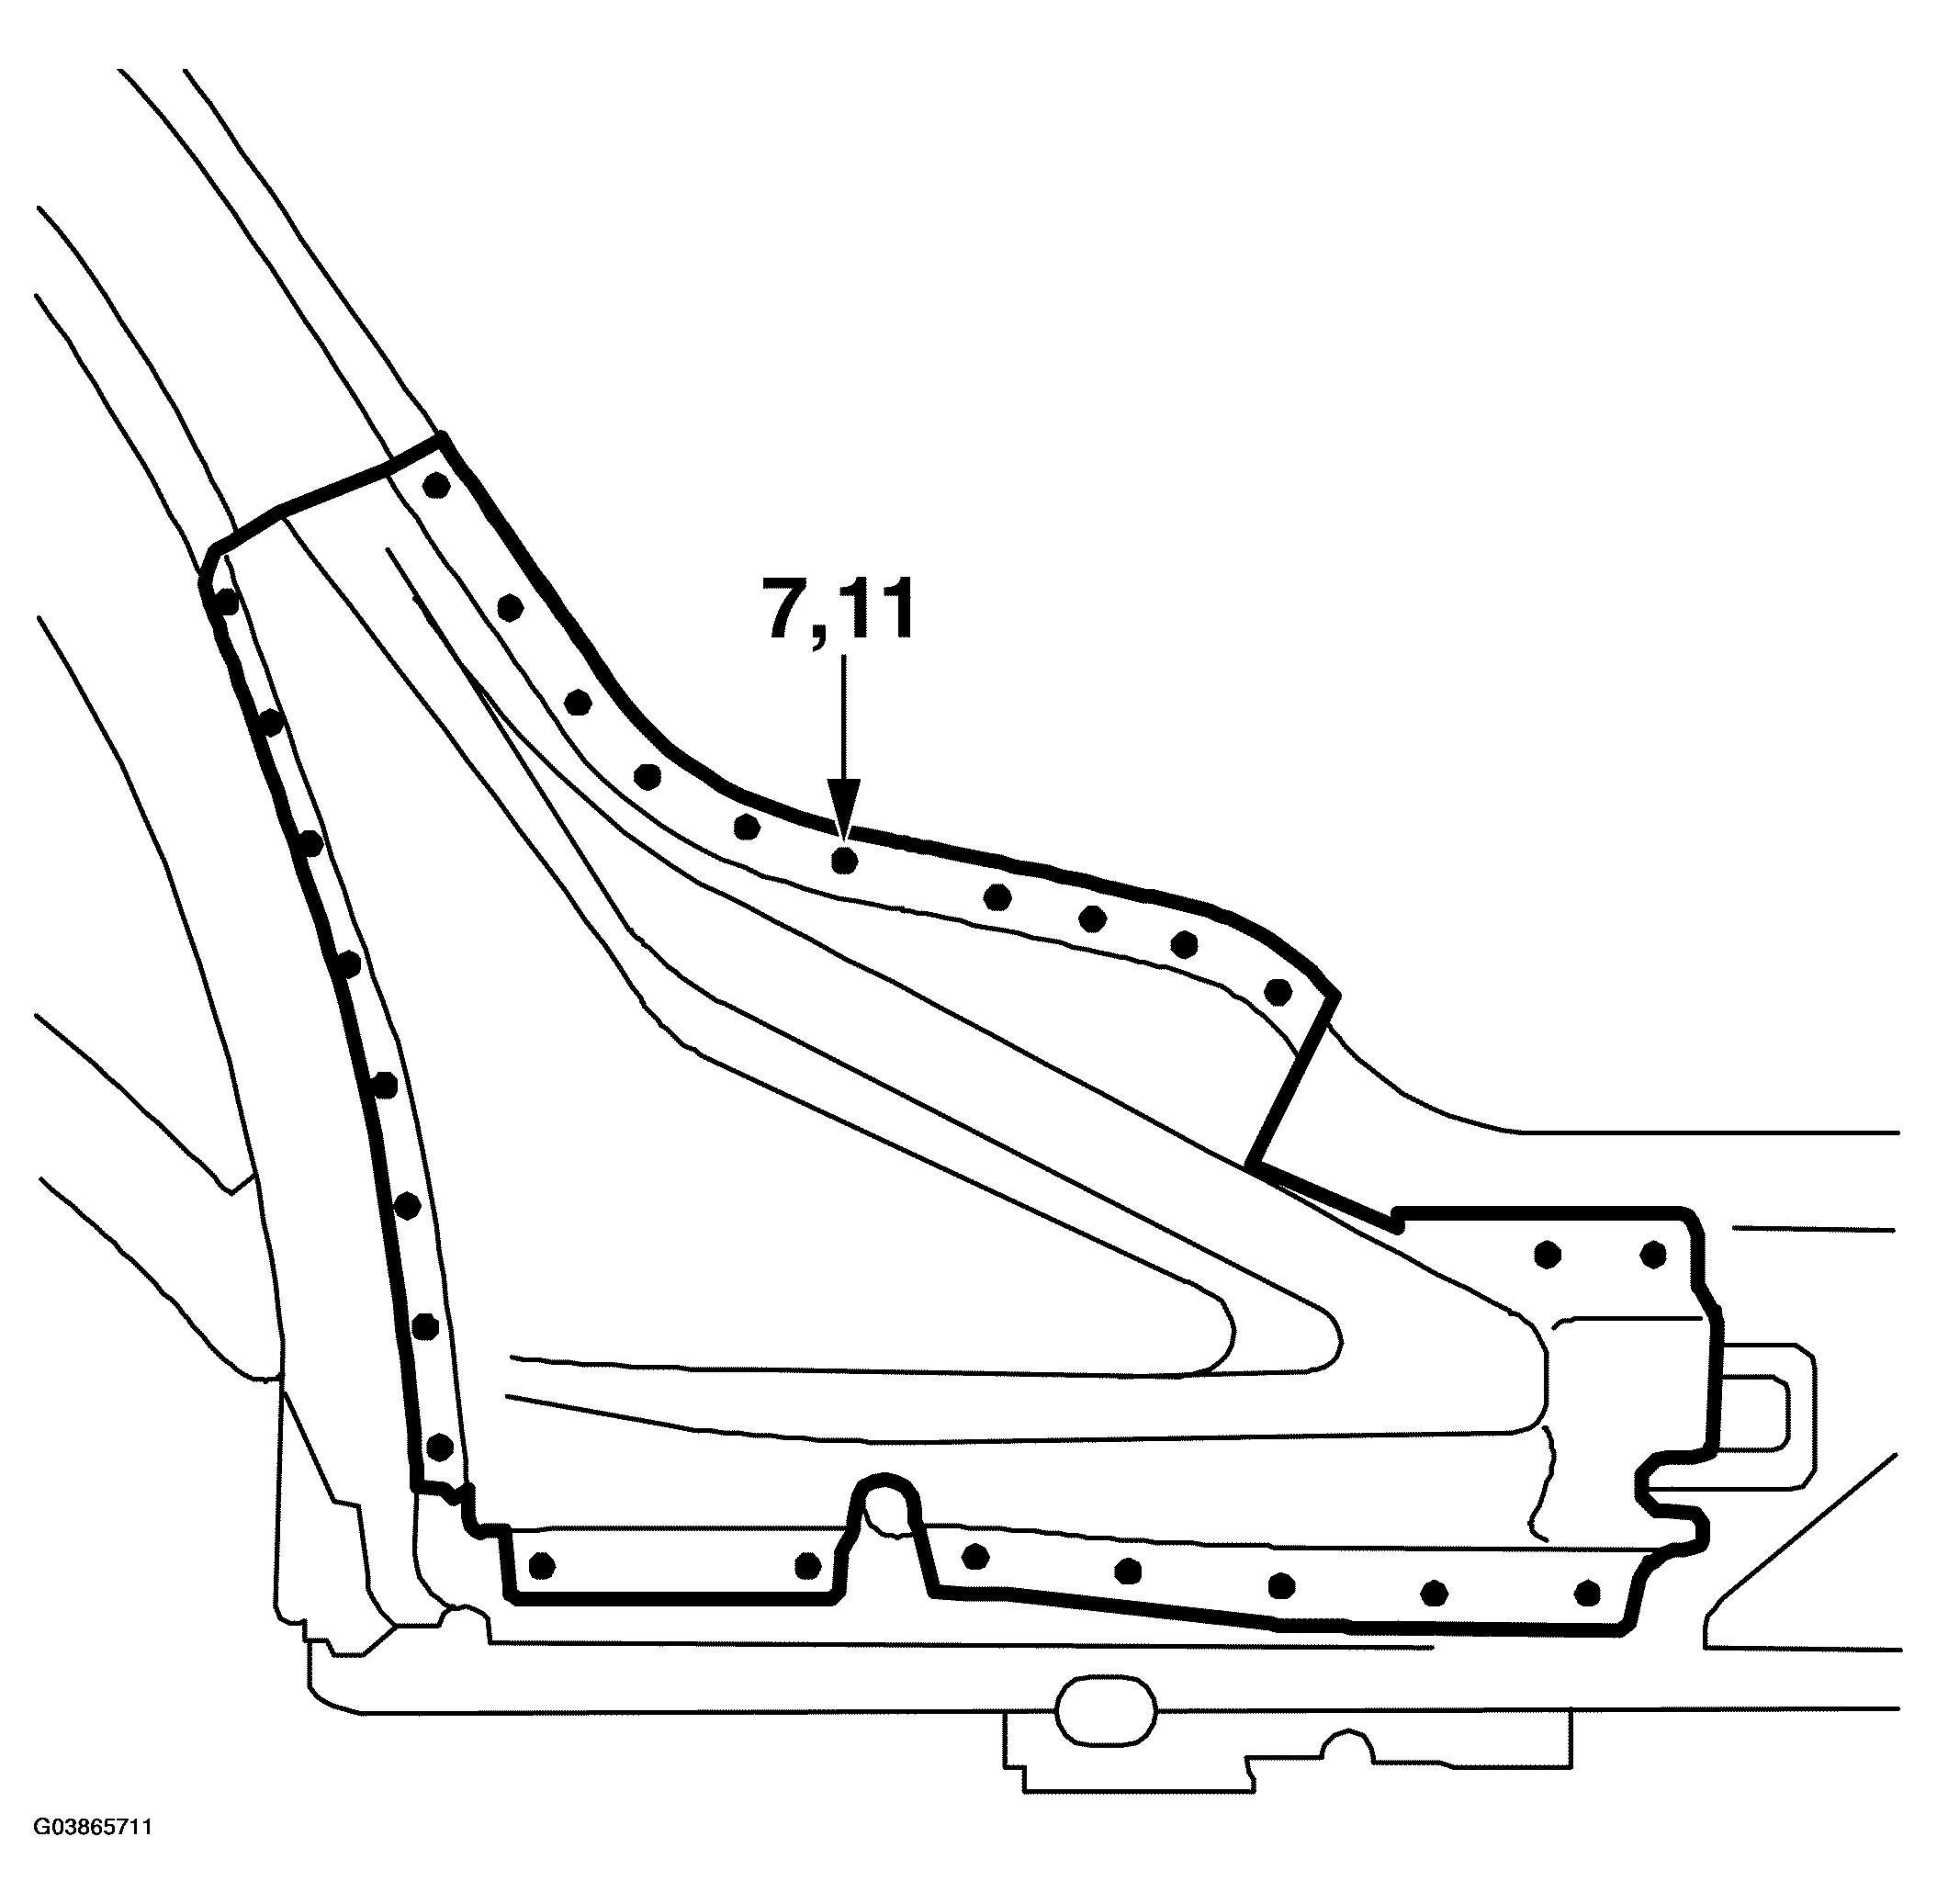
- Drill holes for plug-welding the reinforcement at the sill.
 Courtesy of SAAB-SCANIA OF AMERICA, INC.
- Grind clean the surfaces on the reinforcement and the body.
- Apply welding primer to the surfaces that are to be welded.
- Position the reinforcement and fix it with a few welding clamps.
- Spot and plug-weld the reinforcement.
- Smooth off the welds.
- Remove any remaining welding primer. Welding primer reduces adhesion of paint, filler and sealant.
- Apply primer to all bare metal surfaces.
- Fit the outer side panel.
- Seal joints and seams with sealant.
- Apply PVC substitute in the wheel housing.
- Apply anti-corrosion agent to the wheel housing after painting. Use Terotex HV 400 or Mercasol 1.