Install Carrier Rear
Information
If a new rear carrier is to be installed on the 911 Sport Classic
model, the component must be reworked before installation.
 Courtesy of PORSCHE CARS NORTH AMERICA, INC. Courtesy of PORSCHE CARS NORTH AMERICA, INC.
|
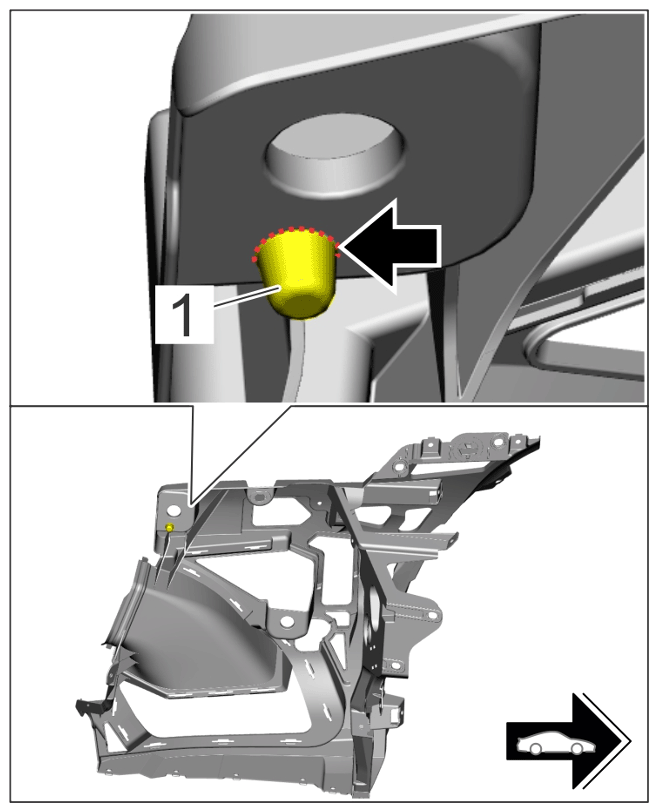
Component machining - only for Sport Classic model
- Cut off guide pin -1-
at the dotted line -Arrow- and de-burr the cut edge.
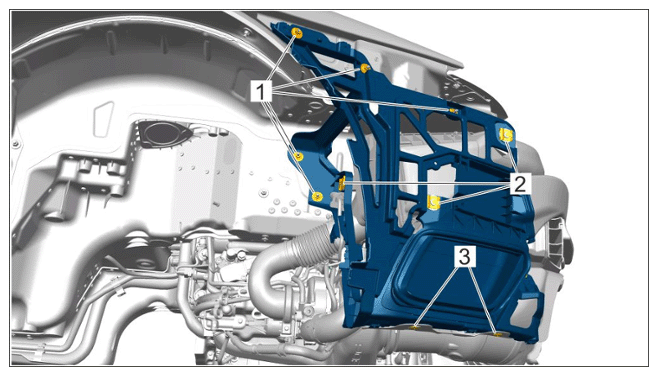
- Fit air guide on the bracket, position bracket on the body and fit air guide at the connection for the charge air cooler.
- Secure the bracket at the sides.
- 2.1
Fit collar nuts -1-
.
- 2.2
Clip in sheet metal clips -2-
.
- 2.3
Secure lower heat shield with tapping screws -3-
.
> Tightening torque 2.5 Nm (1.75 ftlb.)
 Courtesy of PORSCHE CARS NORTH AMERICA, INC. Courtesy of PORSCHE CARS NORTH AMERICA, INC.
|
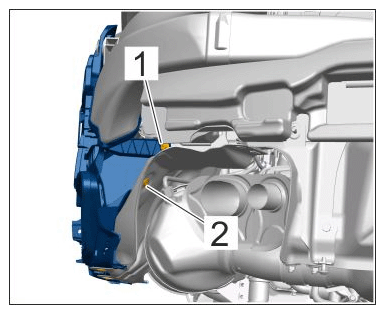
Side mounting for carrier rear
- Secure carrier rear.
- 3.1
Tighten screw -1-
.
> Tightening torque 10 Nm (7.5 ftlb.)
- 3.2
Tighten tapping screw -2-
on rear heat shield.
> Tightening torque 2.5 Nm (1.75 ftlb.)
 Courtesy of PORSCHE CARS NORTH AMERICA, INC. Courtesy of PORSCHE CARS NORTH AMERICA, INC.
|
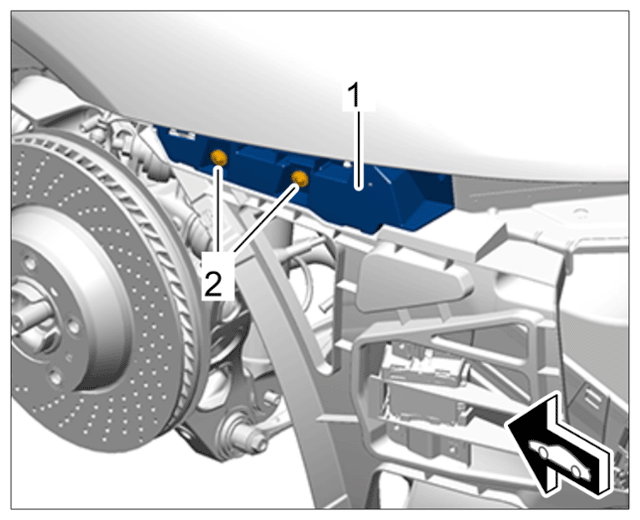
Mounting for rear and lower retaining frame
- Tighten collar nuts for bracket (in the wheel housing and at the sides).
> Tightening torque 10 Nm (7.5 ftlb.)
- Install carrier cover.
- 5.1
Tighten screws.
> Tightening torque 10 Nm (7.5 ftlb.)
 Courtesy of PORSCHE CARS NORTH AMERICA, INC. Courtesy of PORSCHE CARS NORTH AMERICA, INC.
|
Cover on bracket
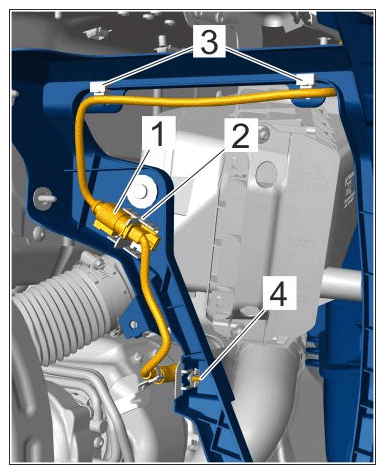
- Secure wiring harness for oxygen sensor in the holder -2-
on the bracket and connect plug connection -1-
.
- 6.1
Clip in wiring harness -3-
.
- 6.2
Tighten tapping screw for heat shield.
> Tightening torque 2.5 Nm (1.75 ftlb.)
 Courtesy of PORSCHE CARS NORTH AMERICA, INC. Courtesy of PORSCHE CARS NORTH AMERICA, INC.
|
Wiring harness for oxygen sensor on bracket
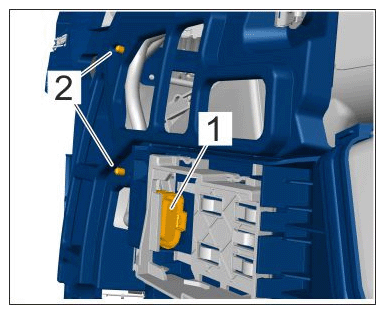
- Clip in cable plug -1-
for Lane Change Assist control unit.
- 7.1
Fit cable clips -2-
on the bracket.
 Courtesy of PORSCHE CARS NORTH AMERICA, INC. Courtesy of PORSCHE CARS NORTH AMERICA, INC.
|
Cable plug and cable clips on supply lead for Lane Change Assist control unit