Preparing Front Panel For Installation
Information
- Some of the repair illustrations show only one side of the vehicle or a similar component.
- Naturally, some steps also have to be performed on the opposite side of the vehicle as well.
Information
Remove component carefully.
The removed component must be re-used during installation.
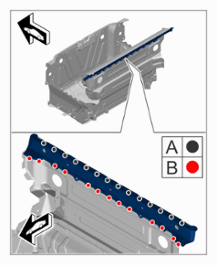
- Loosen upper cross member.
- 1.1
Drill through punch rivets -A and B-
.
 Courtesy of PORSCHE CARS NORTH AMERICA, INC. Courtesy of PORSCHE CARS NORTH AMERICA, INC.
|
Loosening cross member
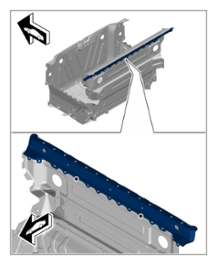
- 1.2
Grind off rear punch rivets.
 Courtesy of PORSCHE CARS NORTH AMERICA, INC. Courtesy of PORSCHE CARS NORTH AMERICA, INC.
|
Grinding off punch rivets
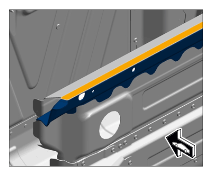
- 1.3
Heat bonding areas.
 Courtesy of PORSCHE CARS NORTH AMERICA, INC. Courtesy of PORSCHE CARS NORTH AMERICA, INC.
|
Loosening cross member
- 1.4
Remove cross member.
- Fit front panel and secure it to the body.
- 2.1
Position front panel.
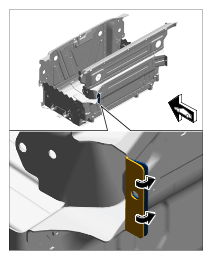
- 2.1.1
Bend sheetmetal flange in slightly on one side.
 Courtesy of PORSCHE CARS NORTH AMERICA, INC. Courtesy of PORSCHE CARS NORTH AMERICA, INC.
|
Fitting sheetmetal flange
- 2.1.2
Insert front panel.
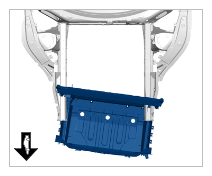 Courtesy of PORSCHE CARS NORTH AMERICA, INC. Courtesy of PORSCHE CARS NORTH AMERICA, INC.
|
Inserting front panel
- 2.2
Drill bores for the rivets through the existing holes. > Diameter 6.5 mm
- Drill new holes in the areas shown. > Diameter 6.5 mm
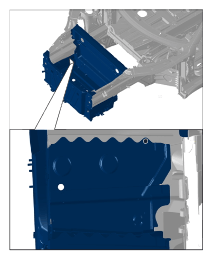 Courtesy of PORSCHE CARS NORTH AMERICA, INC. Courtesy of PORSCHE CARS NORTH AMERICA, INC.
|
Drilling new holes
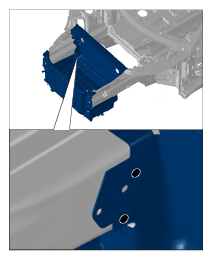 Courtesy of PORSCHE CARS NORTH AMERICA, INC. Courtesy of PORSCHE CARS NORTH AMERICA, INC.
|
Drilling new holes
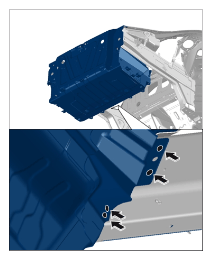 Courtesy of PORSCHE CARS NORTH AMERICA, INC. Courtesy of PORSCHE CARS NORTH AMERICA, INC.
|
Drilling new holes
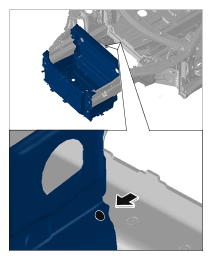 Courtesy of PORSCHE CARS NORTH AMERICA, INC. Courtesy of PORSCHE CARS NORTH AMERICA, INC.
|
Drilling new holes
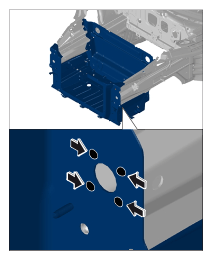 Courtesy of PORSCHE CARS NORTH AMERICA, INC. Courtesy of PORSCHE CARS NORTH AMERICA, INC.
|
Drilling new holes
- Fit upper cross member.
- 4.1
On the cross member, drill new holes through the existing holes on the body.
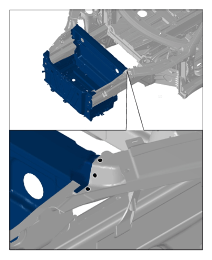 Courtesy of PORSCHE CARS NORTH AMERICA, INC. Courtesy of PORSCHE CARS NORTH AMERICA, INC.
|
Removing front panel
- Countersink the bores shown for installing countersunk rivets. > Nr.202 - Countersink
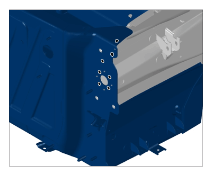 Courtesy of PORSCHE CARS NORTH AMERICA, INC. Courtesy of PORSCHE CARS NORTH AMERICA, INC.
|
Counterbores
- Remove cross member and front panel.
- De-burr the bores.
- Prepare connection areas for bonding.
> 5X00IN21 WORKING WITH BODY STRUCTURAL ADHESIVE
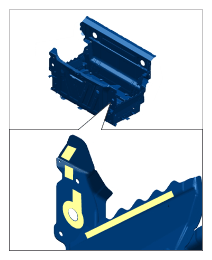 Courtesy of PORSCHE CARS NORTH AMERICA, INC. Courtesy of PORSCHE CARS NORTH AMERICA, INC.
|
Preparing connection areas for bonding
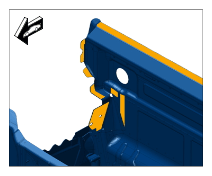 Courtesy of PORSCHE CARS NORTH AMERICA, INC. Courtesy of PORSCHE CARS NORTH AMERICA, INC.
|
Preparing connection areas for bonding
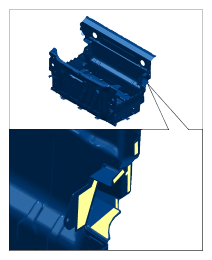 Courtesy of PORSCHE CARS NORTH AMERICA, INC. Courtesy of PORSCHE CARS NORTH AMERICA, INC.
|
Preparing connection areas for bonding
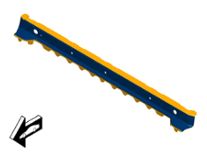 Courtesy of PORSCHE CARS NORTH AMERICA, INC. Courtesy of PORSCHE CARS NORTH AMERICA, INC.
|
Preparing connection areas on the cross member for bonding