Installing Lock Carrier
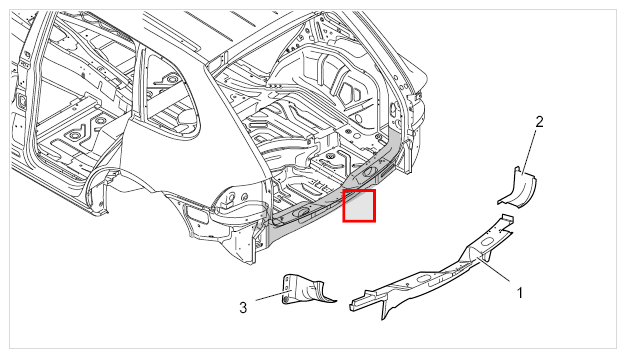 Courtesy of PORSCHE CARS NORTH AMERICA, INC.
- Lock carrier
- D-pillar gusset plate, right
- D-pillar gusset plate, left
- Fit lock carrier to the body.
- 1.1. Position the lock carrier on the body and fix in place with tensioning clamps.
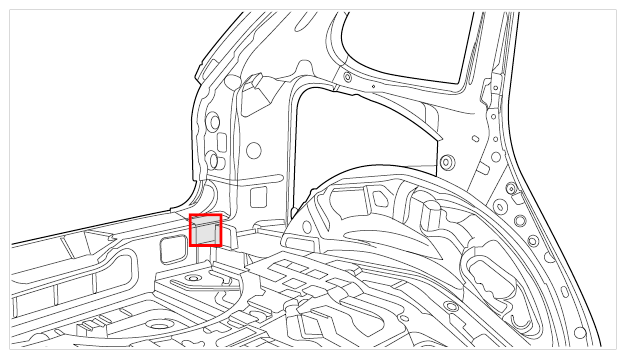 Courtesy of PORSCHE CARS NORTH AMERICA, INC.
- Weld in inner lock carrier in area of D-pillar reinforcement and right side floor section.
- 2.1. Weld the lock carrier in areas -A and B-
using inert gas.
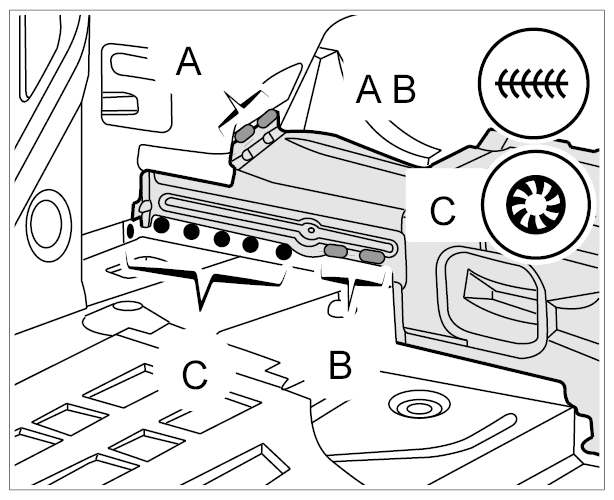 Courtesy of PORSCHE CARS NORTH AMERICA, INC.
- 2.2. Plug-weld the lock carrier in area -C-
using inert gas.
- Weld in inner lock carrier in area of D-pillar reinforcement and left side floor section.
- 3.1. Weld the lock carrier in areas -D and E-
using inert gas.
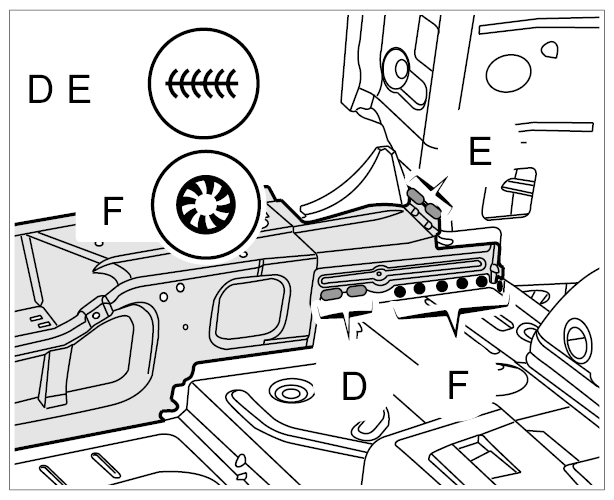 Courtesy of PORSCHE CARS NORTH AMERICA, INC.
- 3.2. Plug-weld the lock carrier in area -F-
using inert gas.
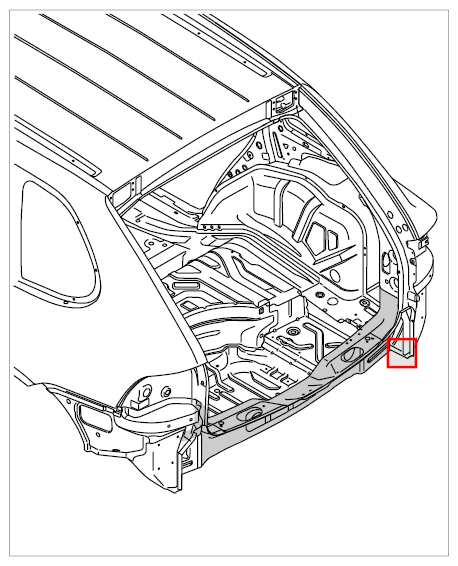 Courtesy of PORSCHE CARS NORTH AMERICA, INC.
- Weld in outer lock carrier in right side member area.
- 4.1. Resistance spot-weld the lock carrier in areas -G-
.
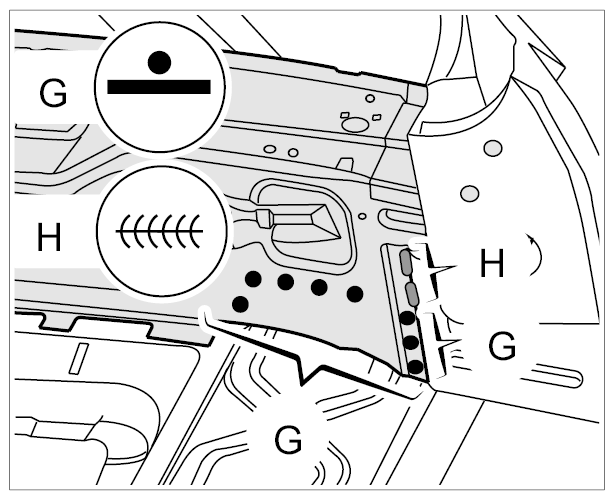 Courtesy of PORSCHE CARS NORTH AMERICA, INC.
- 4.2. Weld lock carrier in area -H-
using inert gas.
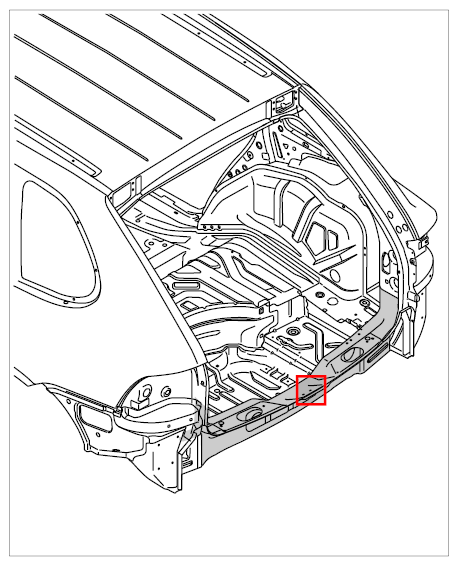 Courtesy of PORSCHE CARS NORTH AMERICA, INC.
- Weld in lock carrier in spare-wheel well area.
- 5.1. Resistance spot-weld the lock carrier in area -I-
.
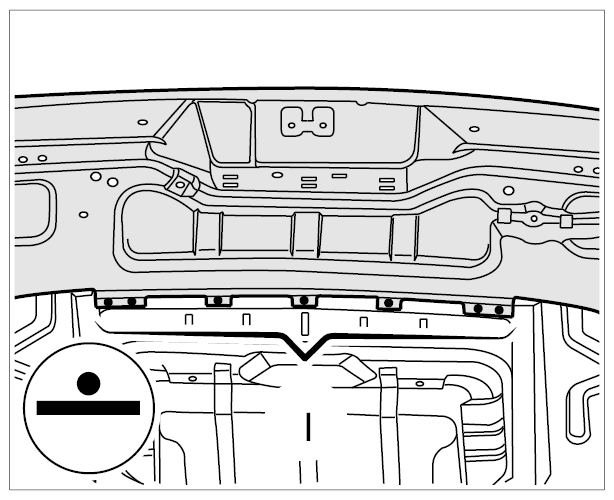 Courtesy of PORSCHE CARS NORTH AMERICA, INC.
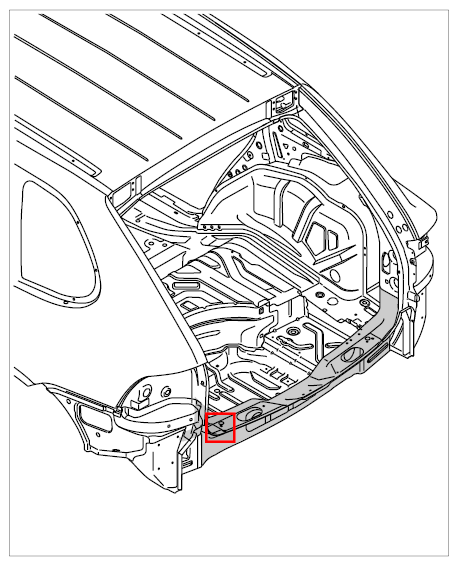 Courtesy of PORSCHE CARS NORTH AMERICA, INC.
- Weld in outer lock carrier in left side member area.
- 6.1. Resistance spot-weld the lock carrier in areas -J-
.
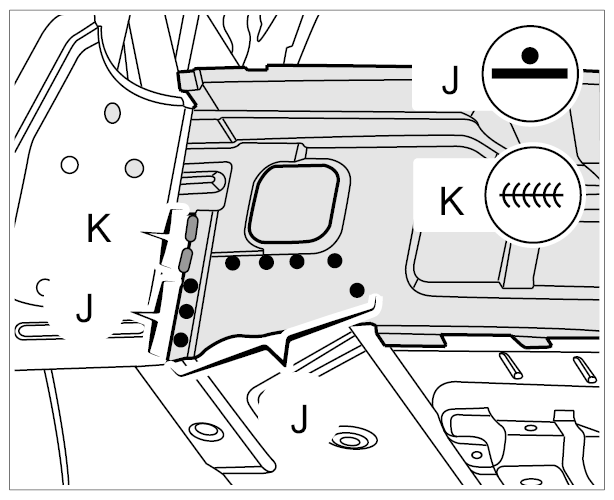 Courtesy of PORSCHE CARS NORTH AMERICA, INC.
- 6.2. Weld lock carrier in area -K-
using inert gas.
- Fit D-pillar gusset plates on the body.
- 7.1. Position D-pillar gusset plates on the body and fix in place with tensioning clamps. Ensure that the D-pillar gusset plates are positioned flat at the connection point for the end plate.
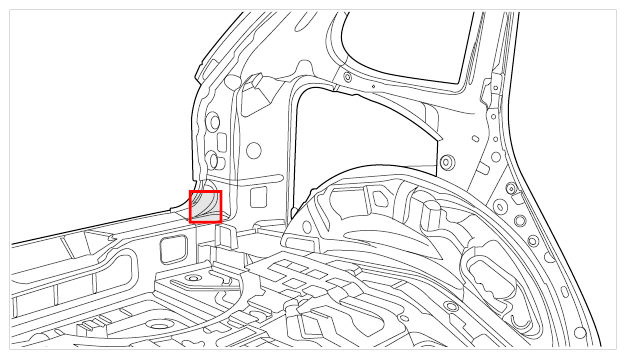 Courtesy of PORSCHE CARS NORTH AMERICA, INC.
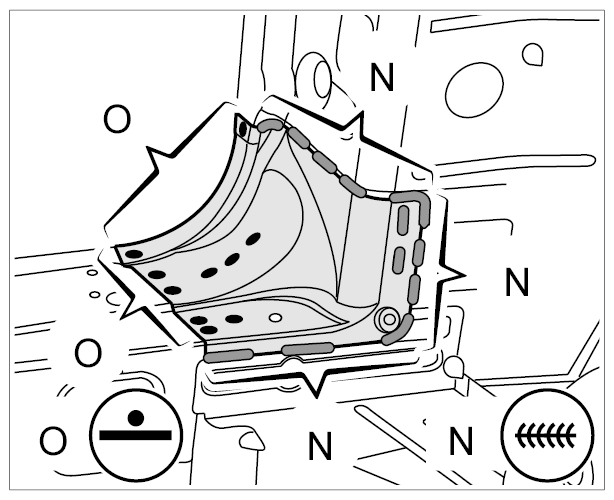
- Weld in D-pillar gusset plates.
- 8.1. Weld D-pillar gusset plates in areas -L-
and -N-
using inert gas.
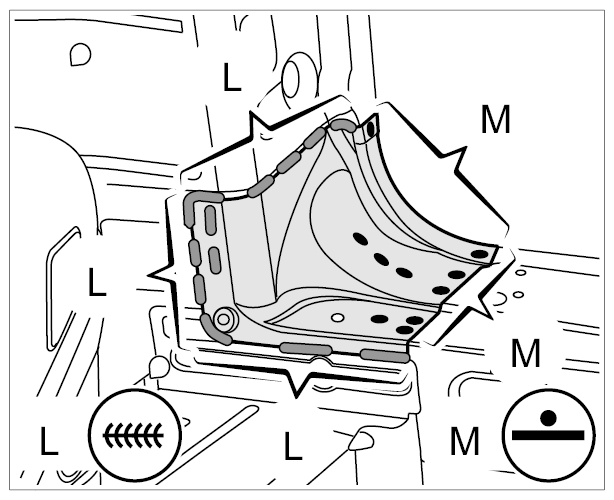 Courtesy of PORSCHE CARS NORTH AMERICA, INC.
 Courtesy of PORSCHE CARS NORTH AMERICA, INC.
- 8.2. Resistance spot-weld the D-pillar gusset plates in areas -M-
and -O-
.
- Install end plate. → INSTALLING CLOSING PANEL