Installing Rear Window Lifter (Cable)
- Grease guide rail (000.043.203.37). → GREASE
- Position the rear window lifter (cable) on the door sub-frame.
- Engage the driver on the guide rail.
- 3.1. Attach the driver to the guide rail -arrow-
.
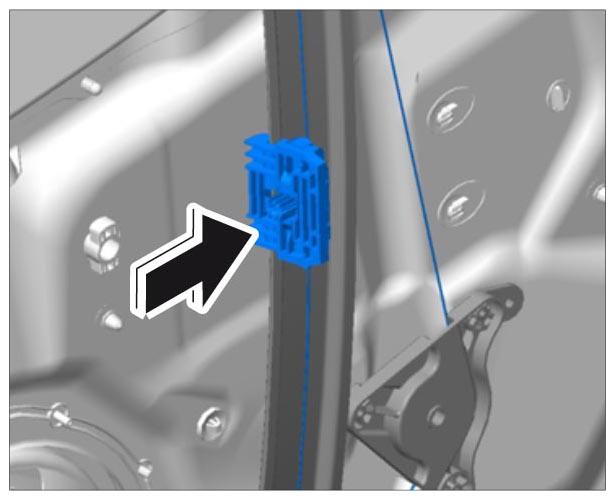 Courtesy of PORSCHE CARS NORTH AMERICA, INC.
- 3.2. Engage the driver on the guide rail -arrow-
.
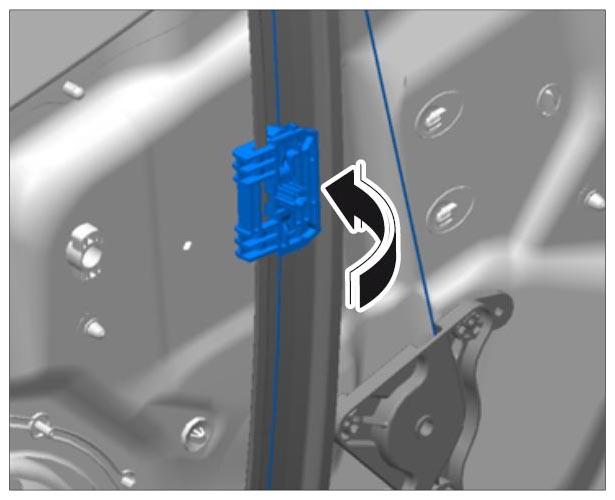 Courtesy of PORSCHE CARS NORTH AMERICA, INC.
- Fit the cable on the top roller.
- 4.1. Turn the top roller to the position shown.
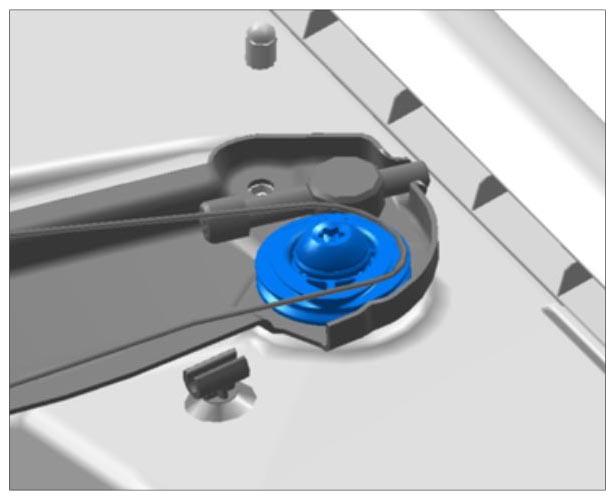 Courtesy of PORSCHE CARS NORTH AMERICA, INC.
- 4.2. Fit the cable on the top roller -arrow-
.
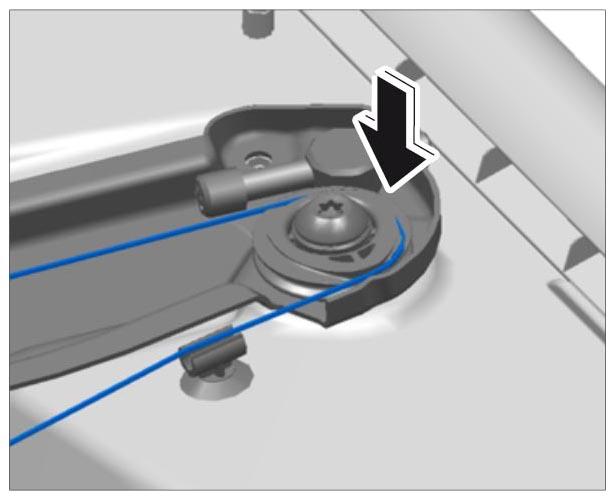 Courtesy of PORSCHE CARS NORTH AMERICA, INC.
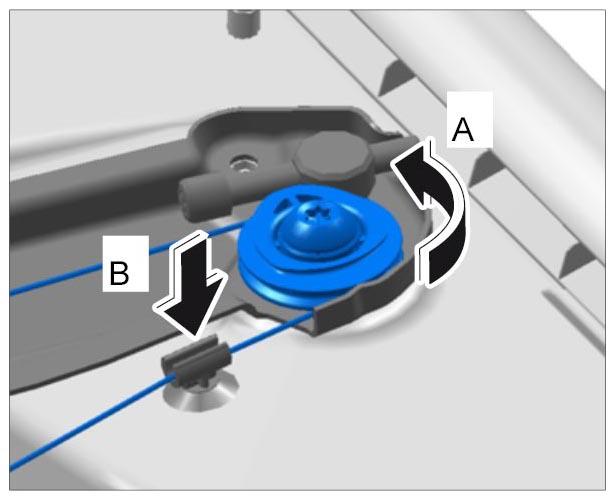
- 4.3. Turn the top roller anti-clockwise -arrow A-
and guide the cable onto the top roller.
- 4.4. Insert the cable into the guide -arrow B-
.
 Courtesy of PORSCHE CARS NORTH AMERICA, INC.
- Fit the cable on the bottom roller.
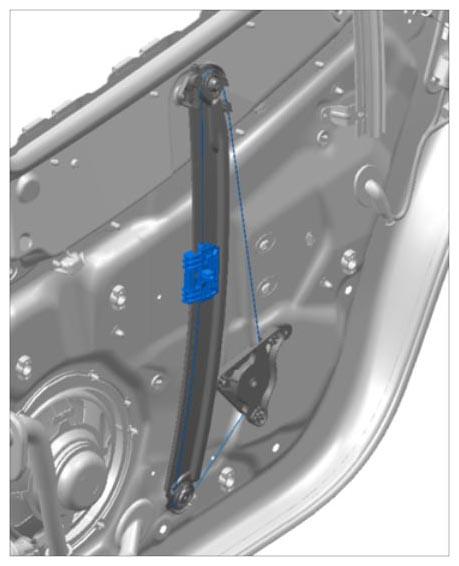
- 5.1. Move the driver into the center of the guide rail.
 Courtesy of PORSCHE CARS NORTH AMERICA, INC.
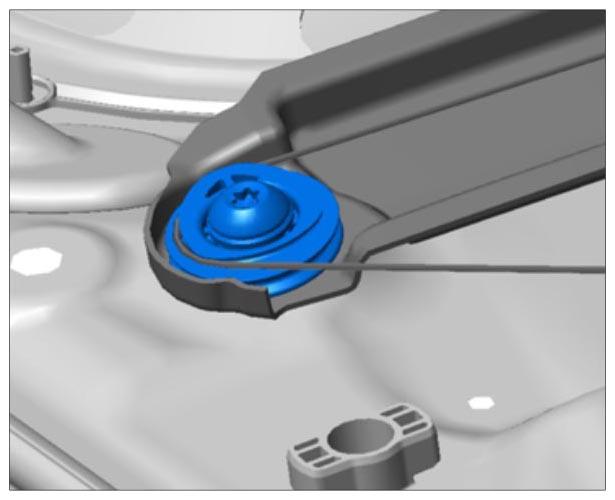
- 5.2. Turn the bottom roller to the position shown and fit the cable.
 Courtesy of PORSCHE CARS NORTH AMERICA, INC.
- Install coil mechanism.
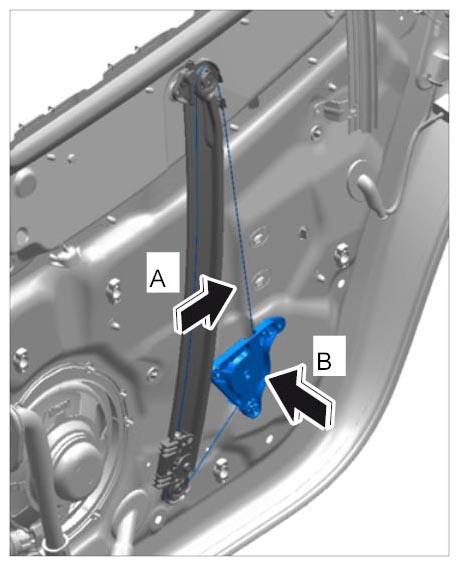
- 6.1. Place the coil mechanism in installation position -arrow A-
and press the three locking lugs into the door sub-frame -arrow B-
until the locking lugs engage securely.
 Courtesy of PORSCHE CARS NORTH AMERICA, INC.
- 6.2. Move the driver downwards. This guides the cable automatically onto the correct track in the bottom roller.
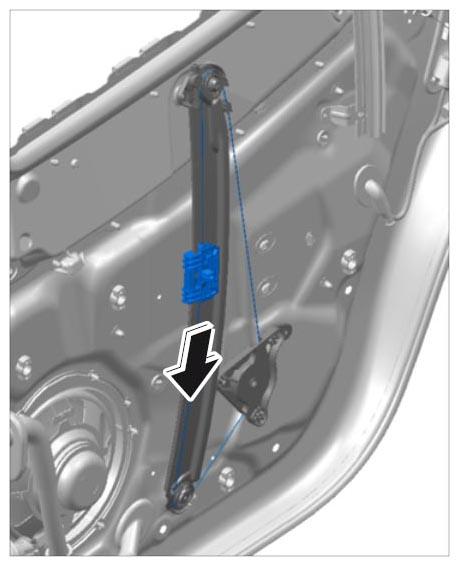 Courtesy of PORSCHE CARS NORTH AMERICA, INC.
- 6.3. Move the driver up and down a number of times on the guide rail.
- 6.4. Rivet in the coil mechanism -1-
using a new rivet -2-
. → BLIND RIVET
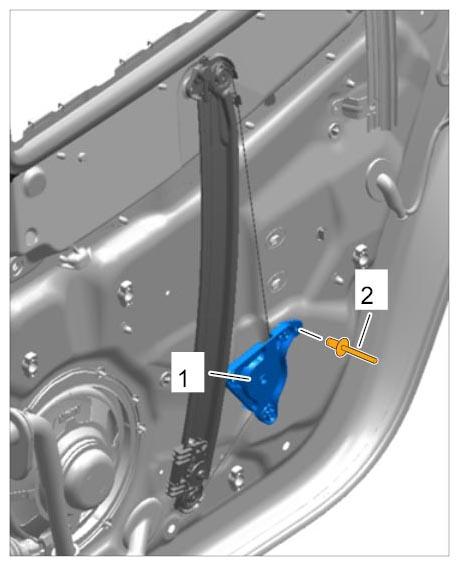 Courtesy of PORSCHE CARS NORTH AMERICA, INC.