Installing Mounting Saddle
- Fit mounting saddle in the vehicle.
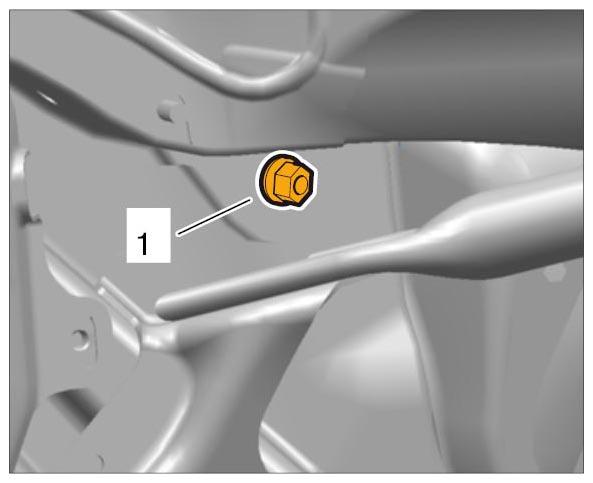
- Tighten fastening screws -1-
at the bottom. Tightening Torque 23 Nm (17 ft. lb.) +/-3 Nm (+/-2 ft. lb.)
 Courtesy of PORSCHE CARS NORTH AMERICA, INC.
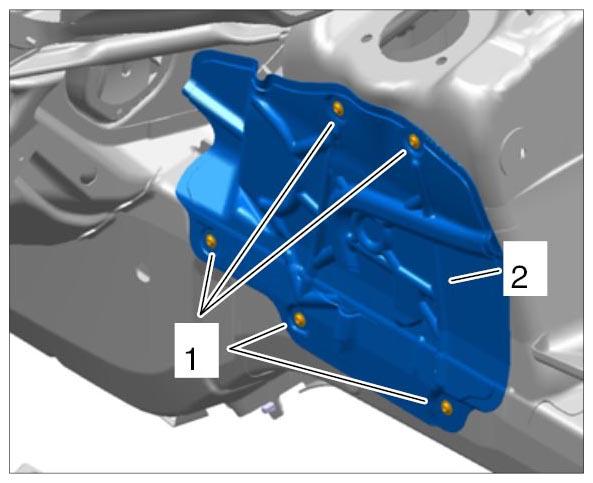
- Tighten fastening screws -1-
for the heat shield -2-
at the left of the longitudinal member. Tightening Torque 2 Nm (1.5 ft. lb.)
 Courtesy of PORSCHE CARS NORTH AMERICA, INC.
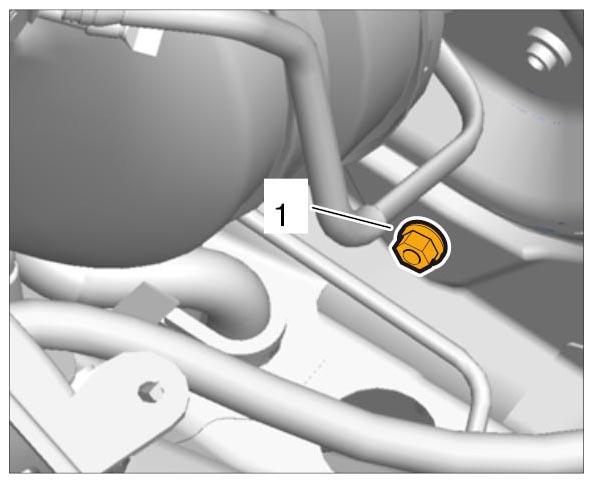
- Tighten fastening screw -1-
for the mounting saddle at the left under the brake booster. Tightening Torque 23 Nm (17 ft. lb.) +/-3 Nm (+/-2 ft. lb.)
 Courtesy of PORSCHE CARS NORTH AMERICA, INC.
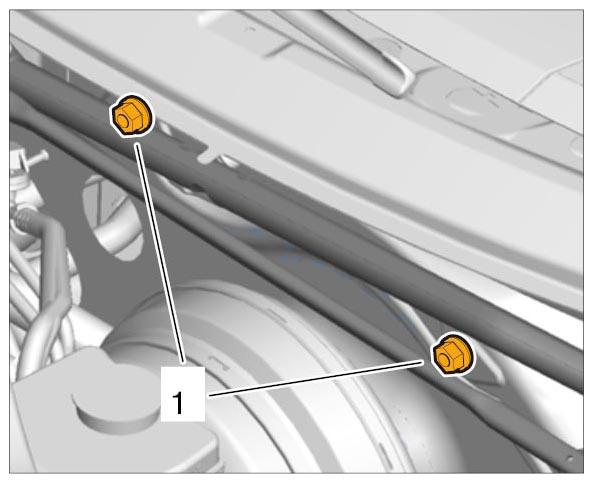
- Tighten the top fastening screws -1-
for the mounting saddle in the plenum panel. Tightening Torque 23 Nm (17 ft. lb.) +/-3 Nm (+/-2 ft. lb.)
 Courtesy of PORSCHE CARS NORTH AMERICA, INC.
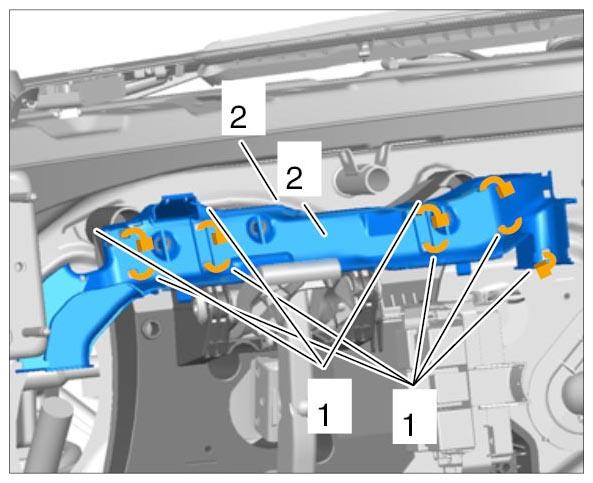
- Pre-fit tie-wraps -1-
in the cable duct -2-
.
 Courtesy of PORSCHE CARS NORTH AMERICA, INC.
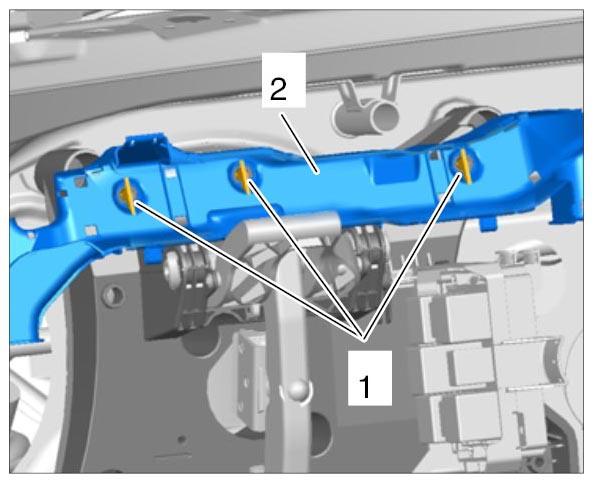
- Clip in fixing clips -1-
from the cable duct -2-
at the mounting saddle.
 Courtesy of PORSCHE CARS NORTH AMERICA, INC.
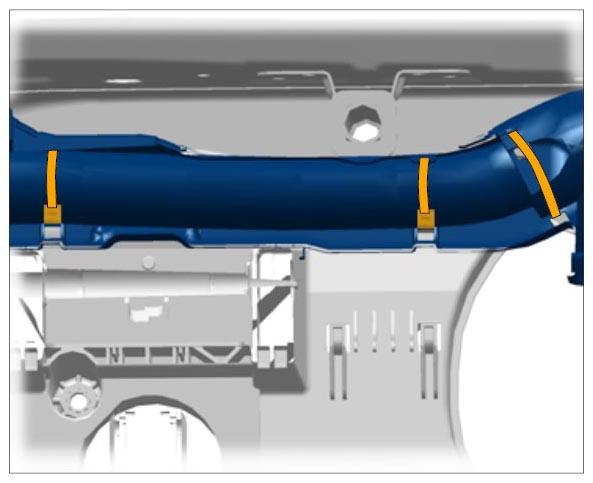
- Secure main wire harness in the cable duct and clip in cover.
 Courtesy of PORSCHE CARS NORTH AMERICA, INC.
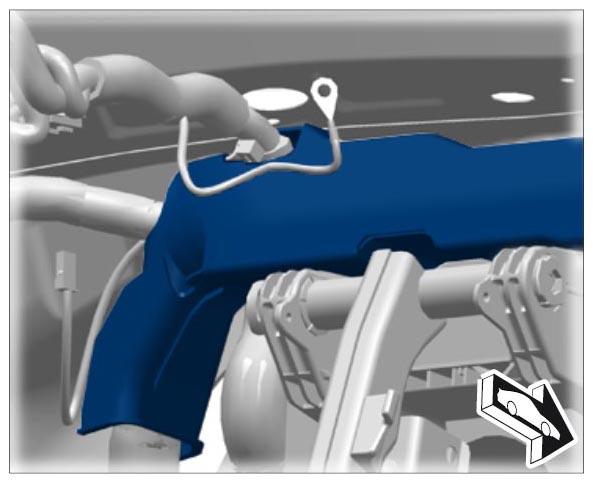
- Secure main wire harness on the cable duct.
 Courtesy of PORSCHE CARS NORTH AMERICA, INC.
- Tighten the fastening nuts -1-
for the brake booster under the dashboard. Tightening Torque 26 Nm (19 ft. lb.) +/-3 Nm (+/-2 ft. lb.)
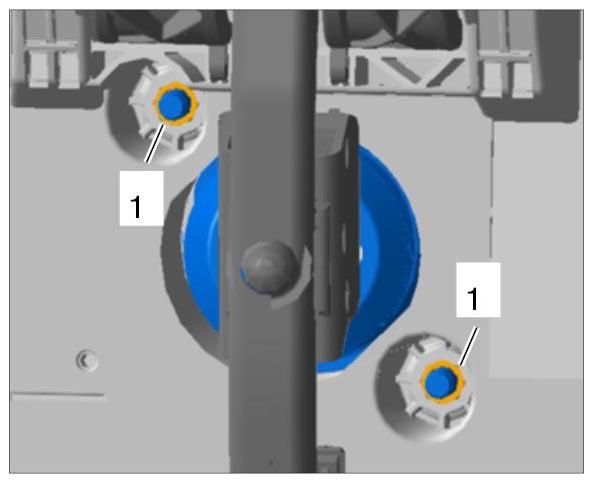 Courtesy of PORSCHE CARS NORTH AMERICA, INC.
- Fit the relay carrier.
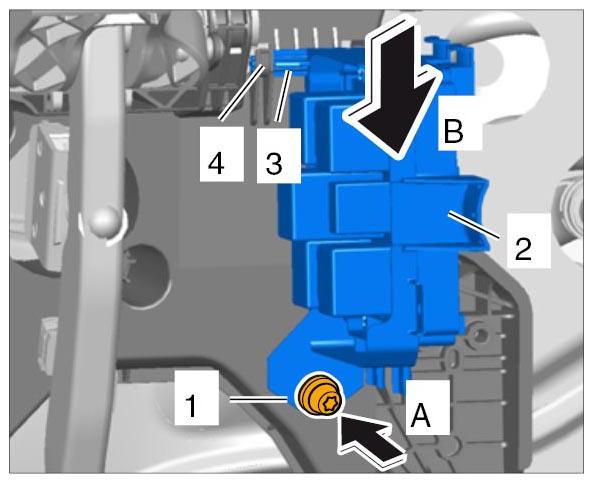 Courtesy of PORSCHE CARS NORTH AMERICA, INC.
- 11.1. Insert the guide -3-
for the relay carrier at the right next to the brake pedal from above -B-
and into the holder -4-
.
- 11.2. Press the relay carrier -2-
down into the guide -A-
.
- 11.3. Fit fastening screw -1-
.