Removing Door Panel
- Remove cover on door opener.
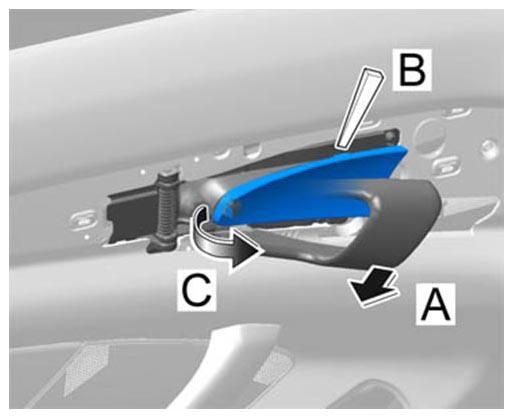 Courtesy of PORSCHE CARS NORTH AMERICA, INC.
- 1.1. Pull up door opener -arrow A-
.
- 1.2. Unclip cover on door opener -arrow B-
.
- 1.3. Unhook rear cover and remove it -arrow C-
.
- Remove covers.
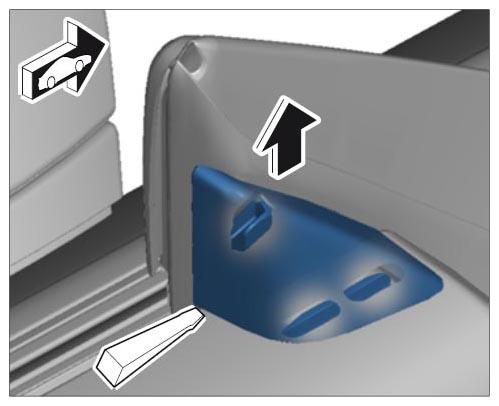 Courtesy of PORSCHE CARS NORTH AMERICA, INC.
- 2.1. Unclip cover on mirror attachment point finisher by pushing it up using a plastic wedge -arrow-
.
- 2.2. Carefully unclip and remove airbag cover using a plastic wedge -arrow-
.
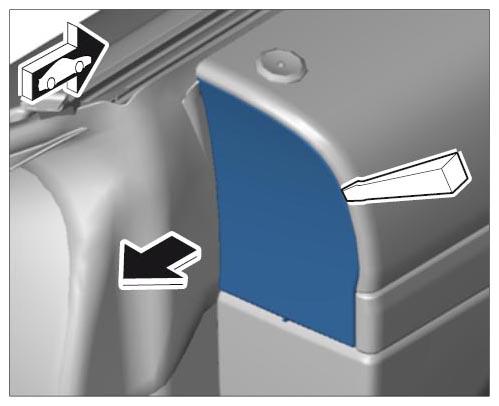 Courtesy of PORSCHE CARS NORTH AMERICA, INC.
- Remove door panel.
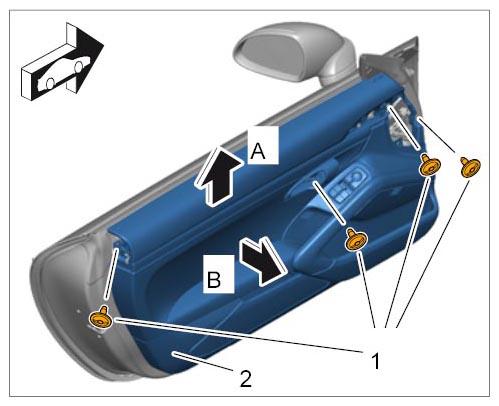 Courtesy of PORSCHE CARS NORTH AMERICA, INC.
- 3.1. Unscrew fastening screws -1-
.
- 3.2. Guide the door panel -2-
up out of the brackets -arrow A-
and pull it out slightly -arrow B-
.
- Disconnect wire harness for door panel.
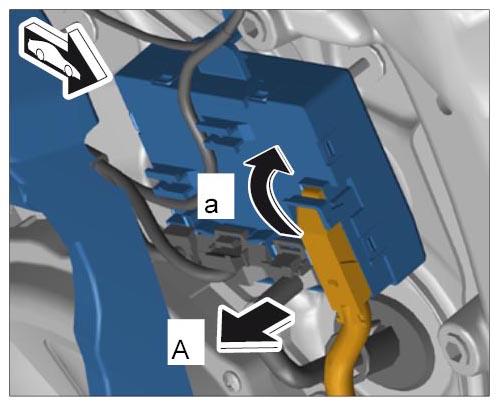 Courtesy of PORSCHE CARS NORTH AMERICA, INC.
- 4.1. Release electric plug connection on the control unit, swivel the locking mechanism up -a-
and pull it off -A-
.
- Disengage cable for door opener.
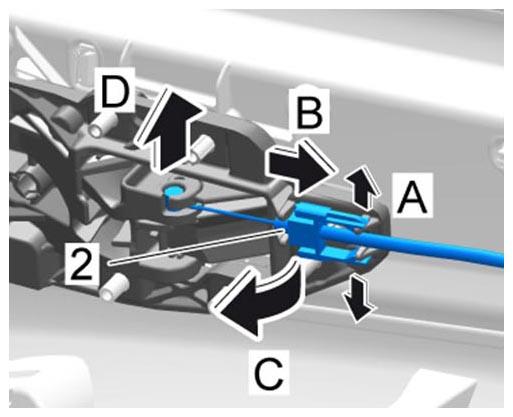 Courtesy of PORSCHE CARS NORTH AMERICA, INC.
- 5.1. Open out the locking mechanism -A-
.
- 5.2. Remove cable by pulling it to the rear out of the guide -2-
(-B-
).
- 5.3. Swivel cable in direction of arrow -C-
until the driver at the front is free.
- 5.4. Remove the driver from the door opener -D-
.
- Remove door panel.
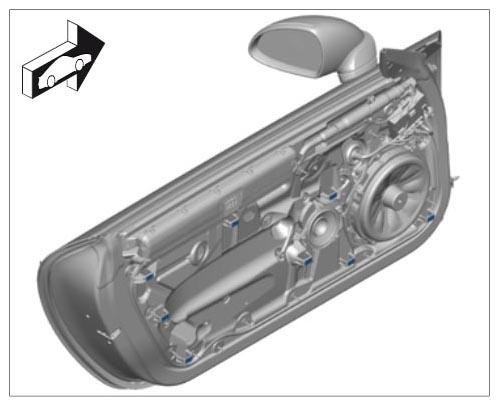 Courtesy of PORSCHE CARS NORTH AMERICA, INC.
- Visually examine the rubber supports to check that they are complete and are seated correctly.