Disassembling And Assembling Charge-Air Cooler
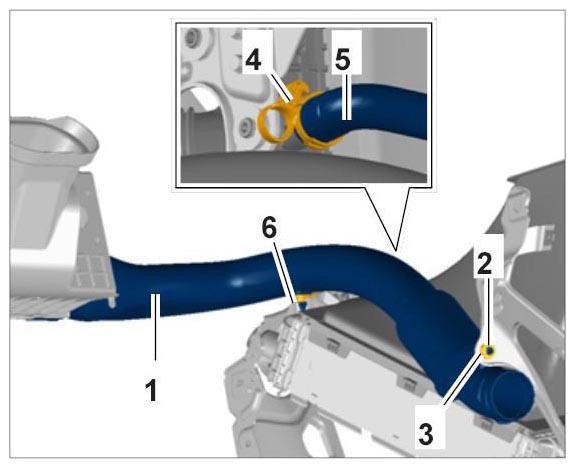
- Disconnect intake pipe -1-
at the charge-air cooler.
- 1.1. Loosen circlip -2-
and remove washer -3-
.
- 1.2. Loosen clamp -4-
and pull off hose -5-
.
- 1.3. Remove intake pipe -1-
from the bracket.
 Courtesy of PORSCHE CARS NORTH AMERICA, INC.
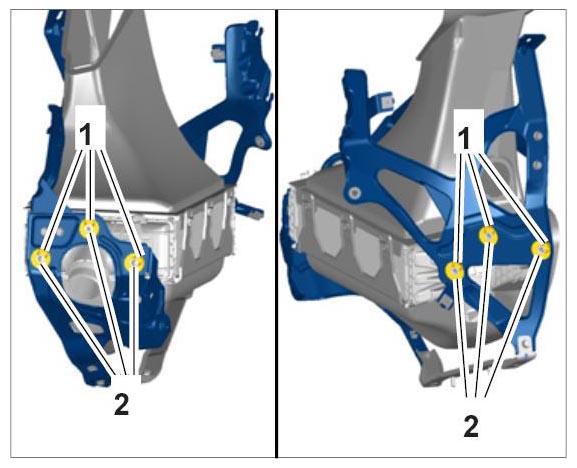
- Loosen and remove circlips -1-
and washers -2-
.
- 2.1. Press off circlips using a screwdriver.
 Courtesy of PORSCHE CARS NORTH AMERICA, INC.
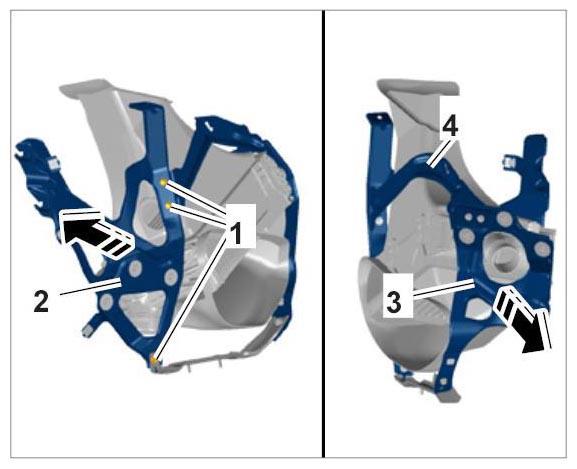
- Loosen bracket from the charge-air cooler.
- 3.1. Unscrew screws -1-
and remove upper part -2-
of the bracket.
- 3.2. Pull lower part -3-
and braces for the bracket -4-
out of the bracket.
 Courtesy of PORSCHE CARS NORTH AMERICA, INC.
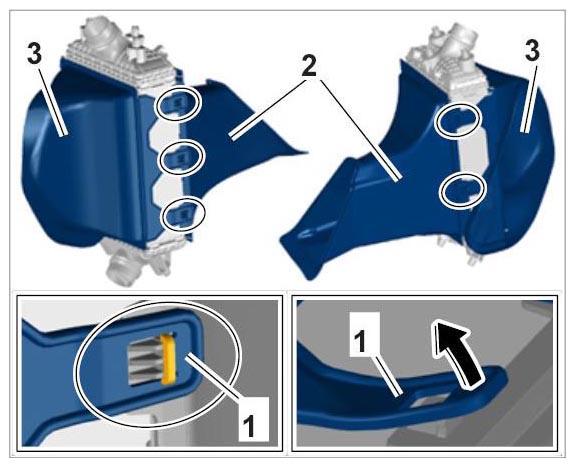
- Disassemble air guide on the charge-air cooler.
- 4.1. Lift tab -1-
and move it in direction of arrow.
- 4.2. Remove upper part -2-
and lower part -3-
of the air guide.
 Courtesy of PORSCHE CARS NORTH AMERICA, INC.
- Assembly is performed in reverse order. Pay particular attention to the following:
- 5.1. Clean the surface (vanes) of the charge-air cooler.
- 5.2. Replace damaged rubber elements.
- 5.3. Replace damaged circlips.
- 5.4. Tightening torque for fastening screw for brackets on upper part: 10 Nm (7.5 ftlb.)
.