Removing Strut (A-Strut)
- Remove side foam pads from the wing on both sides. → Two foam pads at the sides
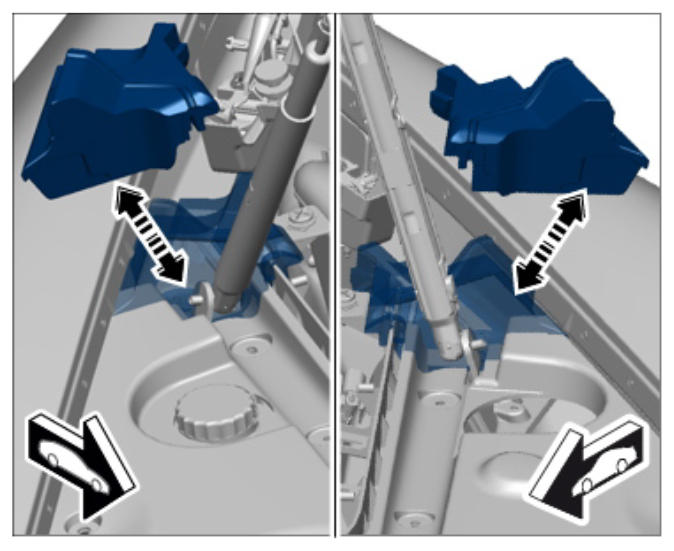 Courtesy of PORSCHE CARS NORTH AMERICA, INC.
- Remove right plenum panel wall.
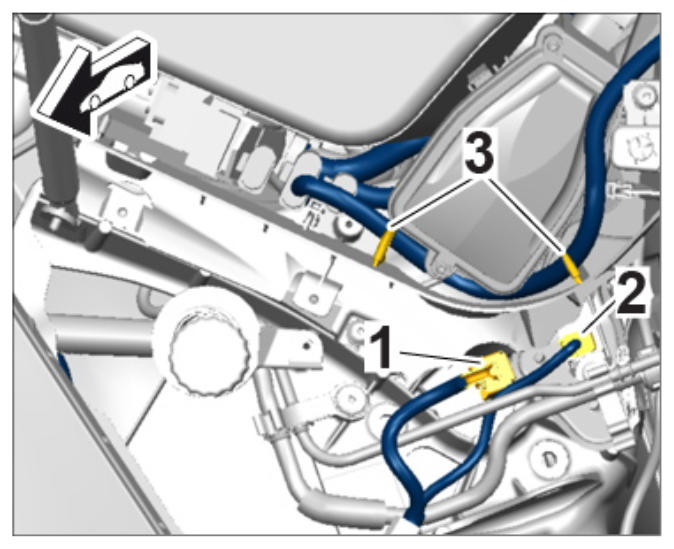
- 2.1. Disconnect cable plugs on the two sensors -1 and 2-
(prevents damage to the plugs during subsequent work). Ensure that you detach the cable plug -1-
from the spring strut vertically (risk of breakage).
- 2.2. Disconnect engine wire harness -3-
from the plenum panel wall and expose it.
 Courtesy of PORSCHE CARS NORTH AMERICA, INC.
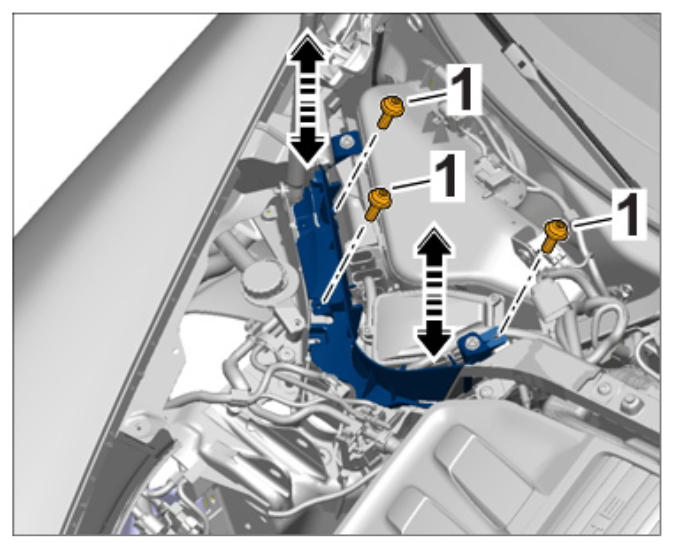
- 2.3. Remove fastening screws on the right plenum panel wall. → Mounting for right-hand side plenum panel wall
 Courtesy of PORSCHE CARS NORTH AMERICA, INC.
- 2.4. Remove plenum panel wall.
- Remove left plenum panel wall.
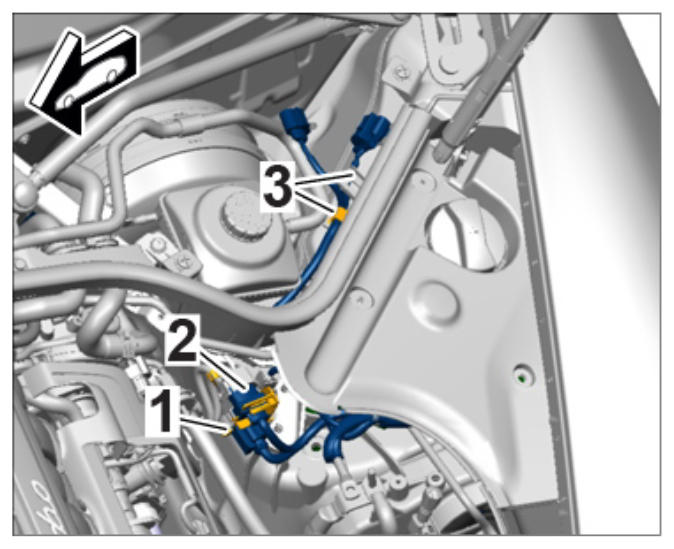
- 3.1. Disconnect cable plugs -1 and 2-
on the two sensors (prevents damage to the plugs during subsequent work). Always disconnect the cable plug from the spring strut -1-
by pulling it straight up (risk of breakage).
 Courtesy of PORSCHE CARS NORTH AMERICA, INC.
- 3.2. Disconnect engine wire harness -3-
from the plenum panel wall and expose it.
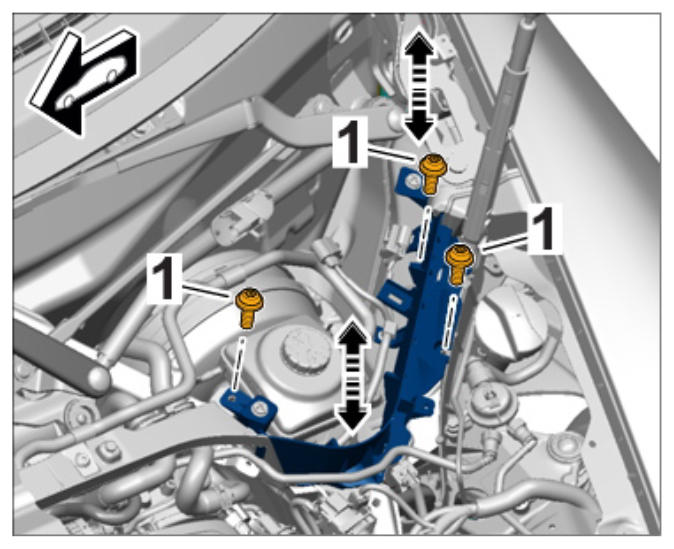
- 3.3. Remove fastening screws on the left plenum panel wall. → Mounting for left plenum panel wall at the side
 Courtesy of PORSCHE CARS NORTH AMERICA, INC.
- 3.4. Remove plenum panel wall.
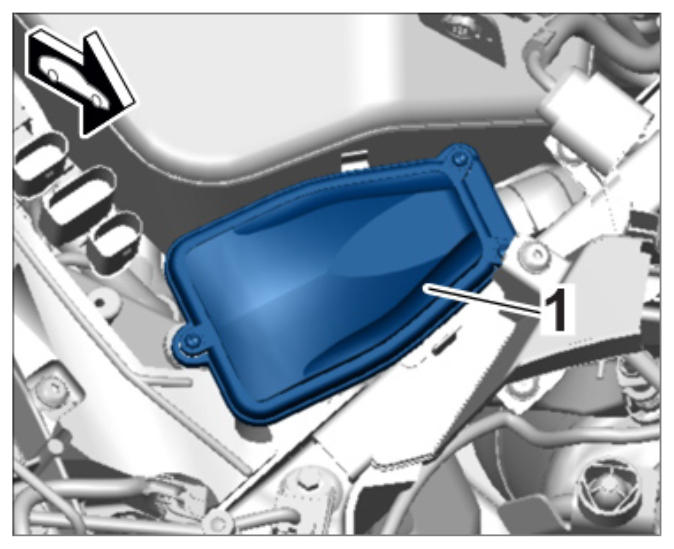
- Detach relay box from the strut. To do this, press the plastic hook -1-
and set the relay box aside.
 Courtesy of PORSCHE CARS NORTH AMERICA, INC.
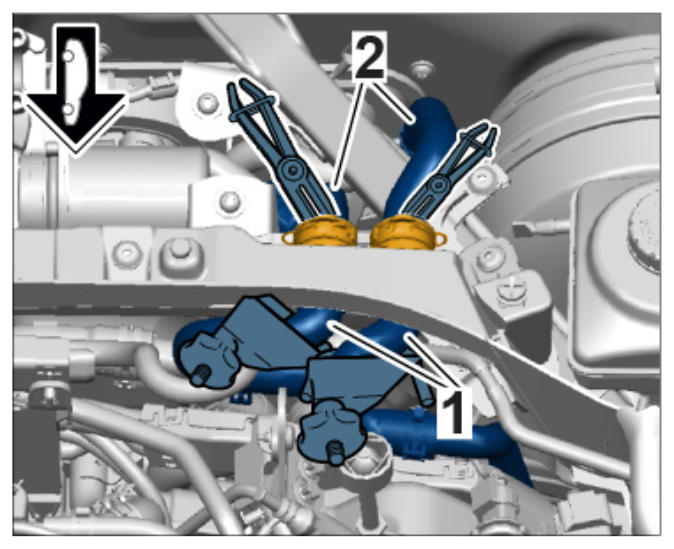
- Clamp heating and coolant hoses on both sides of the center plenum panel wall at the top using suitable hose clamps. → Clamped hoses (examples of hose clamps that can be used)
- Hose clamps on coolant hoses
- Scissor clamps on heater hoses
 Courtesy of PORSCHE CARS NORTH AMERICA, INC.
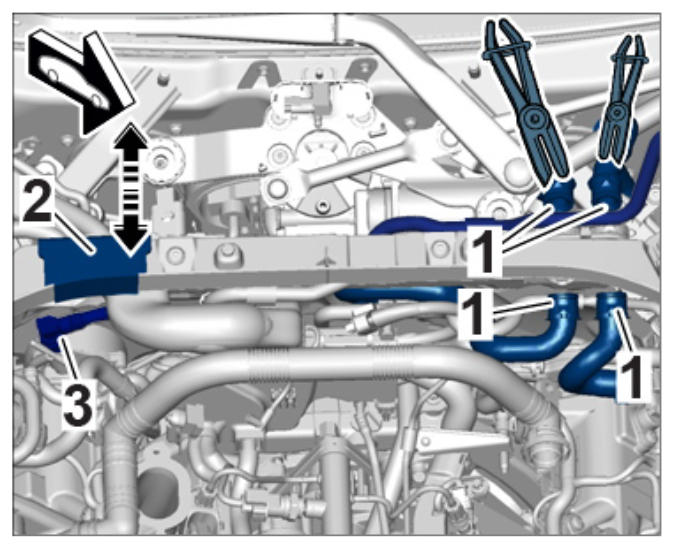
- 5.1. Disconnect hoses by releasing the locking clips and pull them off -1-
. Soak up residual coolant with a cloth.
- 5.2. Move locking clips back into installation position again immediately after removing the hoses.
- Pull engine wire harness -2-
out of the center plenum panel wall.
- Pull vacuum line -3-
off the vacuum pump.
 Courtesy of PORSCHE CARS NORTH AMERICA, INC.
- Remove center plenum panel wall at the top.
- 8.1. Remove fastening screws. → Centre plenum panel at the top
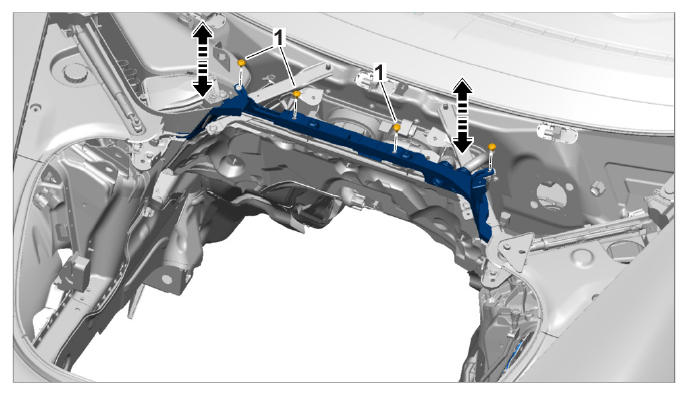 Courtesy of PORSCHE CARS NORTH AMERICA, INC.
- 8.2. Lift the center plenum panel wall at the top and pull the vacuum line through the bore in the grommet. → Guiding vacuum line through the plenum panel wall
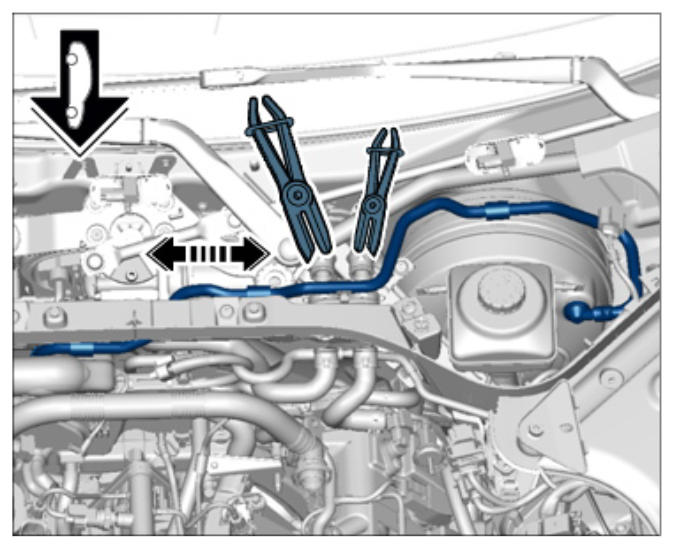 Courtesy of PORSCHE CARS NORTH AMERICA, INC.
- Remove strut (A-strut).
- 9.1. Detach lines (vacuum, tank ventilation, fuel) -4 and 5-
and remove plastic clip. Release the plastic clip by inserting a screwdriver through the side hole in the strut and pull it off.
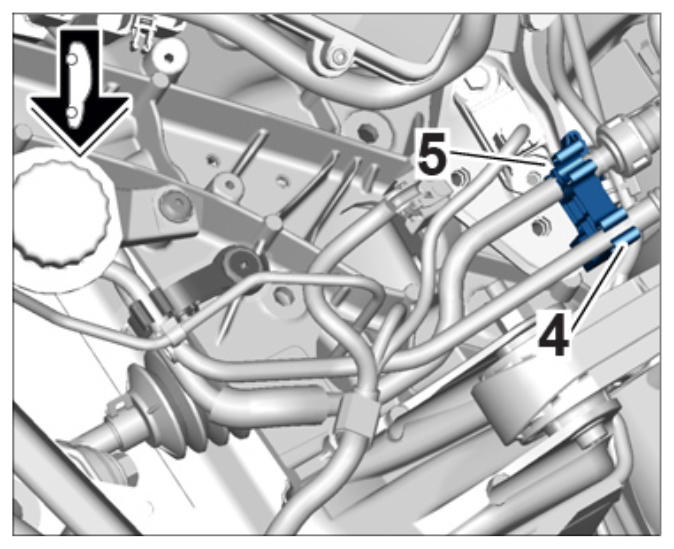 Courtesy of PORSCHE CARS NORTH AMERICA, INC.
- 9.2. Remove fastening screws and nuts connecting the strut (A-strut) -1-
to the plenum panel.
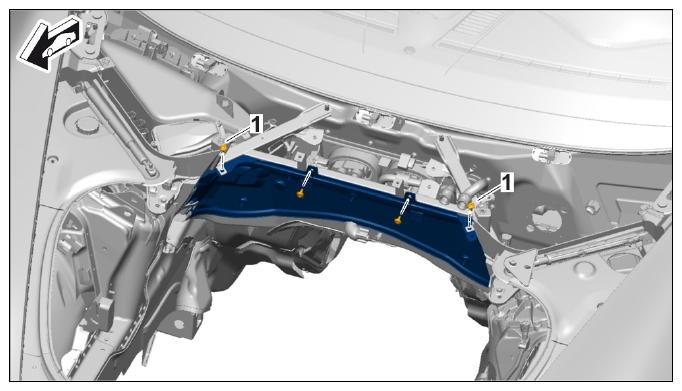 Courtesy of PORSCHE CARS NORTH AMERICA, INC.
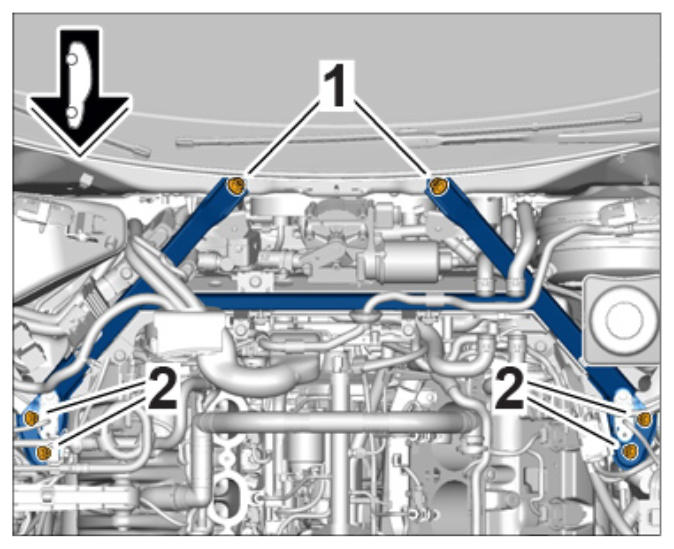
- 9.3. Remove fastening screws on the strut (A-strut) -1 and 2-
.
 Courtesy of PORSCHE CARS NORTH AMERICA, INC.
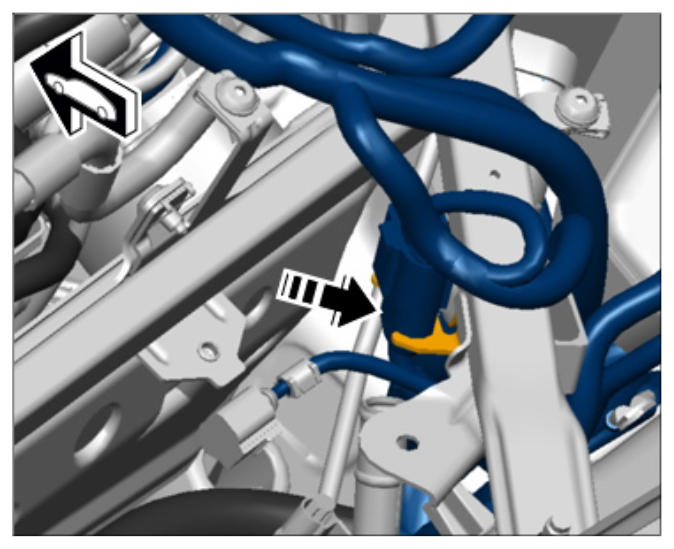
- 9.4. Disconnect engine wire harness under the strut and press holder out carefully -arrow-
.
 Courtesy of PORSCHE CARS NORTH AMERICA, INC.
- 9.5. Release two large cable plugs on the strut. To do this, press the two plugs out of the strut from behind.
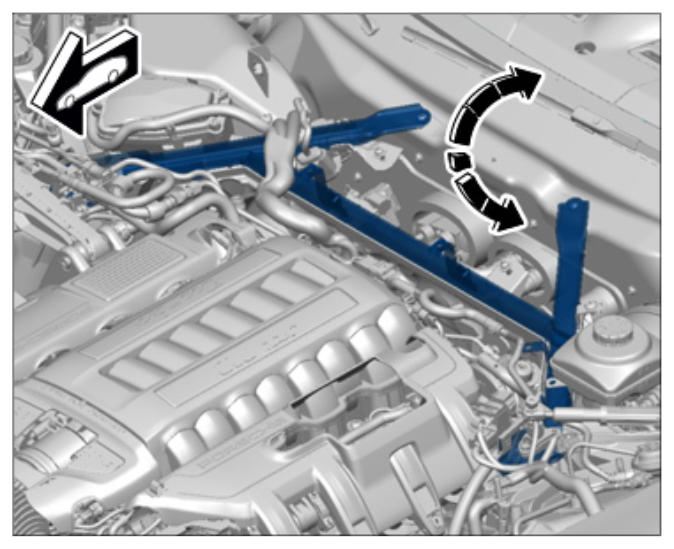
- 9.6. Get another mechanic to help you guide the strut out sideways under the brake fluid reservoir. → Removing strut
 Courtesy of PORSCHE CARS NORTH AMERICA, INC.