Removing Rear Wheel Cover
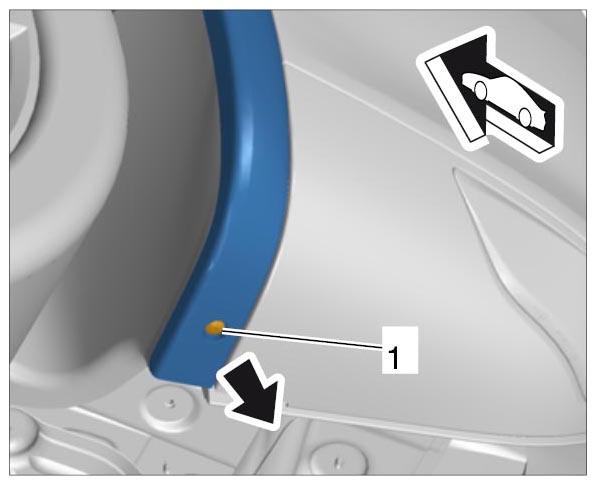
- Unscrew bottom fastening screw -1-
.
 Courtesy of PORSCHE CARS NORTH AMERICA, INC.
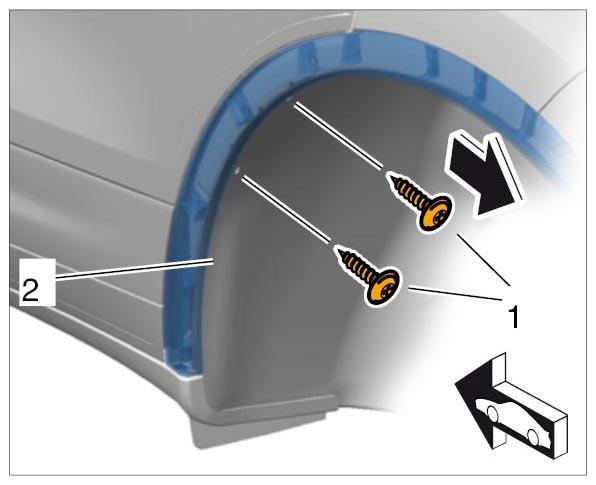
- Unscrew fastening screws -1-
on the wheel housing liner -2-
.
 Courtesy of PORSCHE CARS NORTH AMERICA, INC.
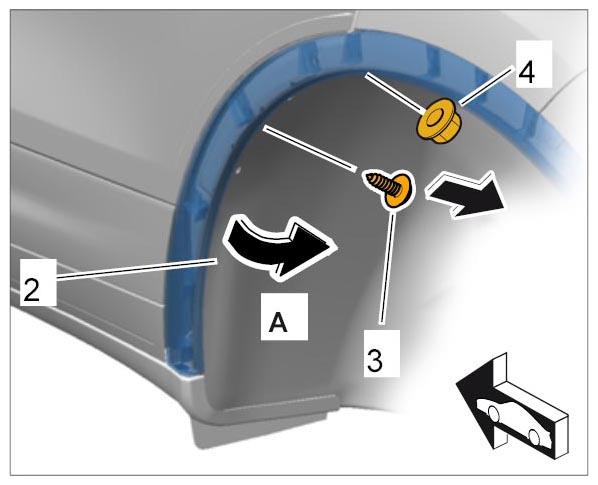
- Press the wheel housing liner -2-
aside -A-
and unscrew the fastening screw -3-
and fastening nut -4-
from the inside.
 Courtesy of PORSCHE CARS NORTH AMERICA, INC.
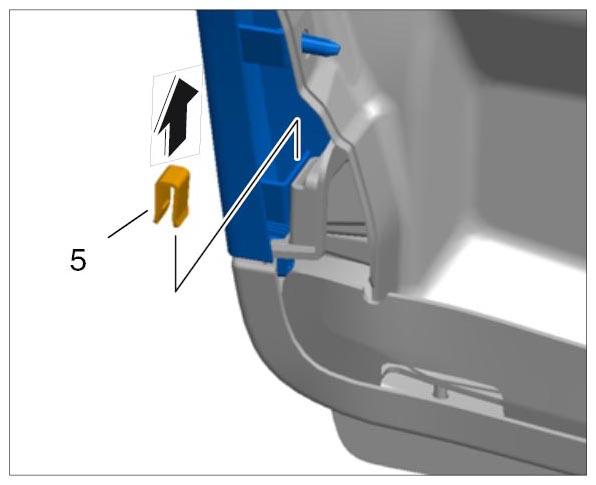
- Pull off safety clip -5-
.
 Courtesy of PORSCHE CARS NORTH AMERICA, INC.
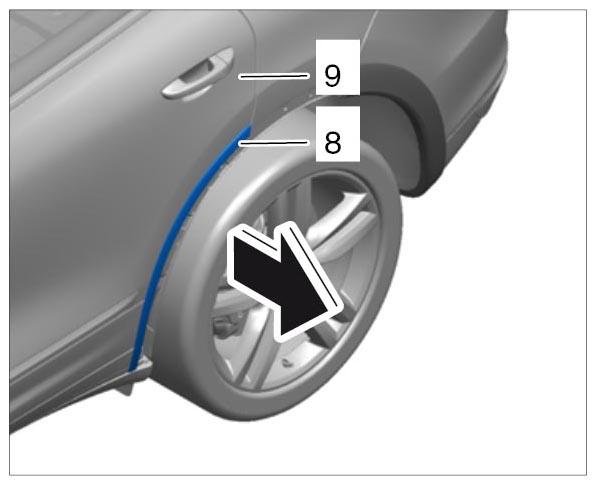
- Remove wheel cover at the door.
- 5.1. Heat up wheel cover -8-
at the door -9-
using a hot-air blower.
- 5.2. Prise wheel cover -8-
off evenly all the way around at the door -9-
using an assembly wedge.
 Courtesy of PORSCHE CARS NORTH AMERICA, INC.
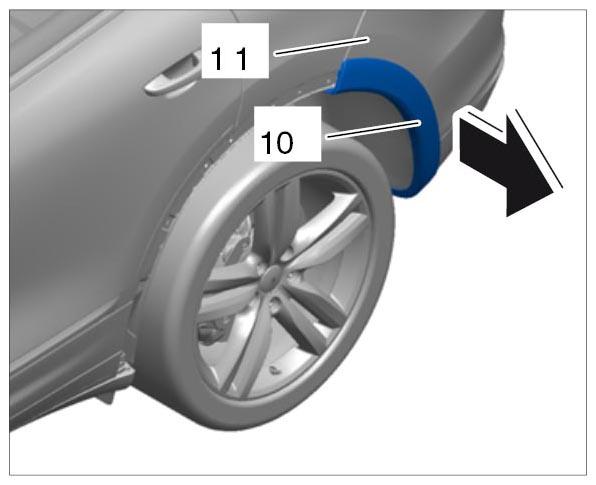
- Remove wheel cover on rear apron.
- 6.1. Heat up wheel cover -10-
on the rear apron -11-
using a hot-air blower.
- 6.2. Prise wheel cover -10-
off the rear apron -11-
evenly all the way around using an assembly wedge -arrow-
.
 Courtesy of PORSCHE CARS NORTH AMERICA, INC.
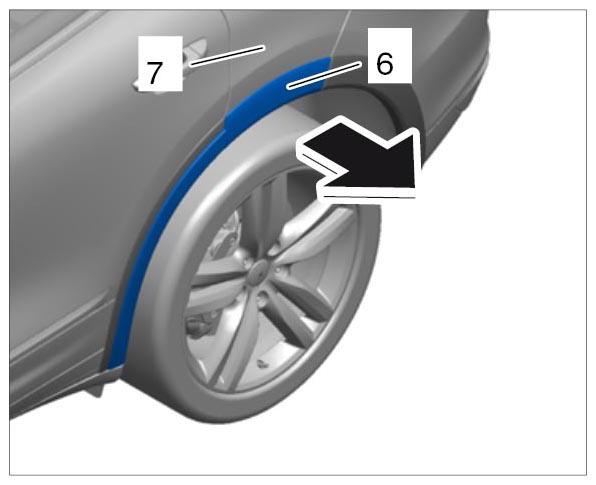
- Remove wheel cover on the side panel.
- 7.1. Heat up wheel cover -6-
on the side panel -7-
using a hot-air blower (hot-air blower WE Leister-Electron
).
- 7.2. Prise wheel cover -6-
off the side panel -7-
evenly all the way around, starting from the rear, using an assembly wedge -arrow-
.
 Courtesy of PORSCHE CARS NORTH AMERICA, INC.
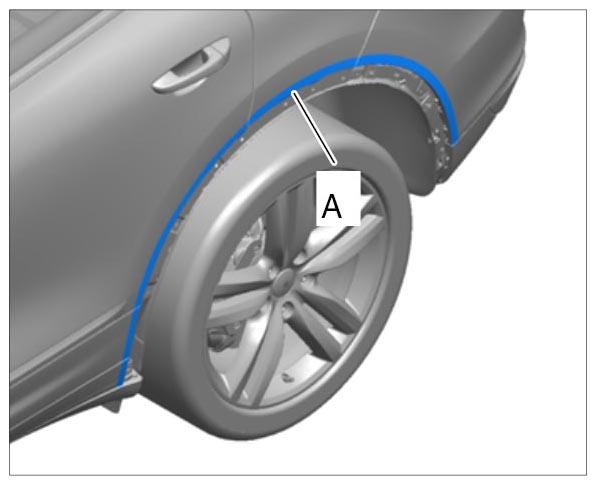
- Clean bonding areas.
- 8.1. Remove adhesive residue in the assembly area -A-
with an erasing disc (erasing disc Nr.174 Pos.1
).
- 8.2. Wipe off fitting area -A-
with a cloth soaked in isopropanol.
 Courtesy of PORSCHE CARS NORTH AMERICA, INC.