Removing Dashboard
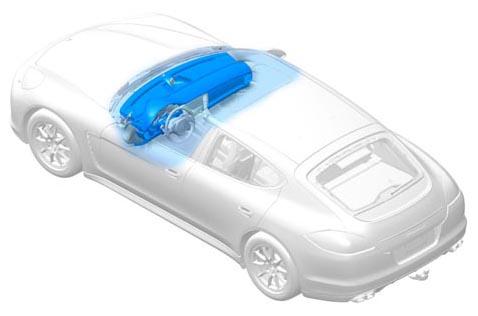 Courtesy of PORSCHE CARS NORTH AMERICA, INC.
- Move the seats all the way back.
- Loosen the fuse boxes at the front left and right. → 978409 LOOSENING AND SECURING FUSE BOX
- Vehicles with KESSY antenna: Remove support for KESSY antenna and release and unplug electric plug connection. → 966719 REMOVING AND INSTALLING KESSY ANTENNA
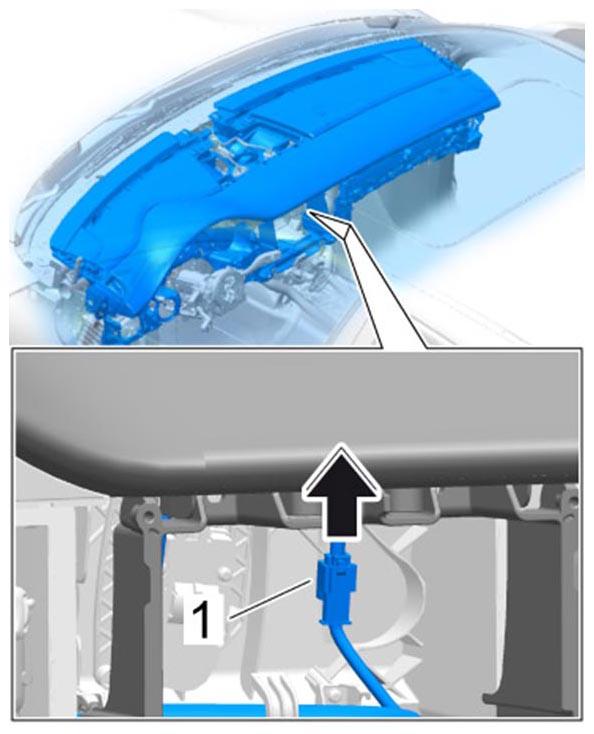
- Disconnect electric plug connection -1-
for the temperature sensor.
 Courtesy of PORSCHE CARS NORTH AMERICA, INC.
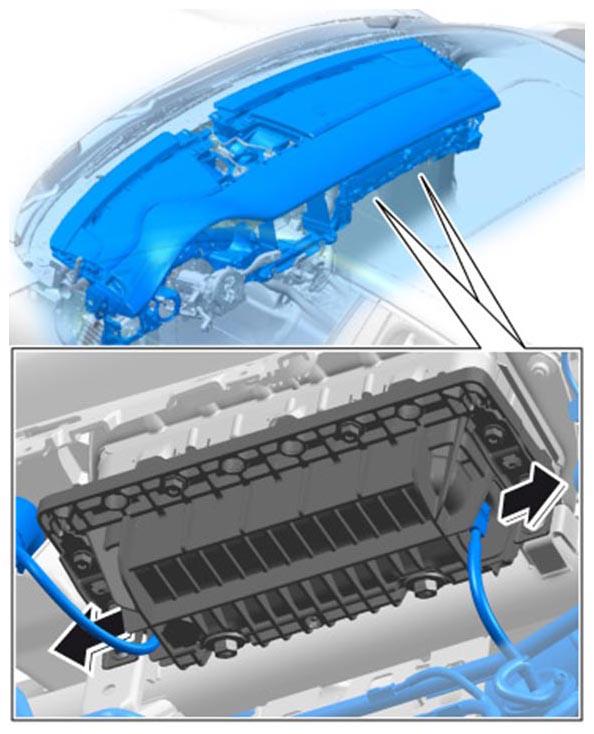
- Release and unplug electric plug connections for the passenger airbag unit.
 Courtesy of PORSCHE CARS NORTH AMERICA, INC.
- Cut the tie-wraps on the line for the passenger airbag unit.
- Cut the tie-wraps on the two wire harnesses going to the center console at the dashboard.
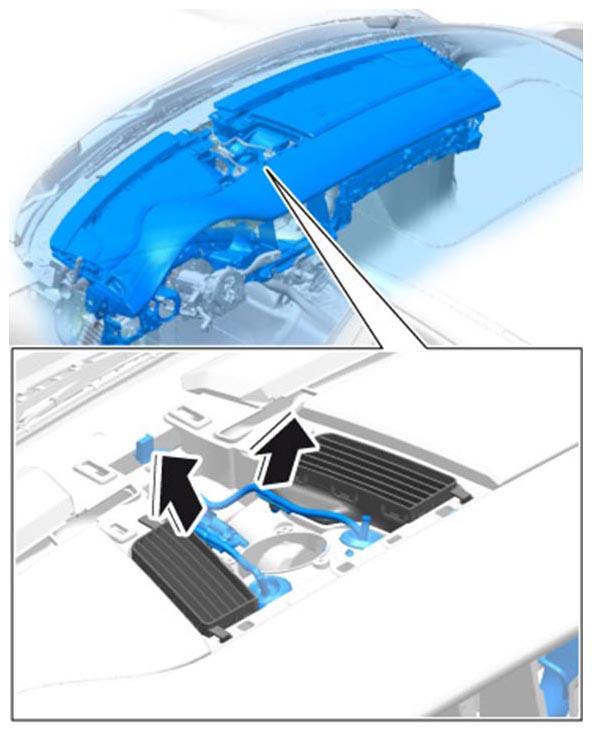
- Unclip the line brackets at the ventilation grilles.
 Courtesy of PORSCHE CARS NORTH AMERICA, INC.
- Pull the wire harnesses and the sleeves inwards through the dashboard.
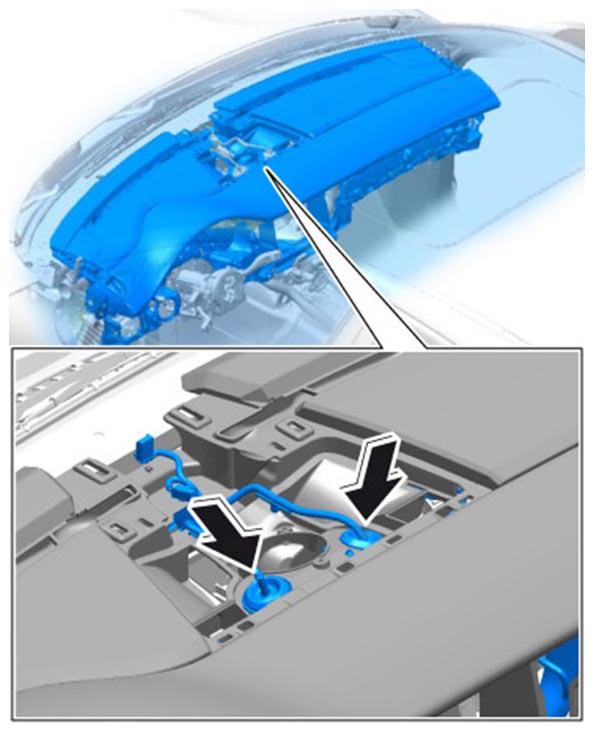 Courtesy of PORSCHE CARS NORTH AMERICA, INC.
- Pull the electric line for the loudspeakers at the left and right out of the dashboard.
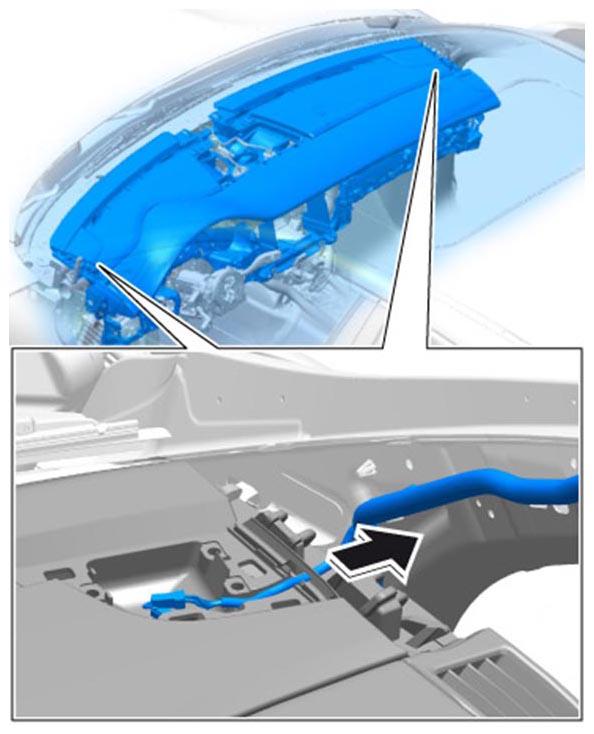 Courtesy of PORSCHE CARS NORTH AMERICA, INC.
- Unclip the line bracket -3-
for the electric line from the dashboard at the left and right A-pillar.
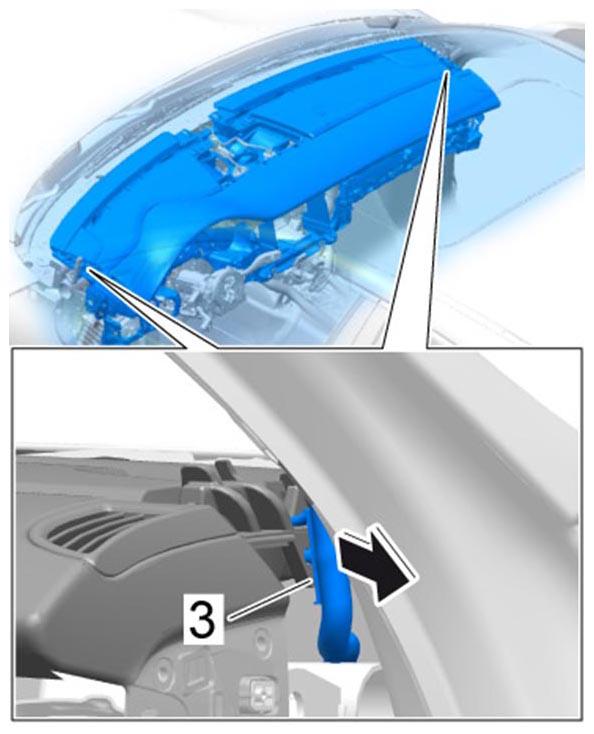 Courtesy of PORSCHE CARS NORTH AMERICA, INC.
- Unscrew and remove the three fastening screws -4-
at the sides.
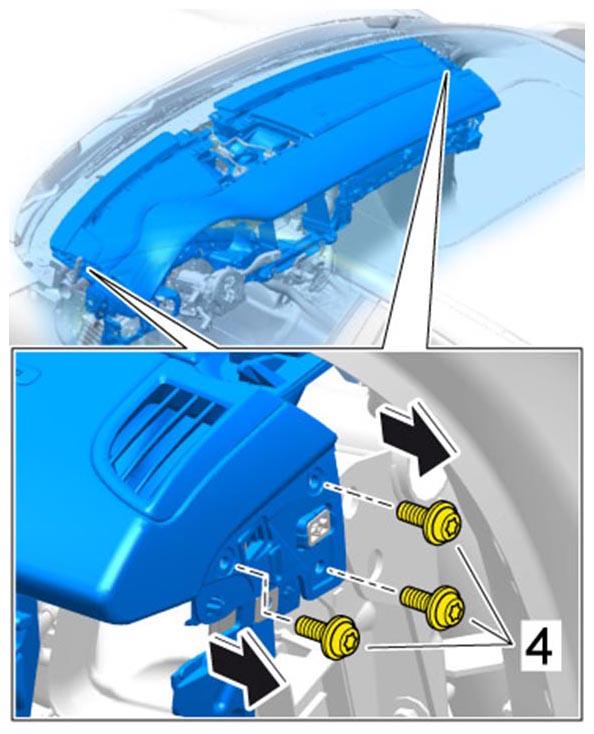 Courtesy of PORSCHE CARS NORTH AMERICA, INC.
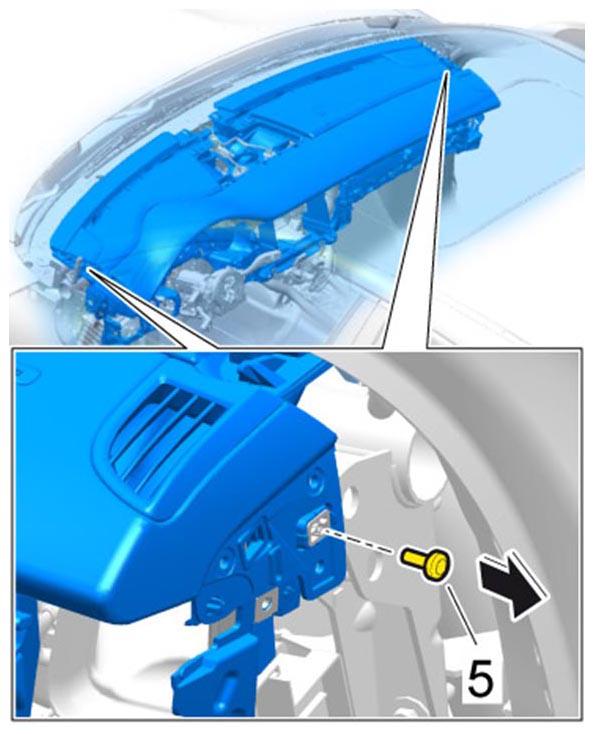
- Unscrew and remove the hexagon socket screw -5-
.
 Courtesy of PORSCHE CARS NORTH AMERICA, INC.
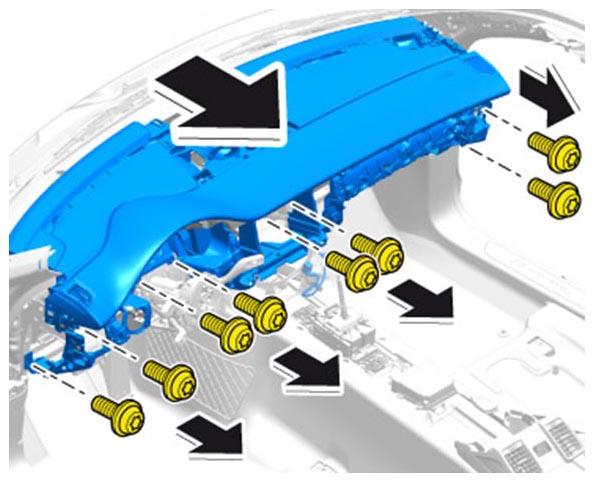
- Unscrew and remove the fastening screws for the dashboard.
 Courtesy of PORSCHE CARS NORTH AMERICA, INC.
- Carefully pull the dashboard inwards out of the holders and remove it.