Installing Dashboard
- Carefully guide the dashboard into place and position it.
- Push the dashboard into the retaining clips. Ensure that no wires are clamped while inserting it.
- Pull the electric lines and rubber sleeves outwards through the dashboard.
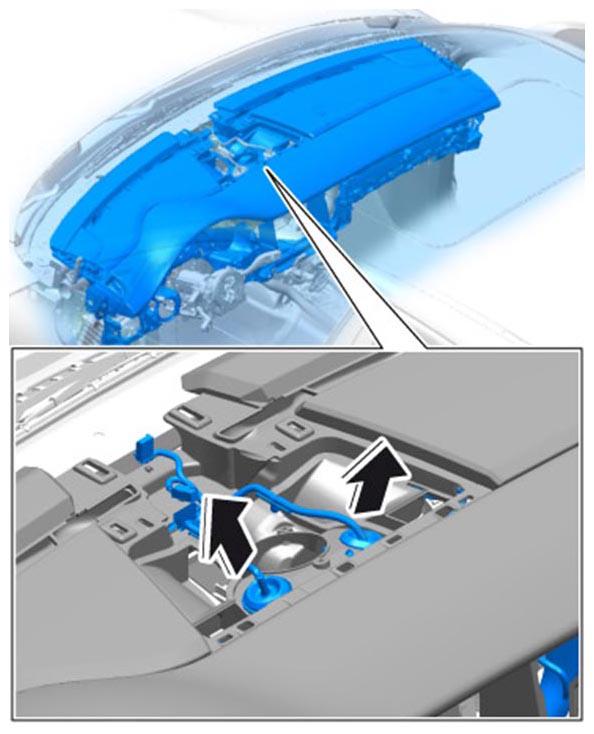 Courtesy of PORSCHE CARS NORTH AMERICA, INC.
- Secure the rubber sleeves on the dashboard.
- Clip in the line brackets at the ventilation grilles.
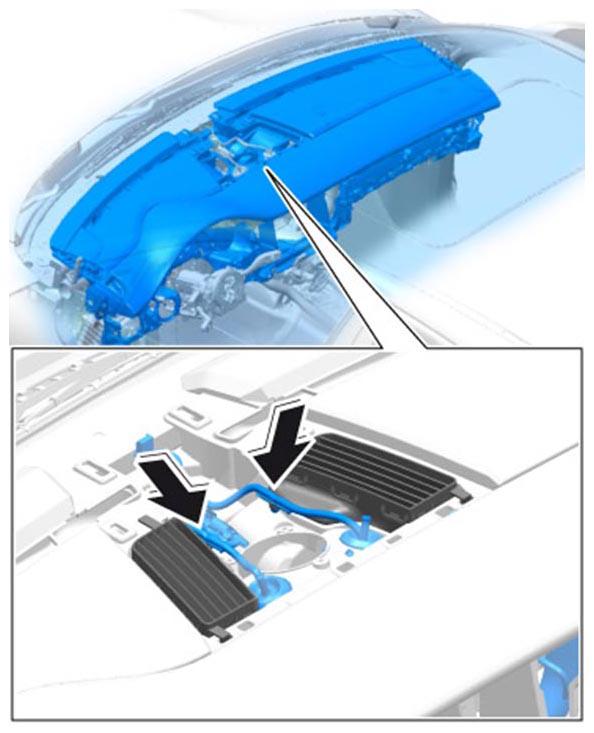 Courtesy of PORSCHE CARS NORTH AMERICA, INC.
- Clip the line bracket -3-
for the electric line into the dashboard at the left and right A-pillar.
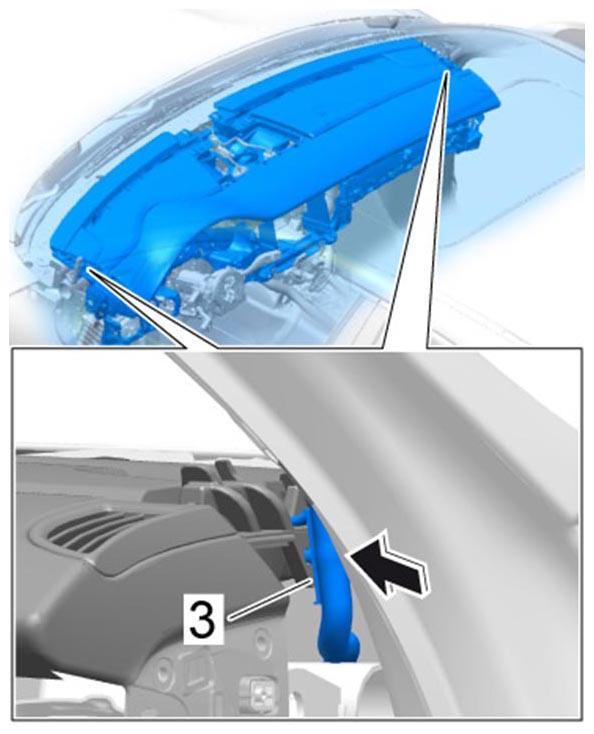 Courtesy of PORSCHE CARS NORTH AMERICA, INC.
- Pull the electric line for the loudspeakers at the left and right into the dashboard.
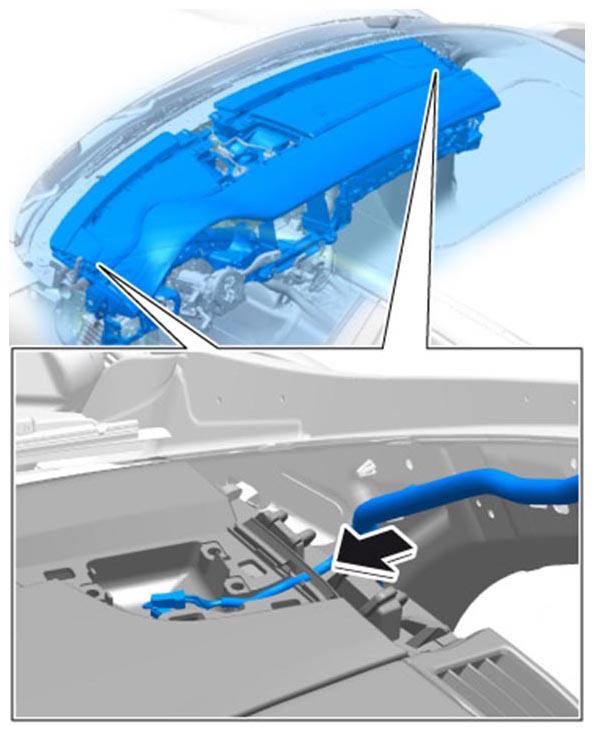 Courtesy of PORSCHE CARS NORTH AMERICA, INC.
- Tighten fastening screws for the dashboard to the specified tightening torque Tightening torque 3.2 Nm
until secure.
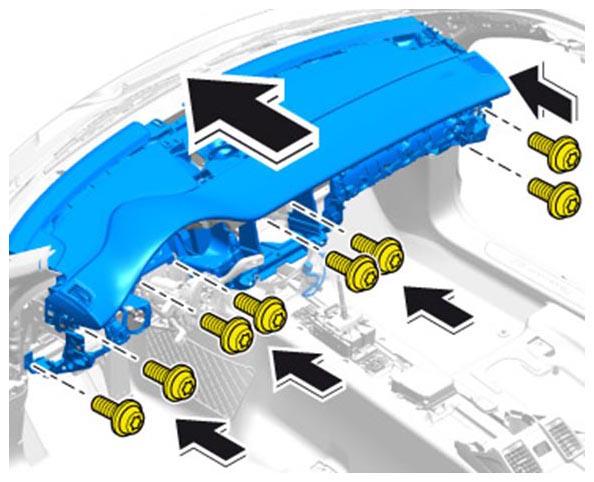 Courtesy of PORSCHE CARS NORTH AMERICA, INC.
- Tighten fastening screws -4-
at the sides to the specified tightening torque Tightening torque 3.2 Nm
until secure.
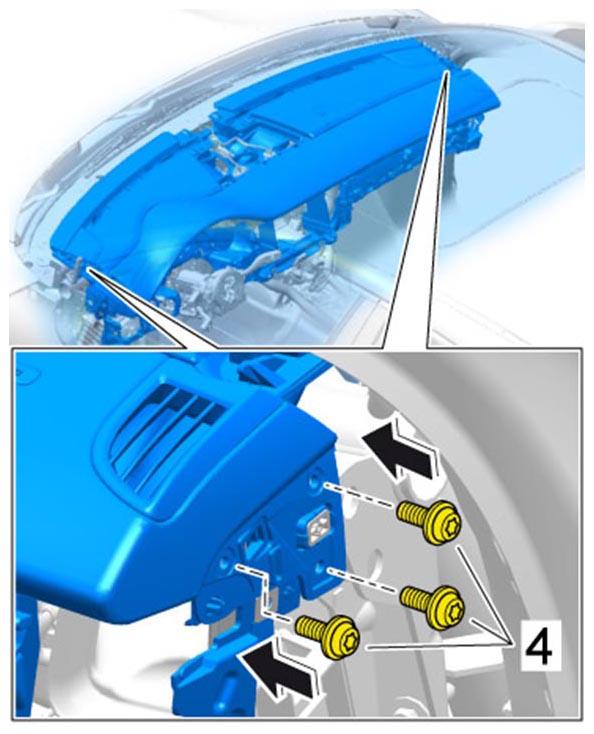 Courtesy of PORSCHE CARS NORTH AMERICA, INC.
- Screw in the hexagon socket screw -5-
at the sides of the dashboard.
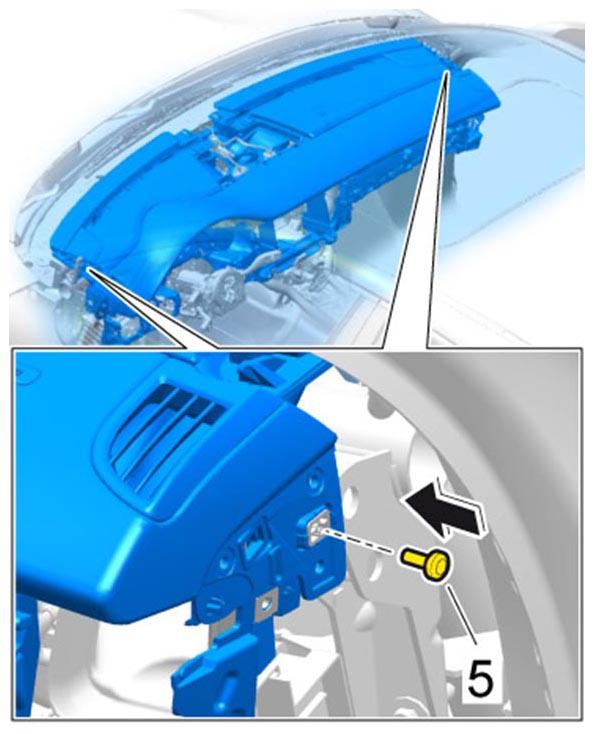 Courtesy of PORSCHE CARS NORTH AMERICA, INC.
- Replace and tighten the tie-wraps on the line for the passenger airbag unit.
- Replace the tie-wraps on the two wire harnesses going to the center console, join them at the dashboard and tighten them.
- Plug in electric plug connections for the passenger airbag unit.
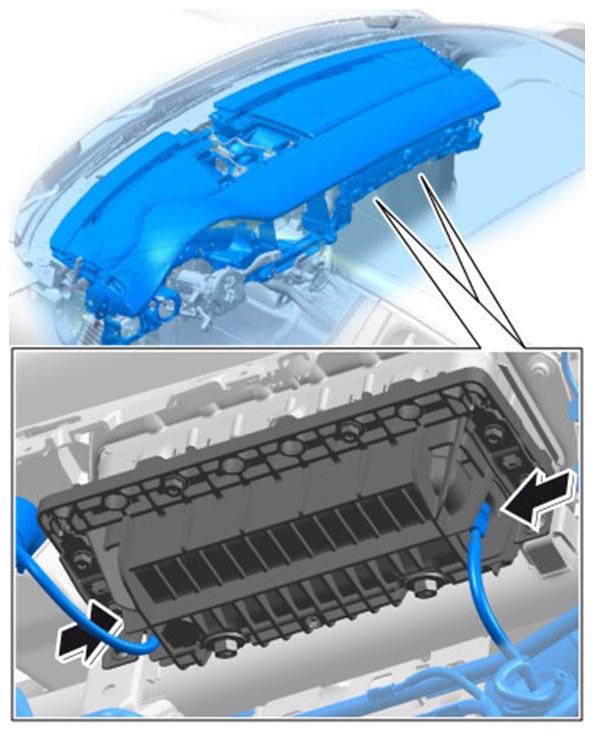 Courtesy of PORSCHE CARS NORTH AMERICA, INC.
- Plug in electric plug connection -1-
for the temperature sensor.
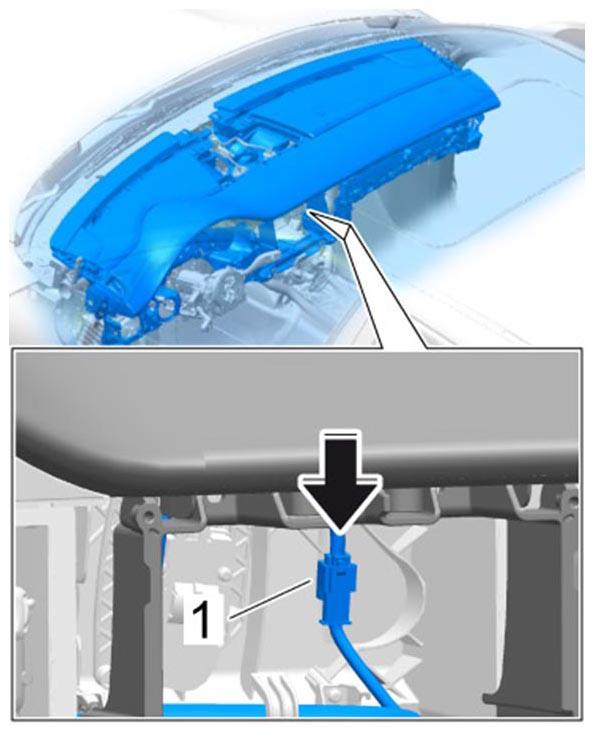 Courtesy of PORSCHE CARS NORTH AMERICA, INC.
- Vehicles with KESSY antenna: Plug in electric plug connection and install the support for the KESSY antenna. → INSTALLING KESSY ANTENNA
- Secure the fuse boxes at the front left and right. → 978409 LOOSENING AND SECURING FUSE BOX
- Move the front seats into position.