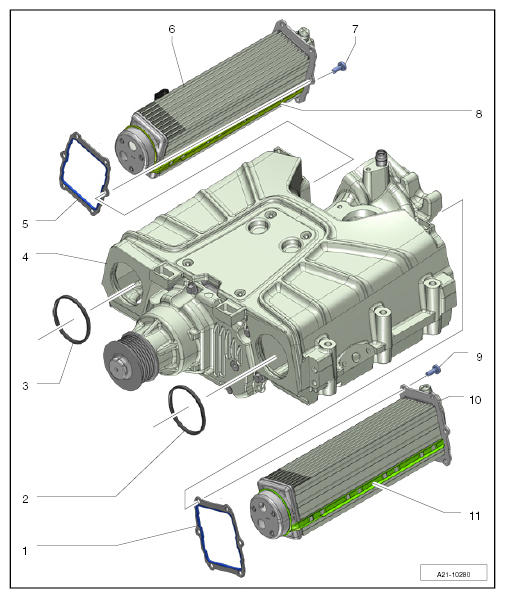
Assembly Overview - Charge-Air Cooler
 Courtesy of PORSCHE CARS NORTH AMERICA, INC.
- Seal replace
- O-ring replace
- Coat the charge-air cooler with engine oil during installation
- O-ring replace
- Coat the charge-air cooler with engine oil during installation
- Compressor housing
- Seal replace
- Right charge-air cooler
- Screw replace → Tightening torque: 10 Nm (7.5 ft. lb.)
- Seal
- Not available individually
- Must not be separated from charge-aircooler
- Coat with engine oil during installation
- Screw replace → Tightening torque: 10 Nm (7.5 ft. lb.)
- Left charge-air cooler
- Seal
- Not available individually
- Must not be separated from charge-aircooler
- Coat with engine oil during removal and installation