Removing Windscreen Frame
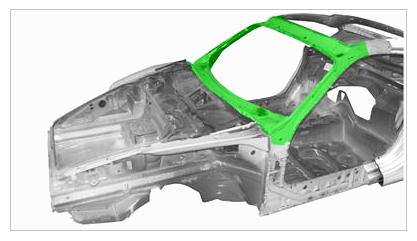 Courtesy of PORSCHE CARS NORTH AMERICA, INC.
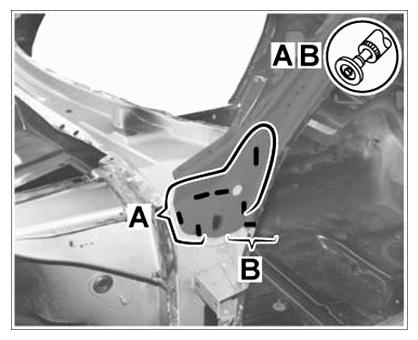
- Remove hinge pillar reinforcement on the left and right. → Removing Hinge Pillar Reinforcement
- Milling off spotwelds
- 2.1. Mill off spotwelds in areas -A-
and -B-
using a spotweld cutter.
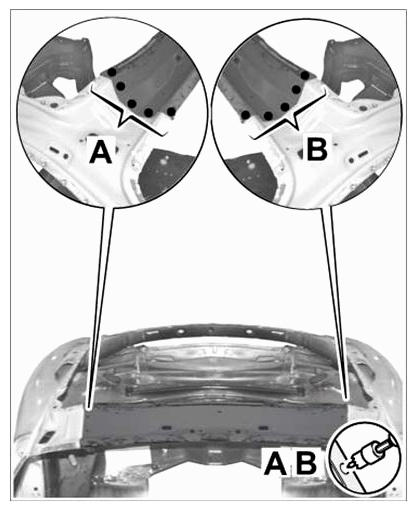 Courtesy of PORSCHE CARS NORTH AMERICA, INC.
- Cutting spotwelds at the left and right
- 3.1. Mill off spotwelds at the left and right in areas -A-
and -B-
using a spotweld cutter.
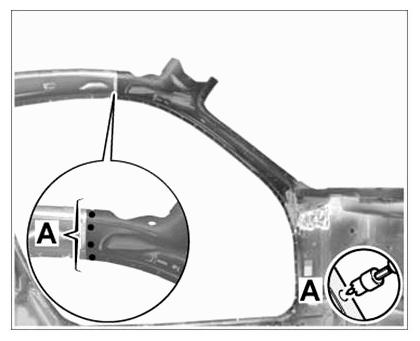 Courtesy of PORSCHE CARS NORTH AMERICA, INC.
- Milling off spotwelds
- 4.1. Mill off spotwelds in areas -A-
and -B-
using a spotweld cutter.
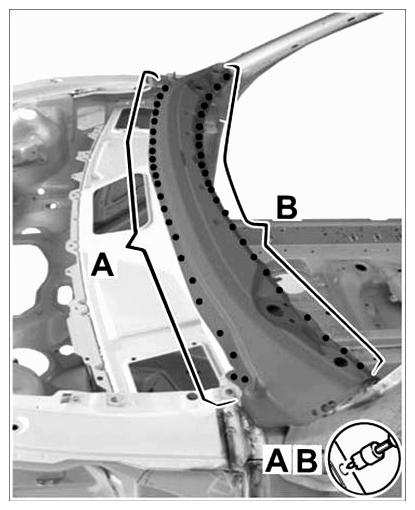 Courtesy of PORSCHE CARS NORTH AMERICA, INC.
- Separating inert-gas welded seams at the left and right
- 5.1. Separate inert-gas welded seams at the left and right in areas -A-
and -B-
using a parting grinder.
 Courtesy of PORSCHE CARS NORTH AMERICA, INC.
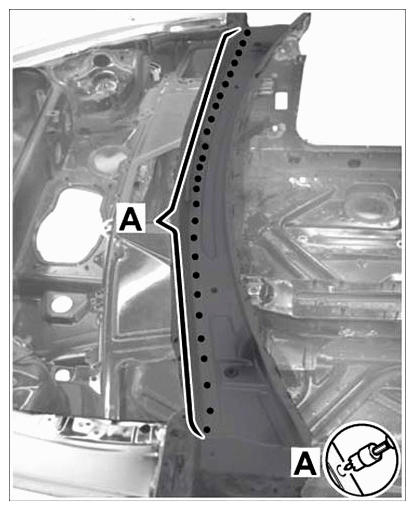
- Milling off spotwelds
- 6.1. Mill off spotwelds in area -A-
using a spotweld cutter.
 Courtesy of PORSCHE CARS NORTH AMERICA, INC.
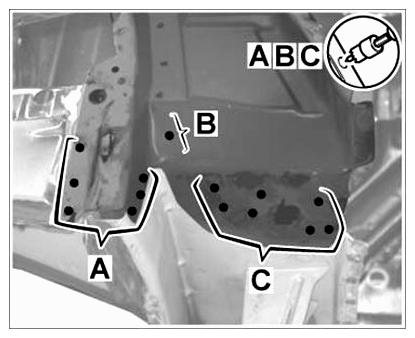
- Cutting spotwelds at the left and right
- 7.1. Mill off spotwelds at the left and right in areas -A-
and -B-
using a spotweld cutter.
 Courtesy of PORSCHE CARS NORTH AMERICA, INC.
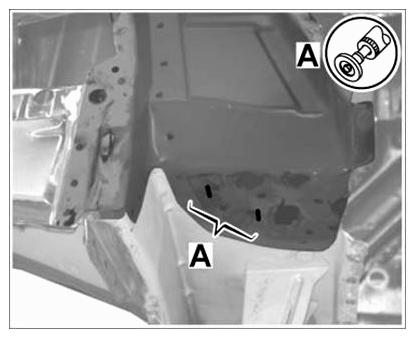
- Separating inert-gas welded seams at the left and right
- 8.1. Separate inert-gas welded seams at the left and right in area -A-
using a parting grinder.
 Courtesy of PORSCHE CARS NORTH AMERICA, INC.