Installing Charge-Air Cooler
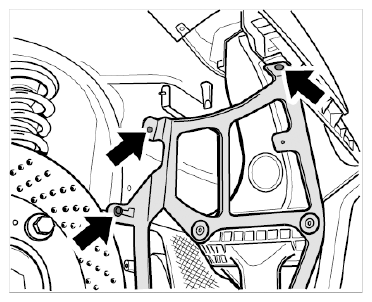
- Position the charge -air cooler module on two threaded bolts on the body.
- Use two hexagon-head bolts (M8 x 16) -left arrows-
and one M8 hexagon nut -top right arrow-
to secure the charge-air cooler bracket in the wheel housing.
 Courtesy of PORSCHE CARS NORTH AMERICA, INC.
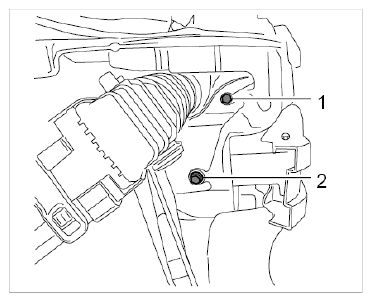
- Position the bracket on the rear side using one hexagon-head bolt (M8 x 16) -2-
and one M8 hexagon nut -1-
, then tighten all threaded joints. → Tightening torque: 23 Nm (17 ft. lb.)
 Courtesy of PORSCHE CARS NORTH AMERICA, INC.
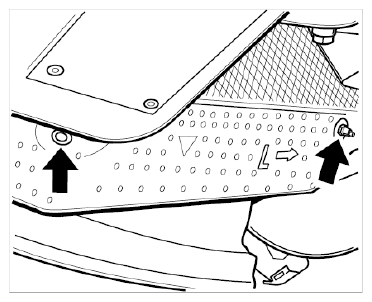
- Use two speed nuts (a/f 13) -arrows-
to secure the heat protection panel to the underside of the charge-air cooler bracket.
 Courtesy of PORSCHE CARS NORTH AMERICA, INC.
- Pre-fit the spring clamps for suction and pressure hoses on the charge-air cooler.
- Replace O-rings on suction and pressure hoses if necessary and grease them with Kluber Syntheso Glep (available from Porsche Parts Service).
- Insert suction and pressure hoses into the rapid-action couplings on the charge-air cooler.
- 7.1. The connection must engage audibly. Pull to check that the connection is secure.