Removing Microswitch For Flap
 Courtesy of PORSCHE CARS NORTH AMERICA, INC.
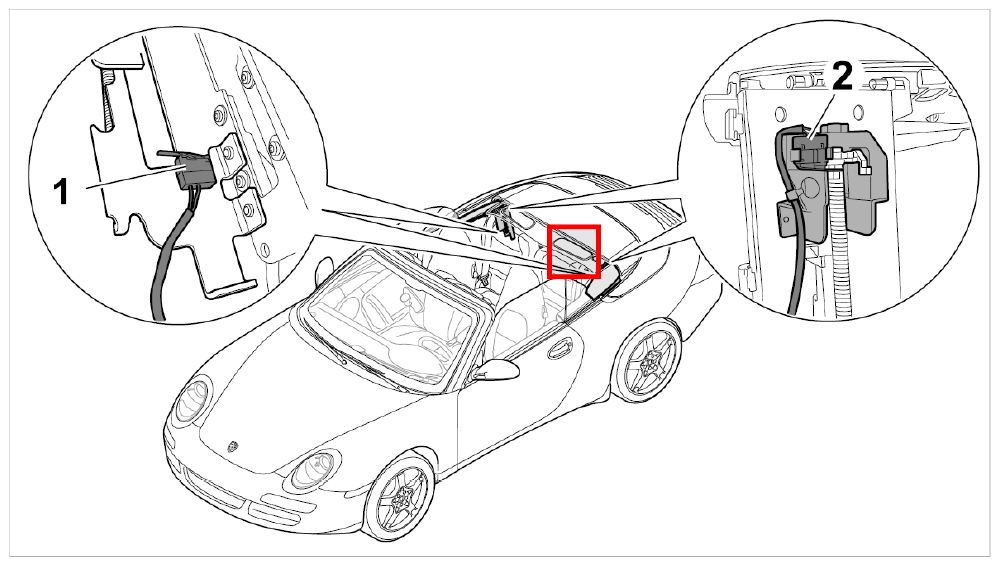
- Bottom microswitch
- Top microswitch
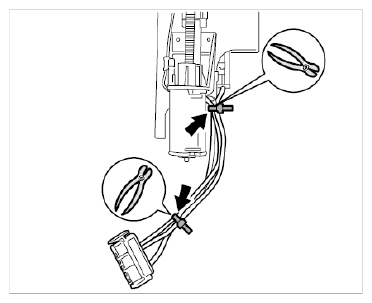
- Undo the two tie-wraps -arrows-
on the electric connecting lines using a wire pliers.
 Courtesy of PORSCHE CARS NORTH AMERICA, INC.
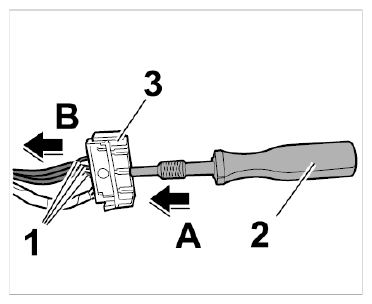
- Undo the three flat connectors of the electric connecting lines -1-
using press-out tool -2- press-out and unlocking tools for flat and round plug connections of all sizes Nr. 155
(-arrow A-
) and pull them out of the central connector -3-
(-arrow B-
).
 Courtesy of PORSCHE CARS NORTH AMERICA, INC.
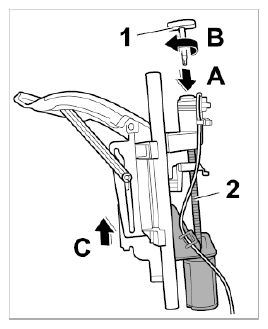
- Insert Allen key -1-
in the emergency operation mechanism -2-
(-arrow A-
) and turn it to the right -arrow B-
until the bottom microswitch can be accessed -arrow C-
.
 Courtesy of PORSCHE CARS NORTH AMERICA, INC.
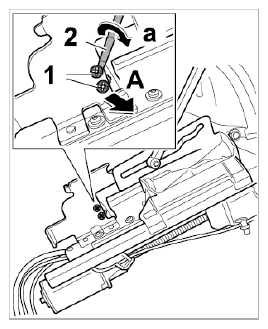
- Undo the two circlips -1-
from the bottom microswitch by turning them -arrow a-
with a small screwdriver -2-
and remove them -arrow A-
.
 Courtesy of PORSCHE CARS NORTH AMERICA, INC.
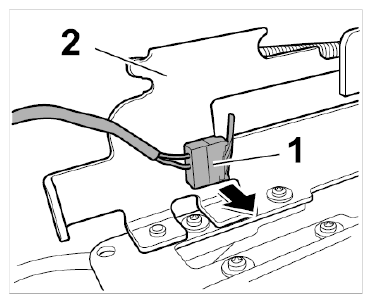
- Remove bottom microswitch -1-
from bracket -2-
(-arrow-
).
 Courtesy of PORSCHE CARS NORTH AMERICA, INC.
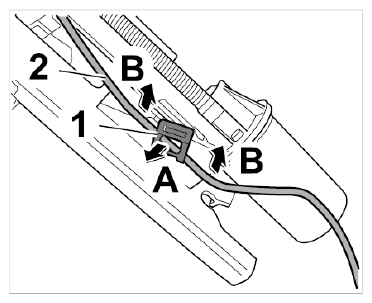
- Bend cable fixing device -1-
on top of engine slightly outwards -arrow A-
and pull out electric connecting line -2-
for the top microswitch from the cable fixing device -arrows B-
.
 Courtesy of PORSCHE CARS NORTH AMERICA, INC.
- Insert Allen key in the emergency operation mechanism and turn it to the right or left until the rear fastening screw of the top microswitch can be accessed → Turning spindle using emergency operation mechanism
.
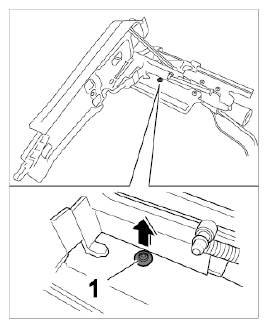
- Undo and remove rear fastening screw -1-
of top microswitch -arrow-
.
 Courtesy of PORSCHE CARS NORTH AMERICA, INC.
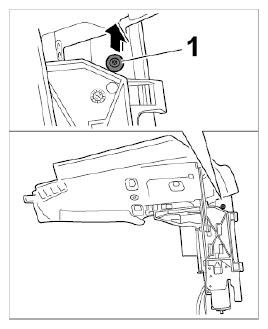
- Insert Allen key in the emergency operation mechanism and turn it to the right or left until the front fastening screw of the top microswitch can be accessed → Turning spindle using emergency operation mechanism
.
- Undo and remove front fastening screw -1-
of top microswitch -arrow-
.
 Courtesy of PORSCHE CARS NORTH AMERICA, INC.
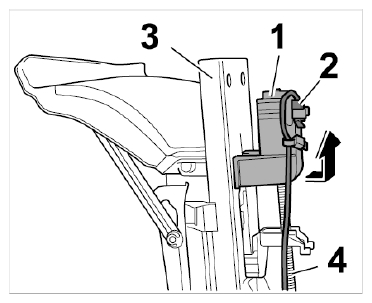
- Remove spindle mount -1-
together with top microswitch -2-
first in a slightly outward direction and then upward -arrow-
from the bracket -3-
and the spindle -4-
.
 Courtesy of PORSCHE CARS NORTH AMERICA, INC.