Assembling Frame For Sliding Roof Cover
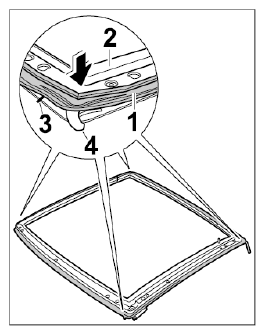
- Fit seal.
- 1.1. Prime bonding surfaces at the corners of the frame for the sliding roof cover -2-
with 3M 4297 primer
.
- 1.2. Press seal -1-
all the way around into the groove in the frame for the sliding roof cover -2-
.
- 1.3. Pull protective film -3-
off the adhesive strips at the corners of the seal -1-
. Also apply a few drops of instant adhesive to the corners and press seal -1-
on firmly at the corners to secure it to the frame for the sliding roof cover -2-
.
 Courtesy of PORSCHE CARS NORTH AMERICA, INC.
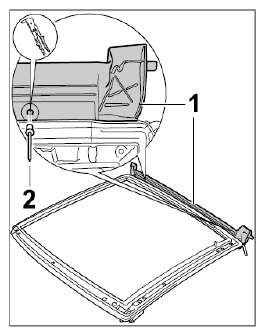
- Position profile strip -1-
and secure with new rivets -2-
.
 Courtesy of PORSCHE CARS NORTH AMERICA, INC.
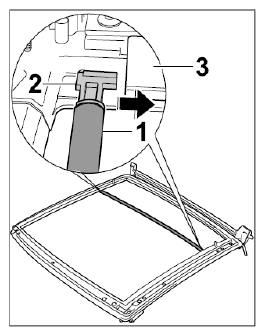
- Fit support bow -1-
and bracket -2-
into the frame for the sliding roof cover -3-
in -direction of arrow-
.
 Courtesy of PORSCHE CARS NORTH AMERICA, INC.
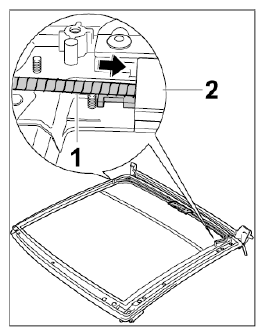
- Insert drive shaft -1-
at the left and right in -direction of arrow-
to fit it into the frame for the sliding roof cover -2-
.
 Courtesy of PORSCHE CARS NORTH AMERICA, INC.
- Position blind shaft mount at the right -1-
and left -2-
and secure with fastening nuts -3-
. → Tightening torque: 5.5 Nm (4.0 ftlb.)
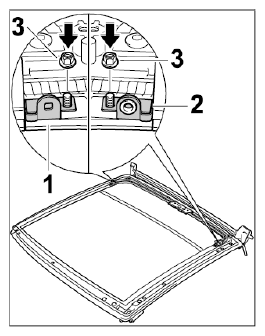 Courtesy of PORSCHE CARS NORTH AMERICA, INC.
- Insert drive tubing -3-
at the left and right into the frame for the sliding roof cover in -direction of arrow-
and secure with the fastening screws -2-
and fastening nuts -1-
. → Tightening torque: 5.5 Nm (4.0 ftlb.) → Tightening torque: 5.5 Nm (4.0 ftlb.)
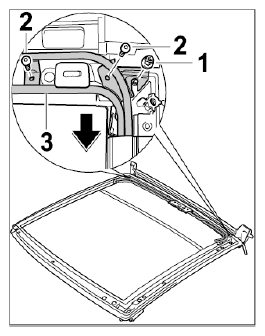 Courtesy of PORSCHE CARS NORTH AMERICA, INC.
- Position drive tubing -1-
in -direction of arrow-
and secure with the fastening screws -2-
. → Tightening torque: 5.5 Nm (4.0 ftlb.)
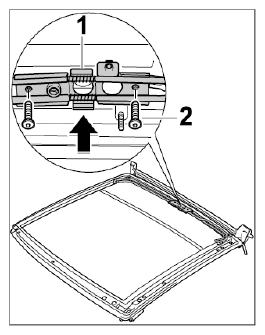 Courtesy of PORSCHE CARS NORTH AMERICA, INC.