Installing Intake-Air Distributor
- Clean sealing surfaces on cylinder head and intake-air distributor (use a clean, lint-free cloth that has been soaked in acetone or solvent naphtha).
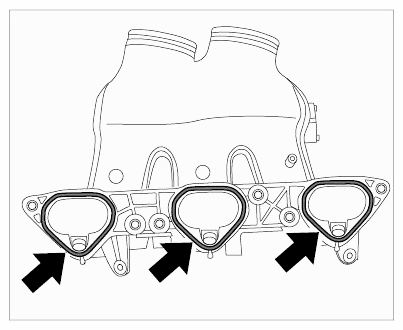
- Replace seals -arrows-
. Observe position of sealing lugs!
 Courtesy of PORSCHE CARS NORTH AMERICA, INC.
- Position intake-air distributor in engine compartment.
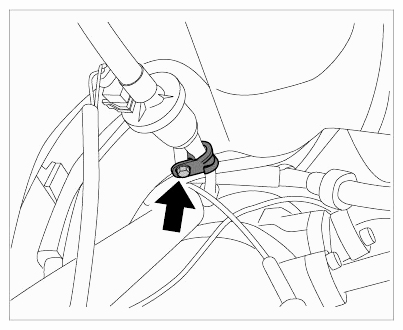
- Lift intake-air distributor and screw in tapping screw -arrow-
(only if intake-air distributor on cylinders 4-6 is installed).
 Courtesy of PORSCHE CARS NORTH AMERICA, INC.
- Position six Torx screws (M6 x 35) of the intake-air distributor and tighten them. → Tightening torque: 7.5 ftlb.
- Plug in cable plug of supply lead for air-conditioning compressor and clip connector housing into the bracket provided (only if intake-air distributor on cylinders 4-6 is installed).
- Replace O-rings on fuel injectors.
- Push fuel injectors with collection pipe into the bores in the intake-air distributor.
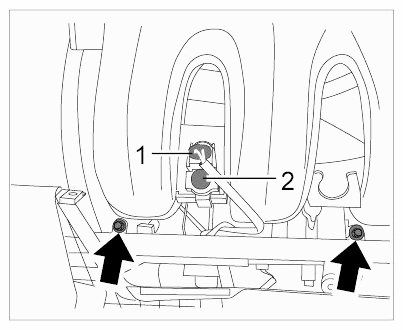
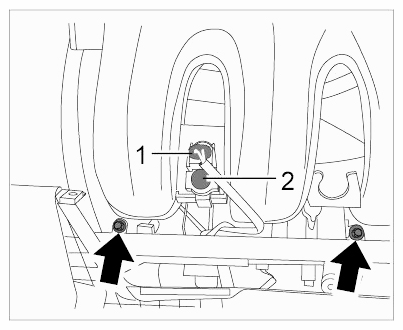
- Position and tighten Torx screws (M6 x 12) -arrows-
. → Tightening torque: 10 Nm (7.5 ftlb.)
- Clip solenoid valve -2-
into intake-air distributor.
- Connect cable plug -1-
to solenoid valve -2-
.
 Courtesy of PORSCHE CARS NORTH AMERICA, INC.
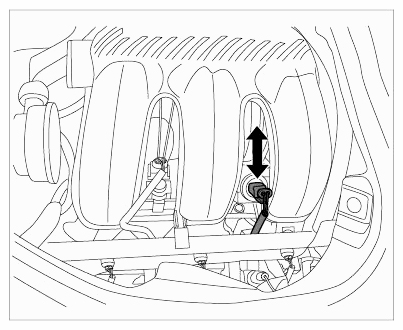
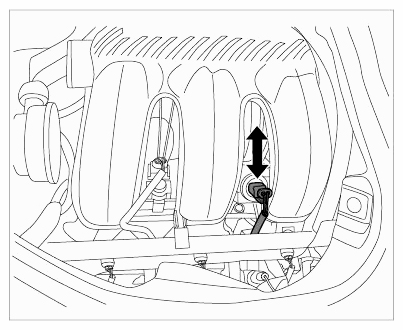
- Push engine compartment temperature sensor and rubber sleeve into bracket (only if removing intake-air distributor on cylinders 1-3). Grease rubber sleeve lightly with Optimol MP0 or silicon spray.
 Courtesy of PORSCHE CARS NORTH AMERICA, INC.
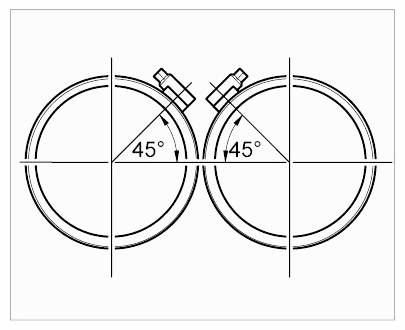
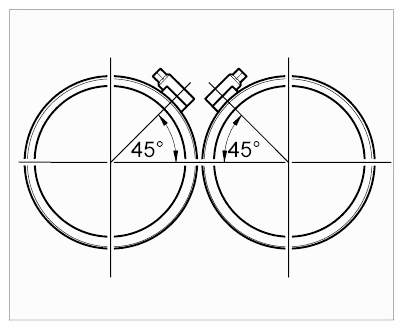
- Position rubber sleeves with screw-type hose clamps.
 Courtesy of PORSCHE CARS NORTH AMERICA, INC.
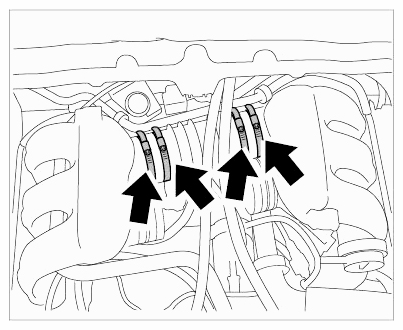
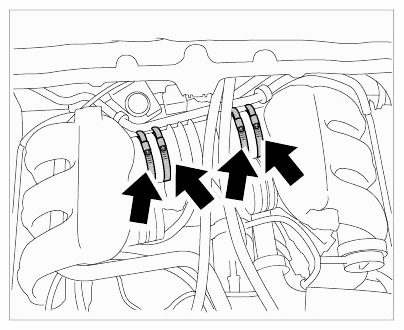
- Tighten screw-type hose clamps -arrows-
on resonance tube.
 Courtesy of PORSCHE CARS NORTH AMERICA, INC.
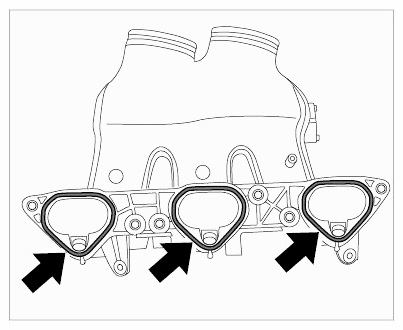
- Clean sealing surfaces on cylinder head and intake-air distributor (use a clean, lint-free cloth that has been soaked in acetone or solvent naphtha).
- Replace seals -arrows-
. Observe position of sealing lugs!
 Courtesy of PORSCHE CARS NORTH AMERICA, INC.
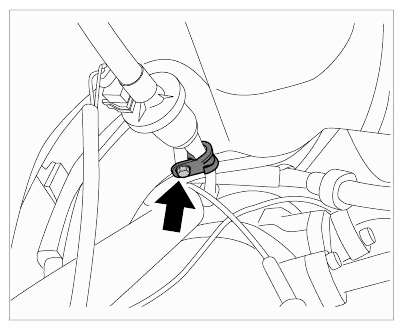
- Position intake-air distributor in engine compartment.
- Lift intake-air distributor and screw in tapping screw -arrow-
(only if intake-air distributor on cylinders 4-6 is installed).
 Courtesy of PORSCHE CARS NORTH AMERICA, INC.
- Position six Torx screws (M6 x 35) of the intake-air distributor and tighten them. → Tightening torque: 7.5 ftlb.
- Plug in cable plug of supply lead for air-conditioning compressor and clip connector housing into the bracket provided (only if intake-air distributor on cylinders 4-6 is installed).
- Replace O-rings on fuel injectors.
- Push fuel injectors with collection pipe into the bores in the intake-air distributor.
- Position and tighten Torx screws (M6 x 12) -arrows-
. → Tightening torque: 10 Nm (7.5 ftlb.)
- Clip solenoid valve -2-
into intake-air distributor.
- Connect cable plug -1-
to solenoid valve -2-
.
 Courtesy of PORSCHE CARS NORTH AMERICA, INC.
- Push engine compartment temperature sensor and rubber sleeve into bracket (only if removing intake-air distributor on cylinders 1-3). Grease rubber sleeve lightly with Optimol MP0 or silicon spray.
 Courtesy of PORSCHE CARS NORTH AMERICA, INC.
- Position rubber sleeves with screw-type hose clamps.
 Courtesy of PORSCHE CARS NORTH AMERICA, INC.
- Tighten screw-type hose clamps -arrows-
on resonance tube.
 Courtesy of PORSCHE CARS NORTH AMERICA, INC.