Mounting Engine On Transmission
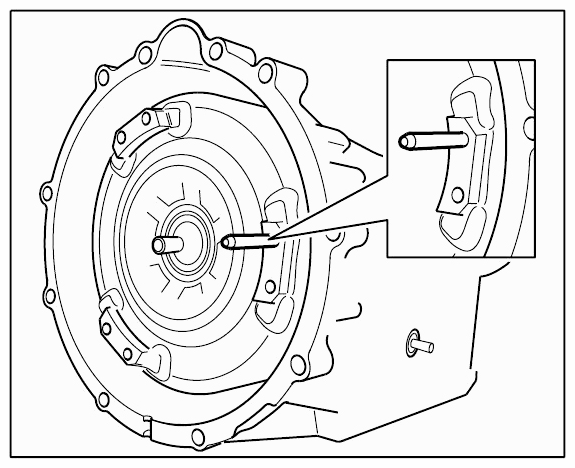
- Insert special tool centring pin 9689
into the torque converter. Roughly position the torque converter and drive plate so that the centring pin passes through a bore on the drive plate.
 Courtesy of PORSCHE CARS NORTH AMERICA, INC.
- Lift the engine with the workshop crane and move it into installation position with respect to the transmission. Put engine and transmission together. The dowel sleeves on the engine must slip perfectly into the bores on the transmission bell housing.
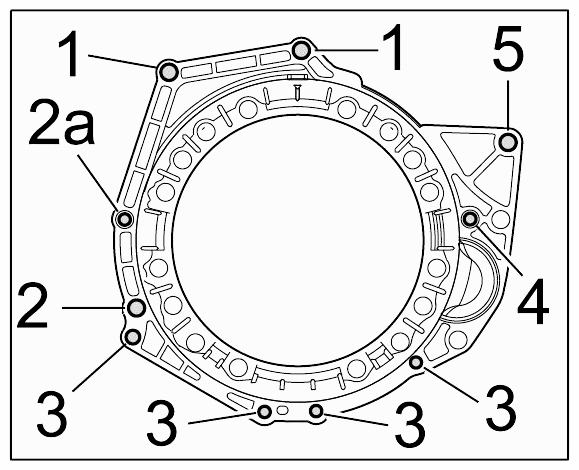
- Fit and screw in fastening screws for securing transmission to engine. This involves screwing in four screws on the engine side and six on the transmission side. For details of tightening torques, see → WM 373527 REMOVING AND MOUNTING TRANSMISSION (CAYENNE TIP, CAYENNE S TIP, CAYENNE TURBO, CAYENNE GTS TIP, CAYENNE TURBO S)
 Courtesy of PORSCHE CARS NORTH AMERICA, INC.
- Remove special tool centring pin 9689
and fit torque converter screws. For details of tightening torques, see → WM 373527 REMOVING AND MOUNTING TRANSMISSION (CAYENNE TIP, CAYENNE S TIP, CAYENNE TURBO, CAYENNE GTS TIP, CAYENNE TURBO S)
- Fit engine mountings.
- 5.1. Carefully lift on engine/transmission unit.
- 5.2. Remove wooden block under transmission.
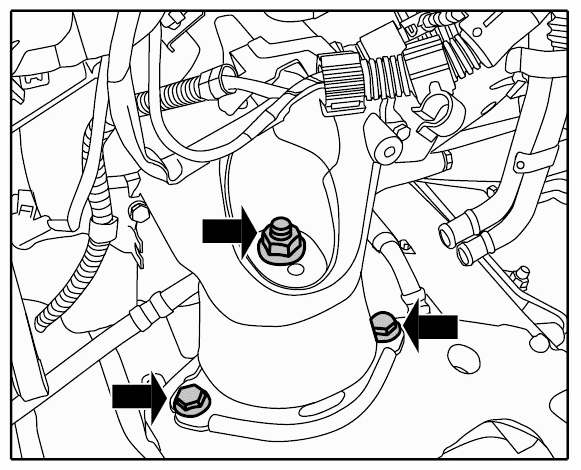
- 5.3. Fit engine mountings according to markings applied during removal. Lug on engine mountings fits into the hole on the engine support arm. Fit screws and new nuts.
 Courtesy of PORSCHE CARS NORTH AMERICA, INC.
- 5.4. Carefully lower engine/transmission unit.
- 5.5. Screw on engine mountings. → Tightening torque: 75 Nm (56 ft lbs.)
→ Tightening torque: 60 Nm (44 ft lbs.)
- Fit starter. → Installing The Starter
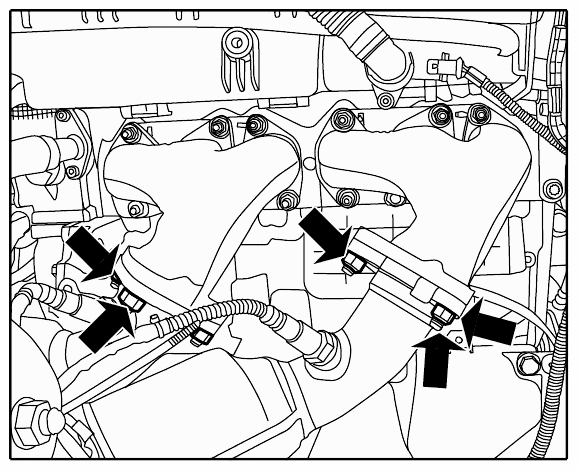
- Fit new seals and nuts on catalytic converters and move into installation position. Tighten the six nuts securing the exhaust manifolds to the catalytic converters -arrows-
. → Tightening torque: 40 Nm (30 ft lbs.)
 Courtesy of PORSCHE CARS NORTH AMERICA, INC.
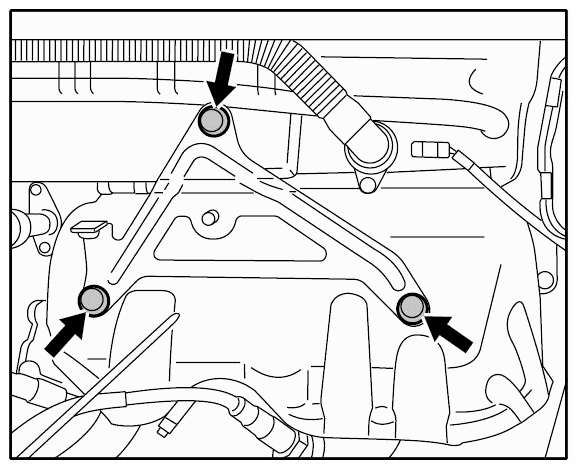
- Fit heat shield on exhaust manifold. Press heat shield into the upper sheetmetal clamps. Then fit sheetmetal holder on heat shield and on intake manifold -arrows-
. → Tightening torque: 20 Nm (15 ft lbs.)
 Courtesy of PORSCHE CARS NORTH AMERICA, INC.
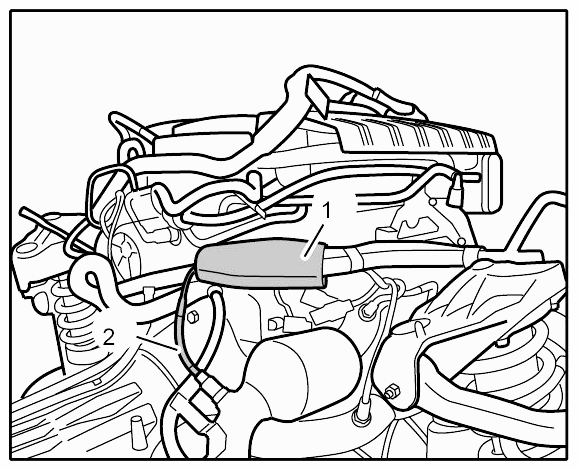
- Route oxygen sensor cable through the heat protection and close heat protection. →
 Courtesy of PORSCHE CARS NORTH AMERICA, INC.
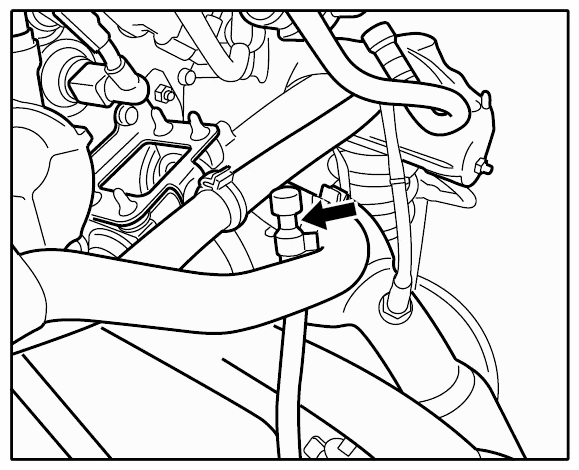
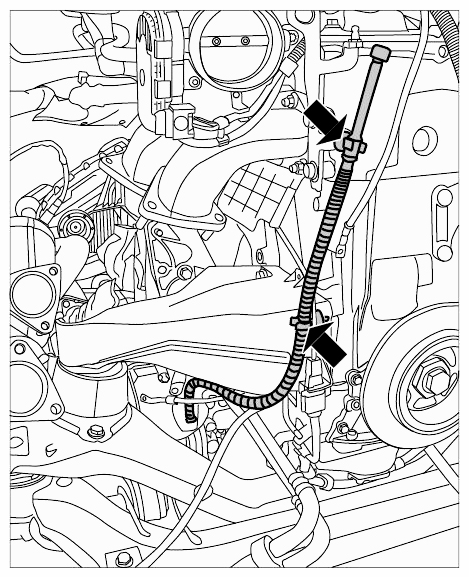
- Clip in vent line on the transmission -arrow-
. Clip in vent line on front-axle final drive at the engine. -arrows-
 Courtesy of PORSCHE CARS NORTH AMERICA, INC.
 Courtesy of PORSCHE CARS NORTH AMERICA, INC.
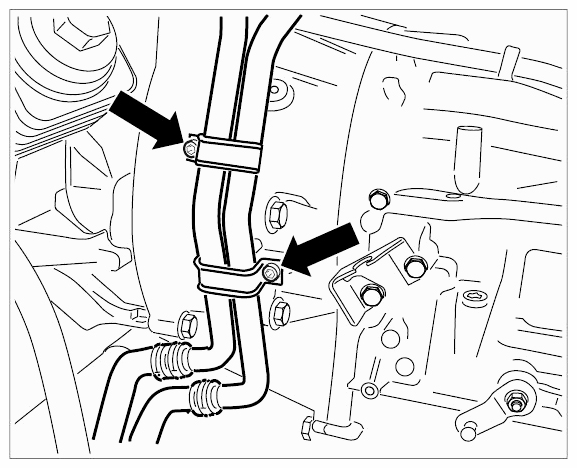
- Secure coolant pipes on the transmission (two screws). -arrows-
→ Tightening torque: 9 Nm (6.5 ft lbs.)
 Courtesy of PORSCHE CARS NORTH AMERICA, INC.
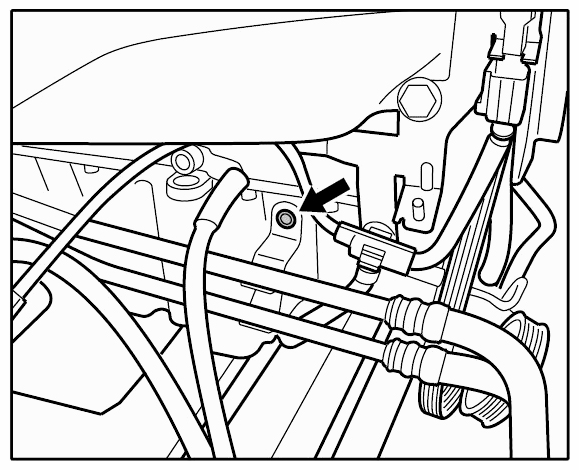
- Fit ATF line on the engine. -arrow-
→ Tightening torque: 10 Nm (7.5 ft lbs.)
 Courtesy of PORSCHE CARS NORTH AMERICA, INC.