Assembling Side Step (Skidpad)
- Press upper protective strips -1-
into the step -2-
(-arrows-
). The ends of the protective strip must be flush with the step.
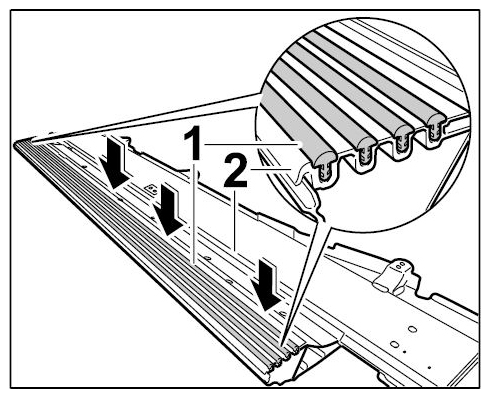 Courtesy of PORSCHE CARS NORTH AMERICA, INC.
- Install outer protective strip.
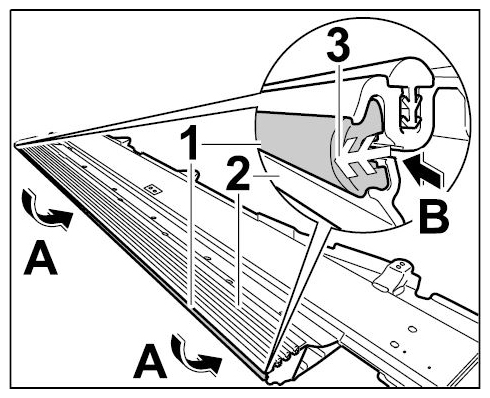 Courtesy of PORSCHE CARS NORTH AMERICA, INC.
- 2.1. Press outer protective strip -1-
into the step -2-
(-arrows A-
). The ends of the protective strip must be flush with the step.
- 2.2. Lock outer protective strip using the expanding clip -3-
(-arrow B-
).
- Install rear impact protection cover.
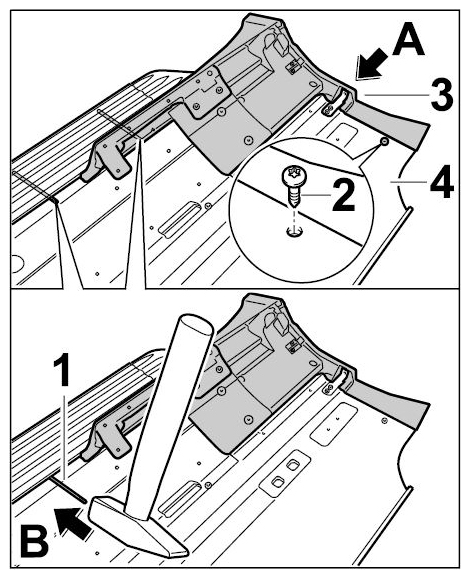 Courtesy of PORSCHE CARS NORTH AMERICA, INC.
- 3.1. Press rear impact protection cover -3-
into the step -4-
(-arrow A-
).
- 3.2. Tighten fastening screw -2-
.
- 3.3. Carefully tap in the locking pins -1-
with a hammer -arrow B-
.
- 3.4. Rivet rear impact protection cover -2-
securely using blind rivets -1-
.
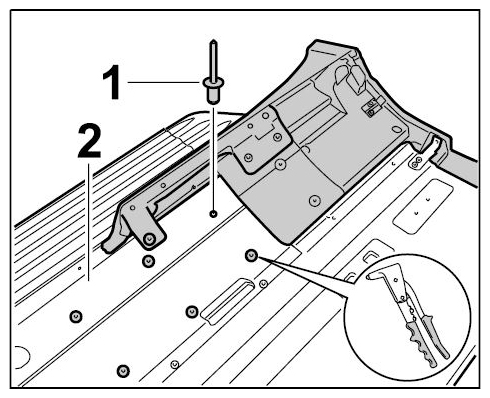 Courtesy of PORSCHE CARS NORTH AMERICA, INC.
- 3.5. Tighten fastening screws -1-
.
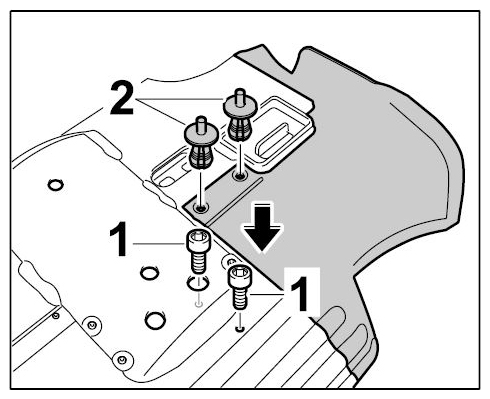 Courtesy of PORSCHE CARS NORTH AMERICA, INC.
- 3.6. Press in plastic expansion rivet -2-
(-arrow-
) and secure with a pin.
- Install front impact protection cover.
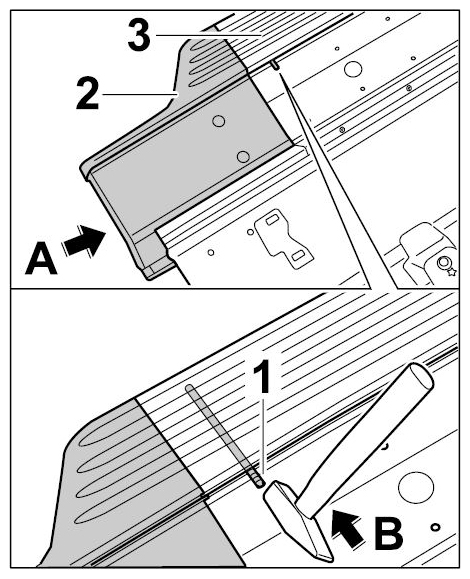 Courtesy of PORSCHE CARS NORTH AMERICA, INC.
- 4.1. Press front impact protection cover -2-
into the step -3-
(-arrow A-
).
- 4.2. Carefully tap in the locking pins -1-
with a hammer -arrow B-
.
- 4.3. Rivet front impact protection cover -2-
securely using blind rivets -1-
.
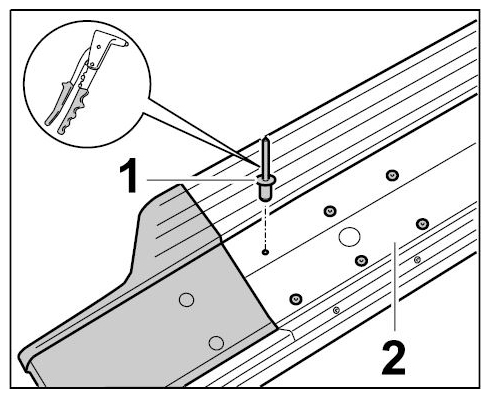 Courtesy of PORSCHE CARS NORTH AMERICA, INC.
- 4.4. Tighten fastening screws -1-
.
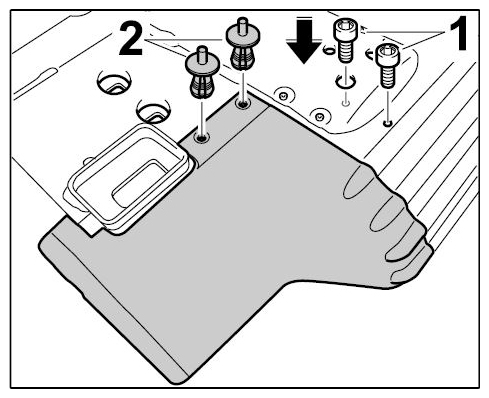 Courtesy of PORSCHE CARS NORTH AMERICA, INC.
- 4.5. Press in plastic expansion rivet -2-
(-arrow-
) and secure with a pin.
- Position seal -1-
with the bores on the locking pins and press seal into the step -2-
(-arrows-
).
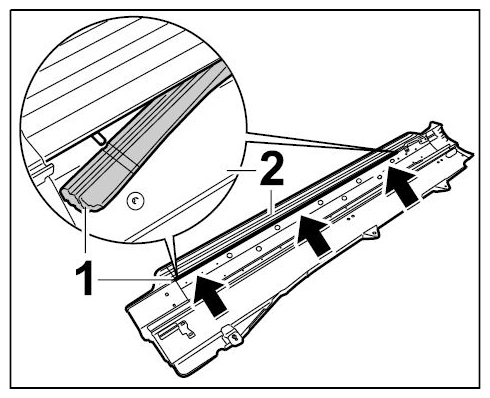 Courtesy of PORSCHE CARS NORTH AMERICA, INC.
- Press spacers -1-
into the step -2-
(-arrow-
).
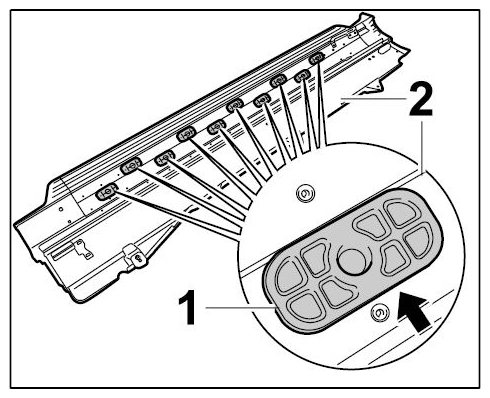 Courtesy of PORSCHE CARS NORTH AMERICA, INC.
- Press front end piece -1-
into the step -2-
(-arrow-
).
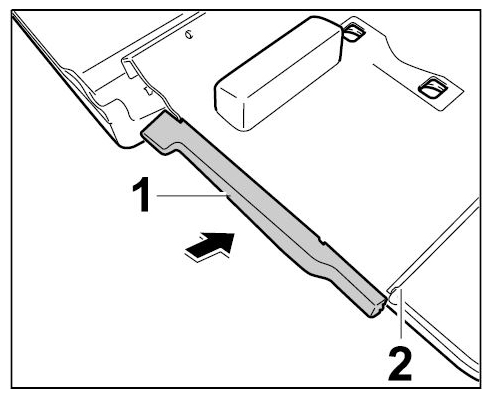 Courtesy of PORSCHE CARS NORTH AMERICA, INC.
- Press spacer insert -1-
into the step -2-
(-arrow-
).
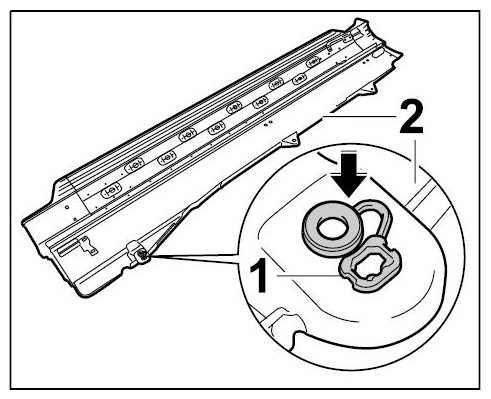 Courtesy of PORSCHE CARS NORTH AMERICA, INC.