Installing The Cover Under The Instrument Panel On The Passenger's Side
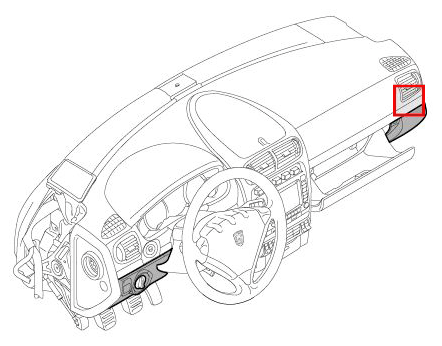 Courtesy of PORSCHE CARS NORTH AMERICA, INC.
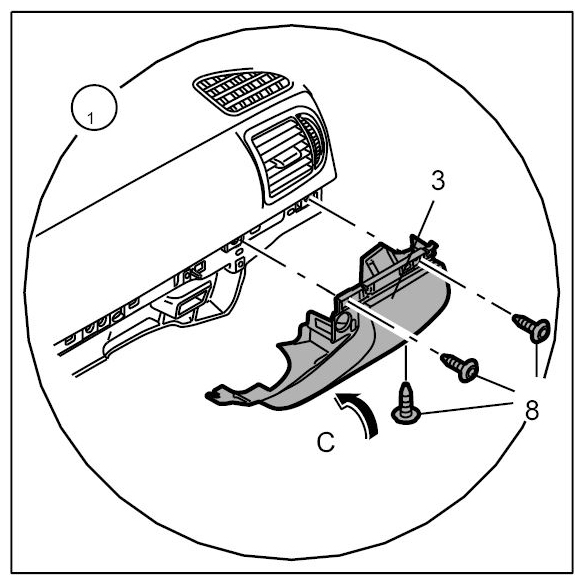
- Insert the trim under the dashboard on the passenger's side.
- 1.1. Move the trim under the dashboard on the passenger's side -3-
until the plug can be plugged in.
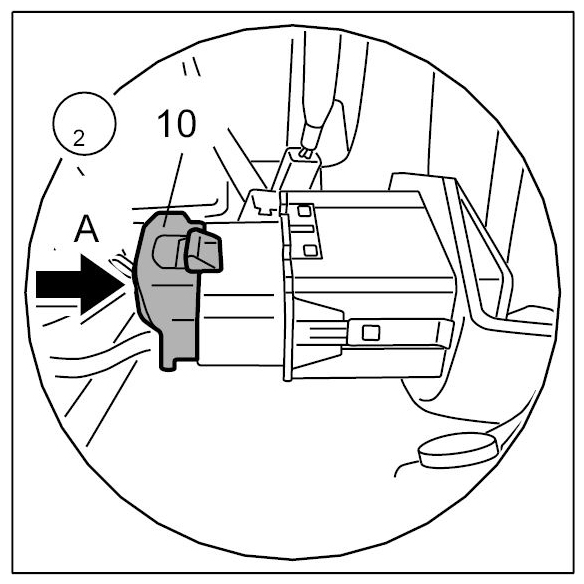
 Courtesy of PORSCHE CARS NORTH AMERICA, INC.
- Push on the plug -10-
until the locking tabs engage audibly (-arrow A-
).
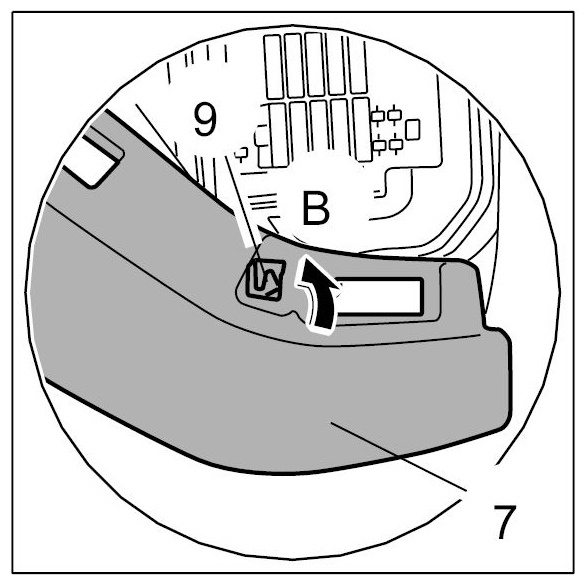
 Courtesy of PORSCHE CARS NORTH AMERICA, INC.
- Install trim under instrument panel at front passenger's side.
- 3.1. Insert trim under the dashboard on the driver's side -7-
over the guide -9-
(-arrow B-
).
 Courtesy of PORSCHE CARS NORTH AMERICA, INC.
- 3.2. Swivel the trim under the dashboard on the passenger's side -3-
upwards (-arrow C-
).
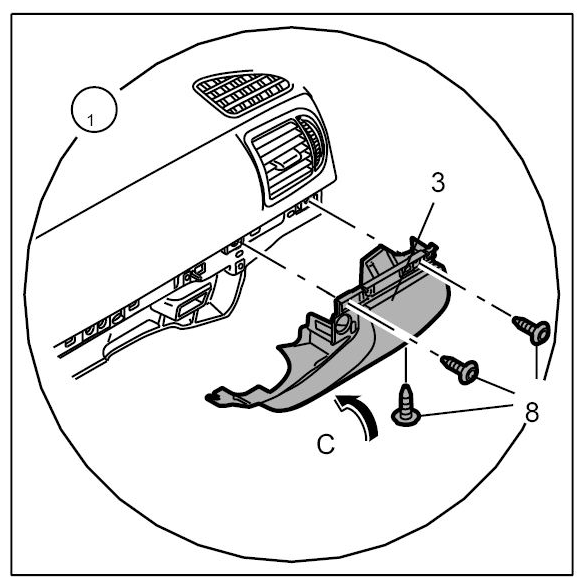 Courtesy of PORSCHE CARS NORTH AMERICA, INC.
- 3.3. Screw in -8-
fastening screws.
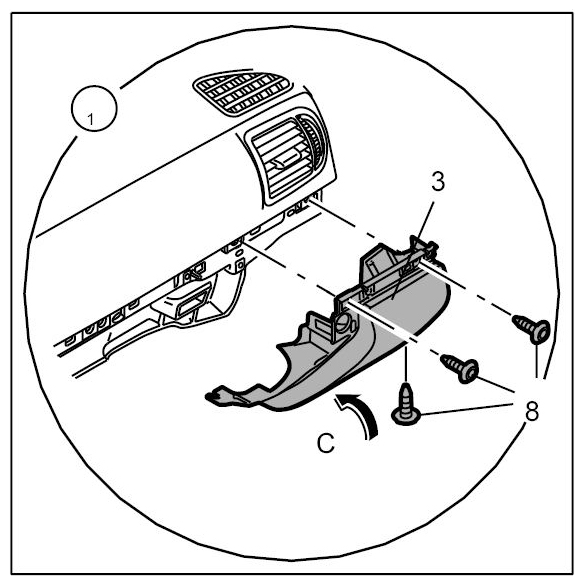 Courtesy of PORSCHE CARS NORTH AMERICA, INC.
- Install fuse box cover.
- 4.1. Insert front fuse box cover -5-
(-arrow D-
).
- 4.2. Swivel fuse box cover -5-
inward and push it in (-arrow E-
) until the retaining clips -6-
engage audibly.
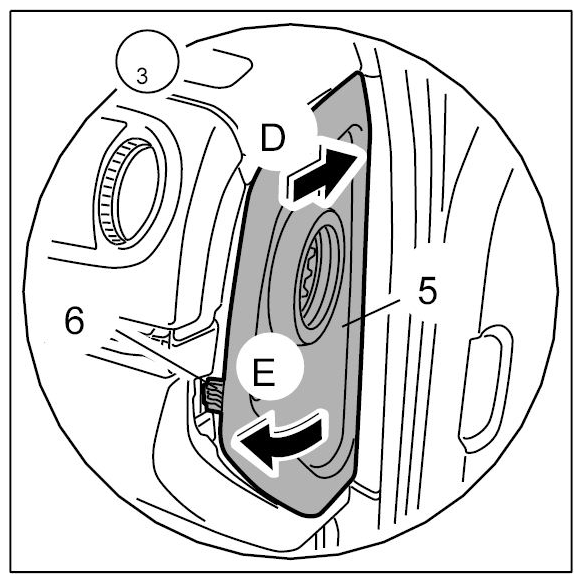 Courtesy of PORSCHE CARS NORTH AMERICA, INC.
- Secure the glove compartment.
- 5.1. Screw in fastening screws -2-
and tighten to the specified tightening torque. → Tightening torque: 1.0 ft lbs.+/- 0.15 ft lbs.
- 5.2. Open glove compartment lid -1-
.
- 5.3. Insert rubber buffer -3-
, screw in fastening screw -4-
and tighten to the specified tightening torque. → Tightening torque: 1.0 ft lbs.+/-0.15 ft lbs.
- 5.4. Close glove compartment lid -1-
.
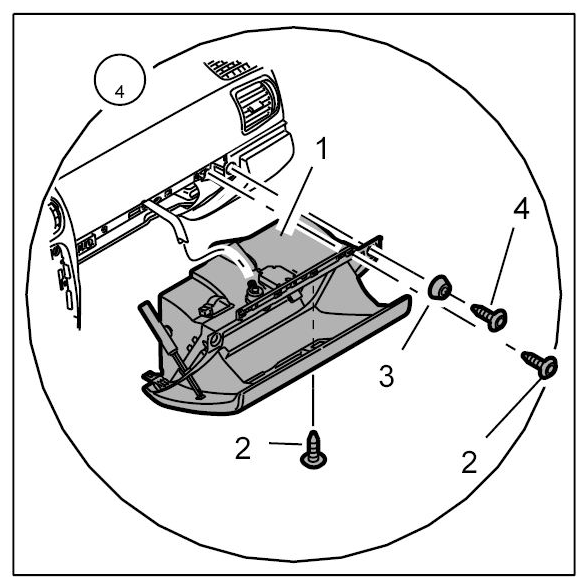 Courtesy of PORSCHE CARS NORTH AMERICA, INC.
- Install cover under dashboard on passenger's side. → Installing Cover Under Dashboard
- Install dashboard moulding on passenger's side. → Installing Trim Strips For Dashboard On The Driver's Side