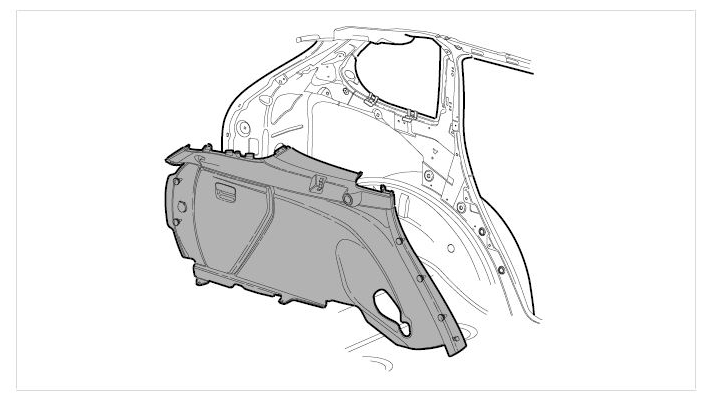
Installing Rear Luggage Compartment Side-Trim Panel
 Courtesy of PORSCHE CARS NORTH AMERICA, INC.
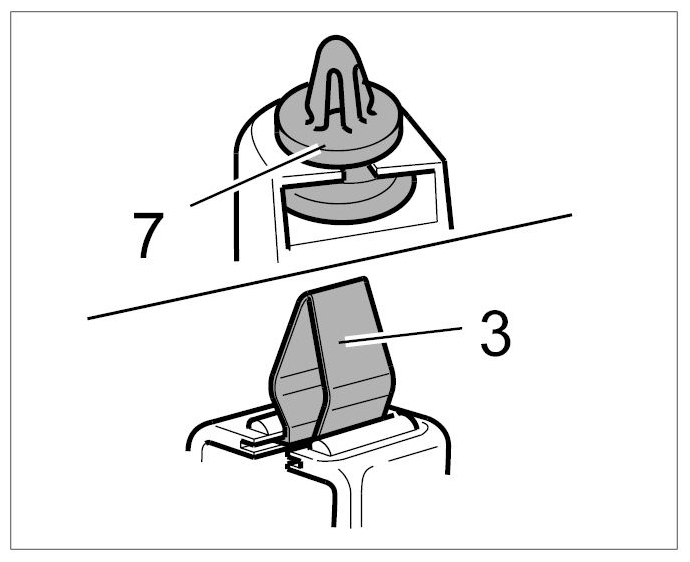
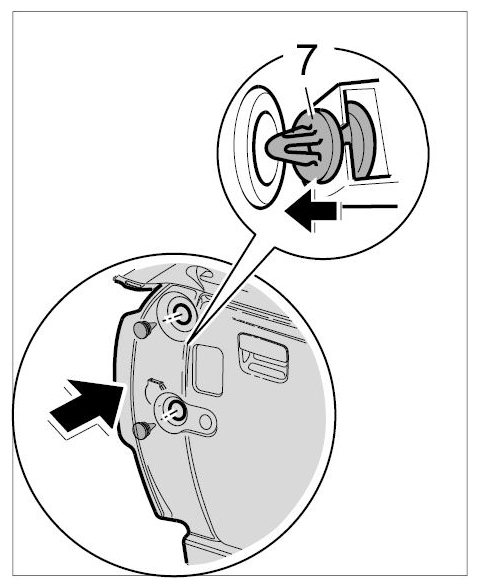
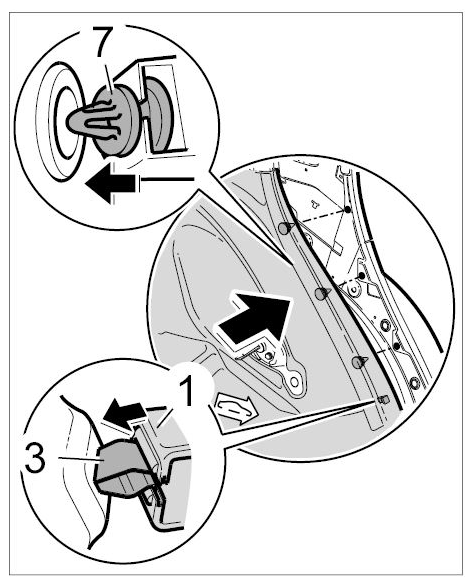
- Check fixing clips.
- 1.1. Check fixing clips -3, 7-
of side trim panel for luggage compartment for deformation and replace if necessary.
 Courtesy of PORSCHE CARS NORTH AMERICA, INC.
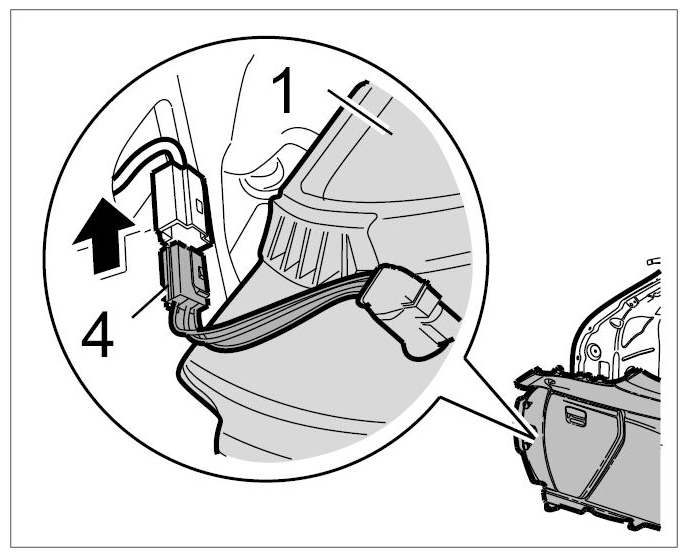
- Position side trim panel for luggage compartment.
- Connect plug connection -4-
.
 Courtesy of PORSCHE CARS NORTH AMERICA, INC.
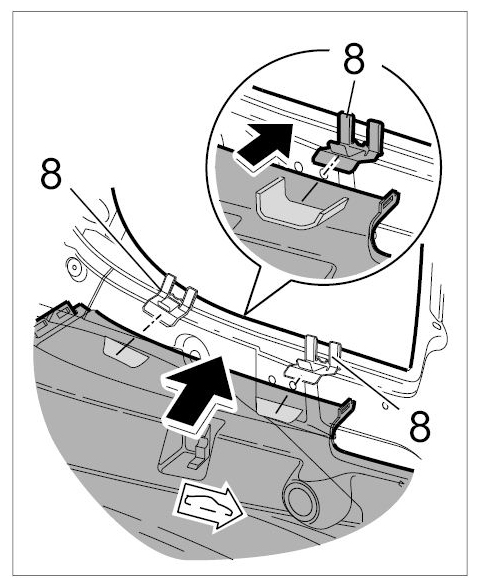
- Clip side trim panel for luggage compartment into the bodyshell at the marked areas. Make sure that the side trim panel engages in the retaining clips at the side window -8-
.
 Courtesy of PORSCHE CARS NORTH AMERICA, INC.
 Courtesy of PORSCHE CARS NORTH AMERICA, INC.
 Courtesy of PORSCHE CARS NORTH AMERICA, INC.
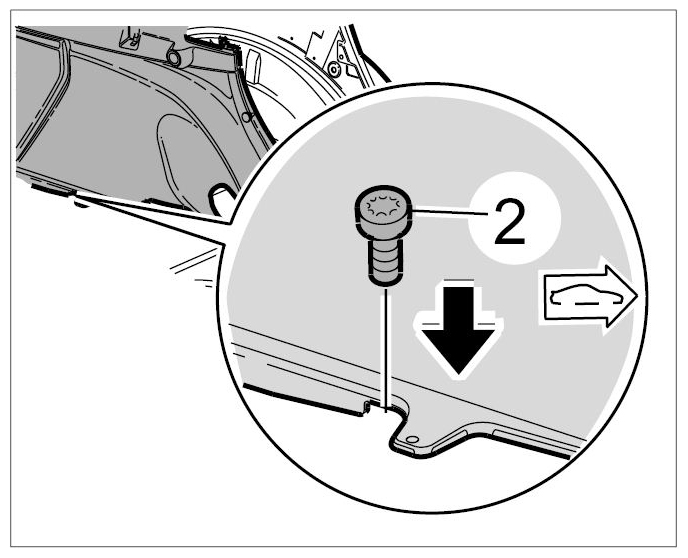
- Screw in fastening screws.
- 5.1. Screw in fastening screws -2-
and -2-
on luggage compartment floor and tighten to the specified tightening torque. → Tightening torque: 1.5 Nm (1.0 ft lbs.)+/-0.5 Nm (+/-0.5 ft lbs.)
 Courtesy of PORSCHE CARS NORTH AMERICA, INC.
 Courtesy of PORSCHE CARS NORTH AMERICA, INC.
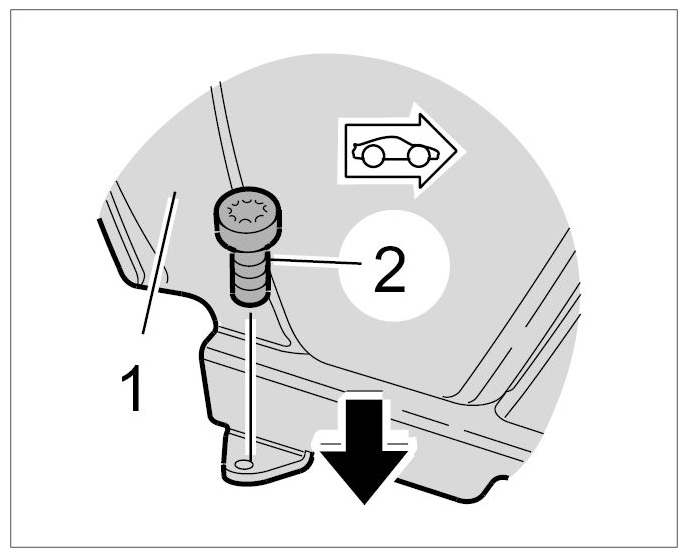
- Screw in fastening screws.
- 6.1. Screw in fastening screws -2-
at the C-pillar and tighten to the specified tightening torque. → Tightening torque: 1.5 Nm (1.0 ft lbs.)+/-0.5 Nm (+/- 0.5 ft lbs.)
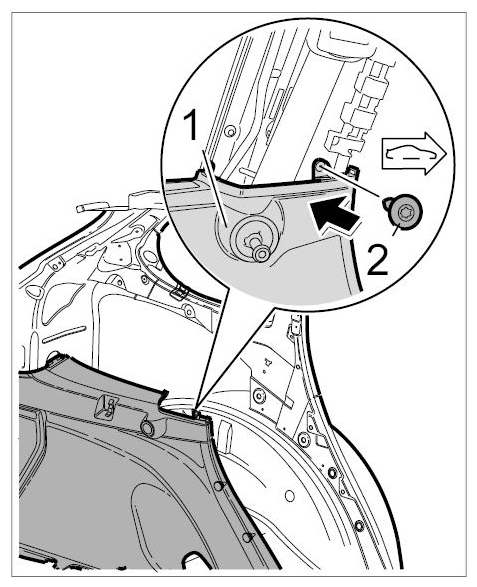 Courtesy of PORSCHE CARS NORTH AMERICA, INC.
- Screw in fastening screw.
- 7.1. Screw in fastening screws -2-
at the D-pillar and tighten to the specified tightening torque. → Tightening torque: 1.5 Nm (1.0 ft lbs.)+/-0.5 Nm (+/- 0.5 ft lbs.)
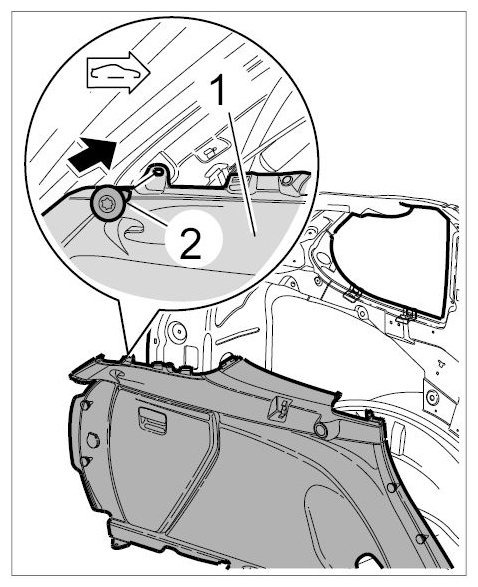 Courtesy of PORSCHE CARS NORTH AMERICA, INC.
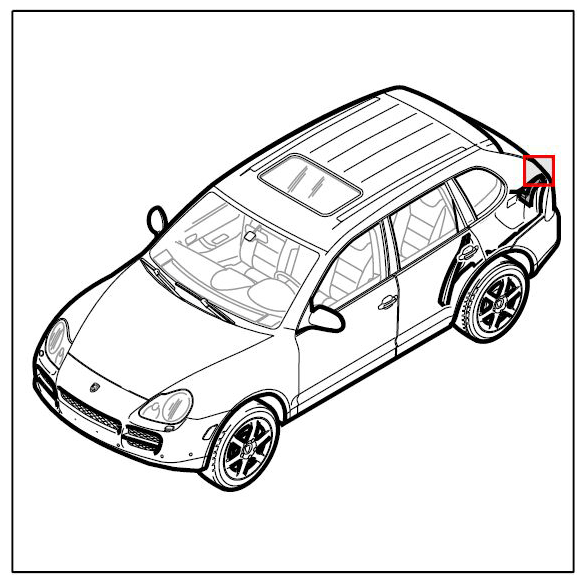 Courtesy of PORSCHE CARS NORTH AMERICA, INC.
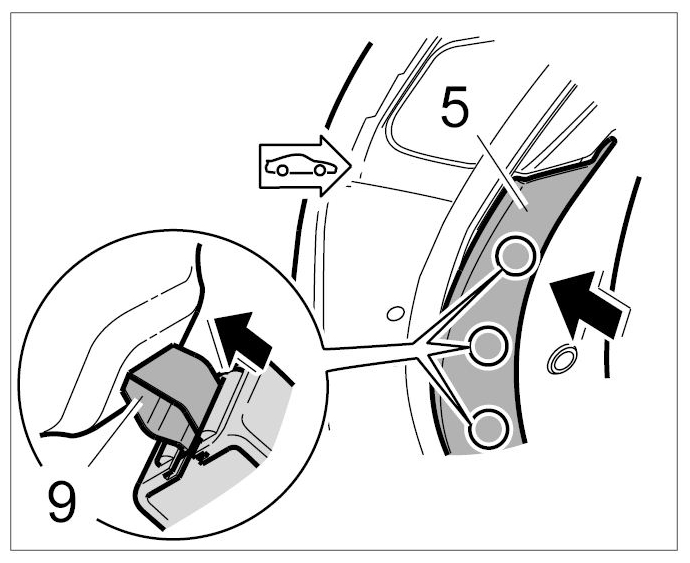
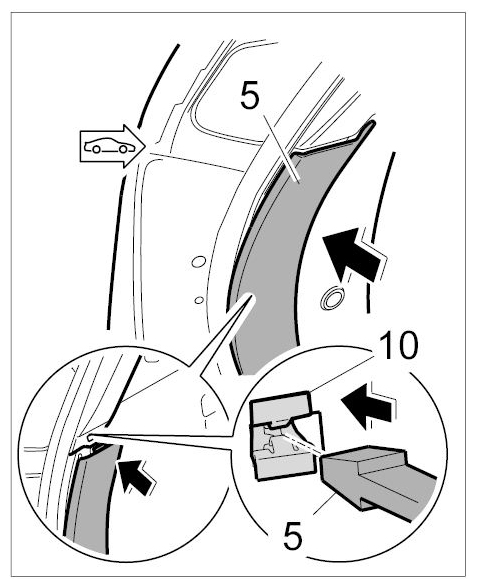
- Check fixing clips.
- 8.1. Check fixing clips -9, 10-
of the end piece for deformation and replace if necessary.
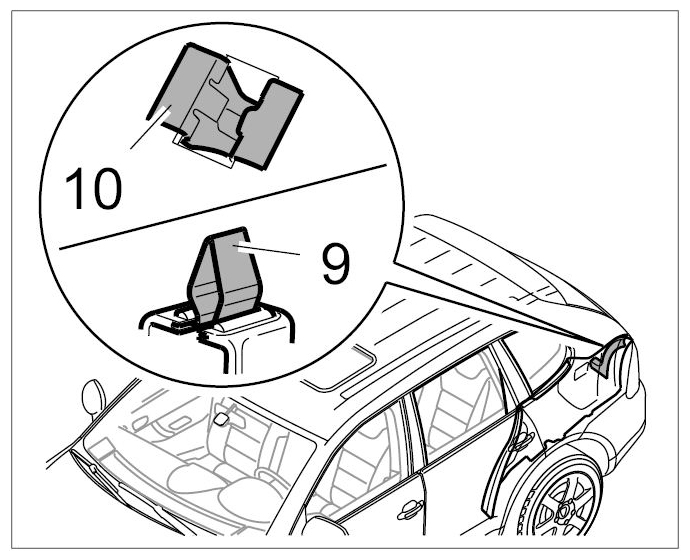 Courtesy of PORSCHE CARS NORTH AMERICA, INC.
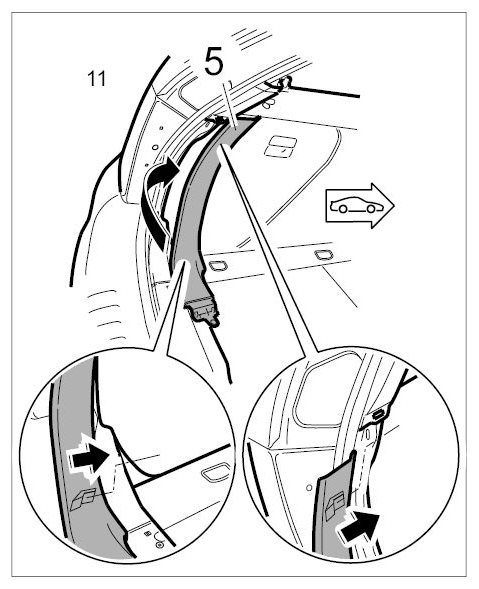
- Hook end piece -5-
in behind the side trim panel.
 Courtesy of PORSCHE CARS NORTH AMERICA, INC.
- Clip end piece -5-
into the bodyshell at the marked areas.
 Courtesy of PORSCHE CARS NORTH AMERICA, INC.
 Courtesy of PORSCHE CARS NORTH AMERICA, INC.