Clutch Master Cylinder: Service and Repair
WM 302019 Removing and installing clutch master cylinderInformation
The clutch master cylinder is removed and installed from the driver's footwell.
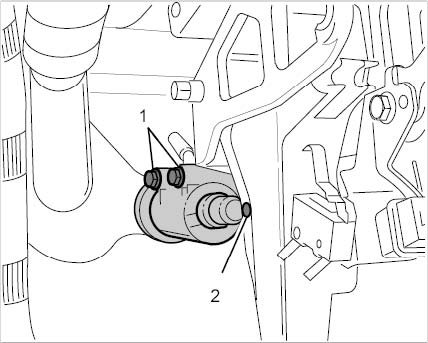
Clutch master cylinder mounting
The -lines at the clutch master cylinder- are located under the cover -A-.
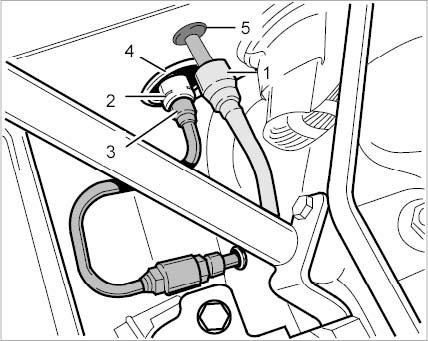
Lines at clutch master cylinder
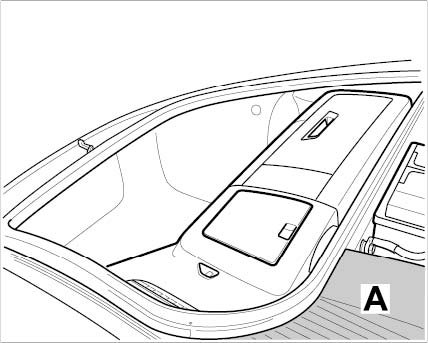
Cover over clutch lines
Preliminary work
1. Remove cover -A-.
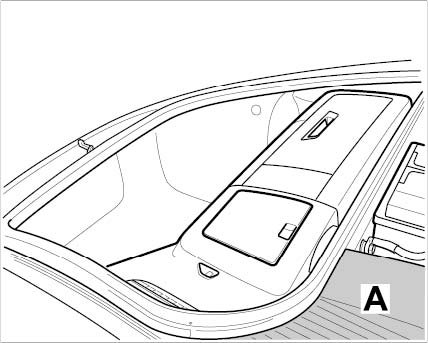
Cover over clutch lines
2. Remove (disengage) cover over the brake fluid reservoir.
3. Drain brake fluid reservoir until the brake fluid level is below the adapter (line to the clutch master cylinder).
Another option (as an alternative to draining) for removing the corresponding quantity from the shared reservoir (brake and clutch fluid reservoir) is to pump out some of the brake fluid at the front brake caliper. To do this, open a ventilation valve (use a collecting bottle) and actuate the brake pedal (pump the pedal until the fluid level in the reservoir has dropped as required). The wheel does not need to be removed for this.
4. Remove driver's seat (to facilitate assembly when removing and installing the clutch master cylinder).
Removing clutch master cylinder
1. When the brake fluid reservoir is partially drained release and disconnect the return line (from the brake fluid reservoir) -1-. Remove pressure line -3- on the clutch master cylinder -2-. Place a lint-free cloth underneath to catch any emerging residual fluid.
Seal clutch master cylinder -2- close to the pressure line connection using a suitable stopper (use stopper from new cylinder) or pump clutch master cylinder dry by actuating the clutch pedal.
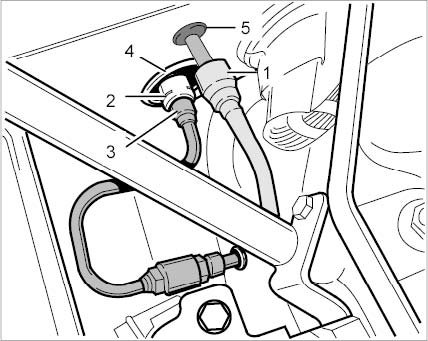
Lines at clutch master cylinder
2. Secure clutch pedal so that it remains in normal position (at the engaged limit stop). To do this:
Secure clutch power spring using a cotter pin (approx. 3.2 x 20 mm) or place a suitable object under the clutch pedal so that (when the push rod is disconnected from the clutch master cylinder) it does not shoot forward (towards the disengaged limit stop) unintentionally/uncontrollably (danger of injury).
Another option (in addition to the securing methods mentioned above) is to guide the pedal towards the disengaged limit stop with your hand (pedal fully depressed) immediately after the clutch master cylinder is removed.
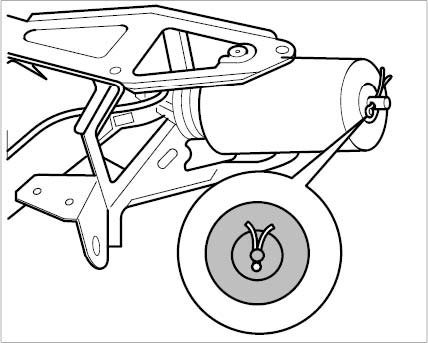
Blocked clutch power spring
3. Remove push rod at the clutch pedal -2-. Remove fastening screws -1- on clutch master cylinder. Remove the clutch master cylinder, together with the return line (remains fitted to the clutch master cylinder), by swiveling it down and pull it out.
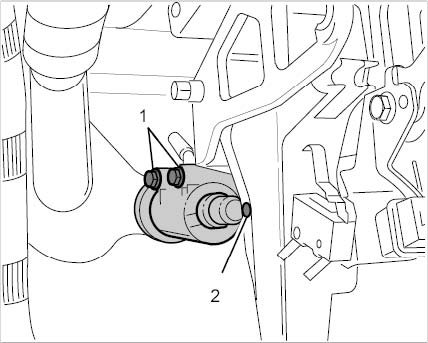
Clutch master cylinder mounting
Installing clutch master cylinder
1. Prepare clutch master cylinder -2- for installation and fit it into the vehicle (text below).
If required (in the event of replacement), fit the return line -3- to the clutch master cylinder -2-.
Check that grommet -4- is in good condition and seated correctly (on the body). Replace grommet -4- if necessary.
Fit clutch master cylinder (with return line) into the vehicle from the footwell.
During fitting, get a second person to check that the grommet -4- is seated correctly on the body and on the clutch master cylinder (and to correct the position if necessary). Then get the other person to fit the grommet for the return line -5-.
Screw in the fastening screws -1- just slightly so that the master cylinder can still be moved.
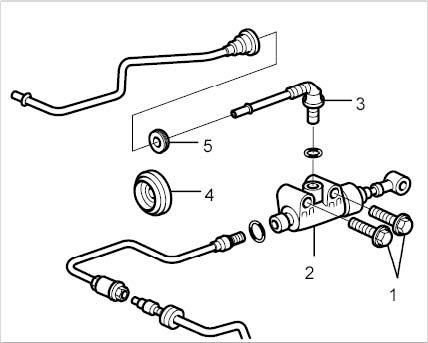
Installing clutch master cylinder
2. Fit push rod at the clutch pedal -2-.
Secure the clutch master cylinder. To do this, with the fastening screws -1- screwed in slightly (so that the master cylinder can still be moved) and the unactuated clutch pedal at the limit stop, press the clutch master cylinder in the direction of travel and at the same time tighten the fastening screws -1-.
This ensures that the return bore in the clutch master cylinder is not blocked.
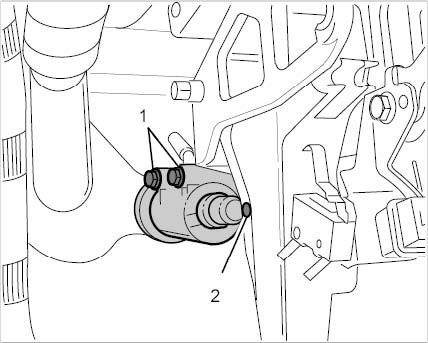
Clutch master cylinder mounting
3. Fit pressure line -3- and return line -1-.
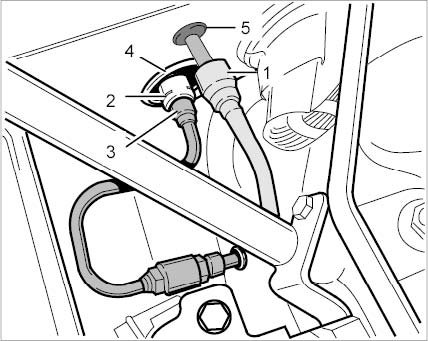
Lines at clutch master cylinder
4. If the clutch power spring was secured with a cotter pin, remove it.
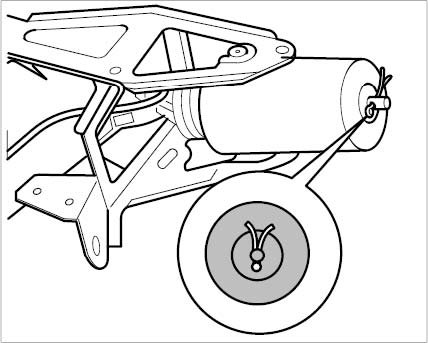
Blocked clutch power spring
Subsequent work
1. Bleed the clutch system.
In general, a minimum filling time of 90 seconds must be observed.
Only use new Super DOT 4 class brake fluid (see Parts Catalogue).
Procedure for bleeding:
1.1. Fill reservoir to its top edge with new brake fluid. Connect the bleeding device to the reservoir. --> see figure
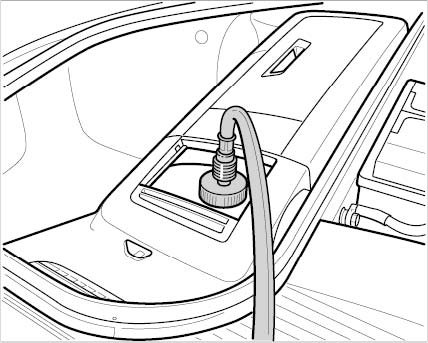
1.2. Switch on the bleeding device and set an overpressure of approx. 1.3 bar.
1.3. Open the bleeder valve -arrow- on the clutch slave cylinder.
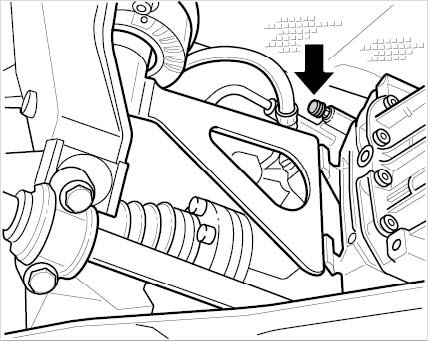
Bleeding (figure shows 5-speed transmission)
1.4. Move the pedal very slowly into the 'Pedal fully depressed' position. When doing so, guide the pedal by hand so that it does not move forward abruptly.
1.5. Allow the brake fluid to rinse through for 30 seconds.
1.6. Afterwards, activate complete pedal travel with your hand very slowly for a further 60 seconds. After about 10 to 15 pedal strokes, leave the pedal in its normal position. Once this filling period has elapsed, check that no more bubbles appear at the bleeder valve (use a collecting bottle with a transparent hose). Then close the bleeder valve.
1.7. Switch off and disconnect the bleeding device. Check the brake fluid level. It should not be above the MAX. marking on the brake fluid reservoir.
1.8. Actuate the clutch pedal slowly five times.
2. Fit cover over the brake fluid reservoir and install cover -A-.
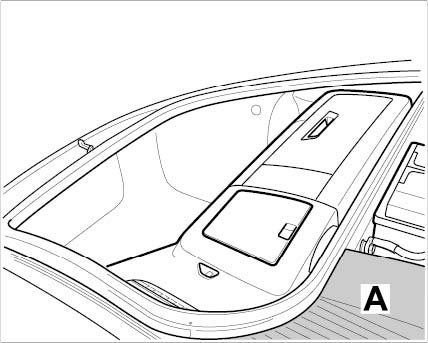
Cover over brake push rod
3. Install driver's seat.