Procedures
Preliminary work for crankshaft sealing ring on flywheel sideManual transmission:
1. Remove manual transmission.
2. Remove clutch.
3. Remove double-mass flywheel.
Tiptronic:
4. Remove automatic transmission.
5. Remove drive plate for converter.
Removing crankshaft sealing ring on flywheel side
Note: The serial spindle sealing ring is pressed 11 mm in, measured from the end of the flange. The new sealing ring is pressed 13 mm in using the special tool insertion tool 9699 in order to generate a new running track.
Note: Perform a visual inspection of the crankshaft flange and crankcase bore for damage.
ATTENTION: Particles of dirt can damage the engine.
^ When working on the engine, absolute cleanliness is essential.
1. Carefully remove small edges or burrs on the chamfer of the crankshaft flange with an oilstone. Then, carefully remove metal filings and any dirt remaining on the crankshaft journal and crankcase bore (using a clean, lint-free cloth that has been soaked in solvent naphtha or acetone).
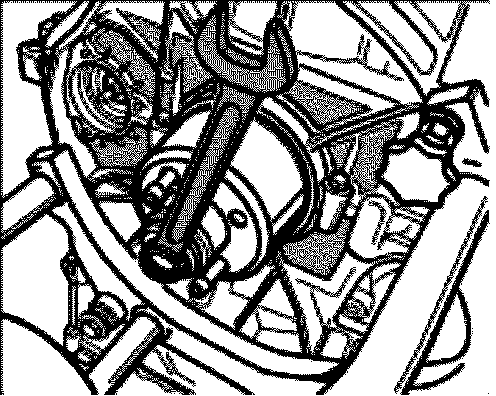
2. Press the old crankshaft sealing ring in further with the insertion tool 9699 in the same way as you would install a new sealing ring.
ATTENTION: The crankshaft flange can be damaged if not cleaned correctly.
^ Leaks
^ Never use an abrasive or polishing cloth or brushes with metal bristles.
^ Follow cleaning instructions.
3. If there are corroded spots on the crankshaft flange, clean them off using a metal-polishing pad (e.g. Nevr Dull, available in car and motor bike accessory stores). Then, carefully rub off the flange (using a clean, lint-free cloth that has been soaked in solvent naphtha or acetone).
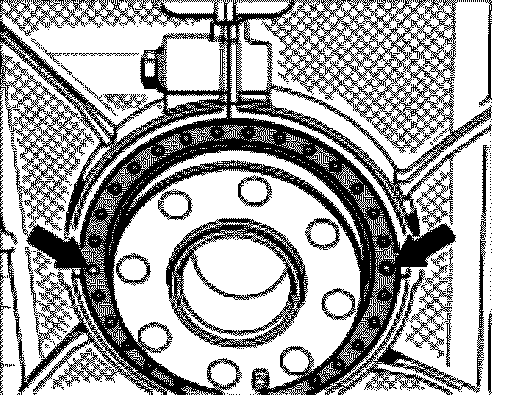
4. Carefully drill two bores (offset by 180°) on the crankshaft sealing ring at the front using a greased 3-mm drill bit -arrows-.
5. Screw two sheet metal screws (5 x 20) with washer approximately 5 mm into the bore.
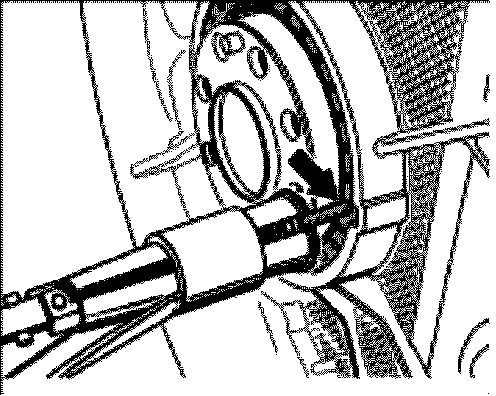
6. Pull out the sealing ring evenly at the sheet metal screws using the puller 9237.
7. If necessary, clean the crankshaft flange again using the metal-polishing pad. Then, carefully degrease the flange and crankcase bore using a clean, lint-free cloth that has been soaked in solvent naphtha or acetone. Leave this to dry off.
8. Check crankshaft flange and crankcase bore for damage.
Installing crankshaft sealing ring on wheel side
ATTENTION: Sharp tool edges and burrs
^ Damage to sealing lip
^ Check tools carefully for burred spots and sharp edges
1. Small burred spots or damaged areas on the tools can be eliminated with a nail file, then pull off with a fine abrasive or polishing cloth. Remove residual dirt on the tools, e.g. using solvent naphtha or acetone.
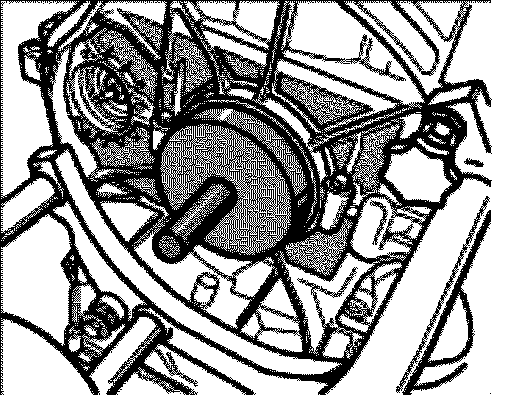
2. Check crankshaft installation position. To do this, insert special tool measuring mandrel 9699/1 across the crankshaft flange into the fitting bore of the crankcase -Figure-. The measuring mandrel must be placed with slight resistance in the bore. If the measuring mandrel cannot be positioned, the engine must be replaced.
ATTENTION: Grease on sealing ring can cause material damage
^ Damage to micro-sealing lip
^ Do not oil or grease the crankshaft sealing ring
^ Only coat the crankshaft housing bore with new engine oil
3. Coat the crankshaft case bore with new engine oil and slide the new crankshaft sealing ring over the crankshaft flange.
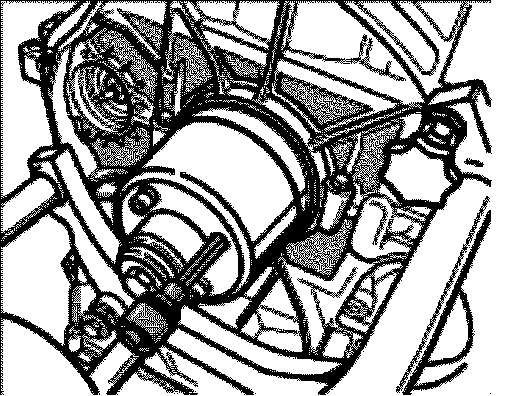
4. Fit insertion tool 9699 between the two internal M8 pan-head screws, (hexagon socket a/f 8) -with hexagon socket wrench insert- on the crankshaft flange and fasten it. The crankshaft flange's dowel pin must sit in the bore of the device.
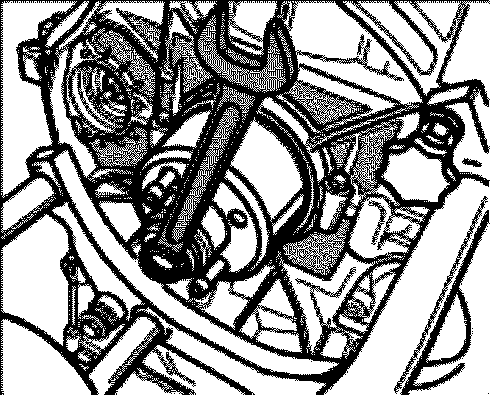
5. To position the crankshaft sealing ring correctly on the crankshaft flange, turn an open-end/ring wrench in a clockwise direction as far as it will go on the hexagon (a/f 19) of the device -Figure-. Then, remove the tool.
6. Check that the sealing ring is seated correctly. To do this, measure at four points, offset by 90°, from the flywheel attachment surface on the crankshaft flange to the sealing ring (outer radius). Dimension 13 mm
Subsequent work for crankshaft sealing ring on wheel side
Manual transmission:
1. Install double-mass flywheel.
2. Install clutch.
3. Install manual transmission.
Tiptronic:
4. Install drive plate for converter.
5. Install automatic transmission.