Removing and Installing the Rear Retaining Strip
Removing And Installing The Rear Retaining Strip
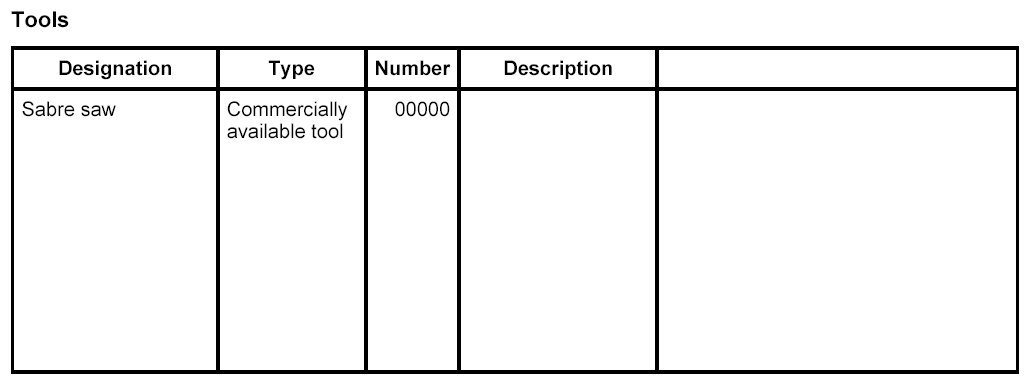
Tools
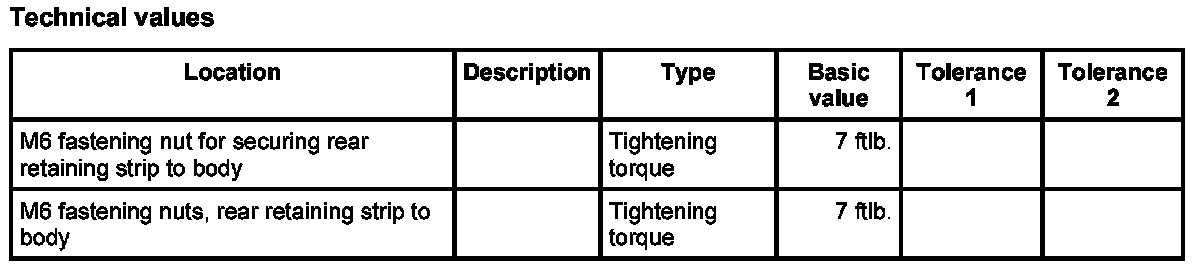
Technical values
Preliminary work
Remove rear apron. Refer to Removing and installing rear apron
Tools and materials
Producing assembly fixture
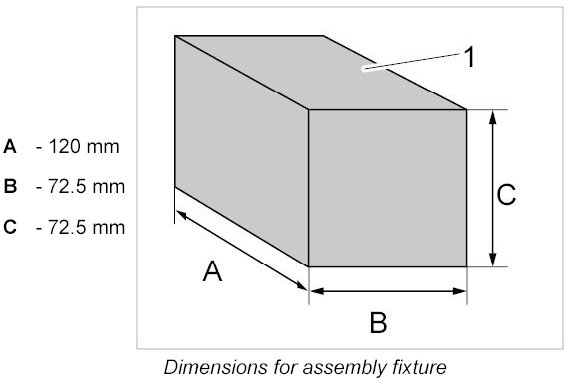
INFORMATION: The following assembly fixtures must be produced for assembly work on the rear retaining strip.
1. The following tools and materials are required for producing the assembly fixtures:
1.1. Sabre saw 00000
1.2. Measuring tape 00000
1.3. Commercially available hardwood block 00000
2. Make hardwood block for assembly fixtures -1- with the corresponding stated dimensions.
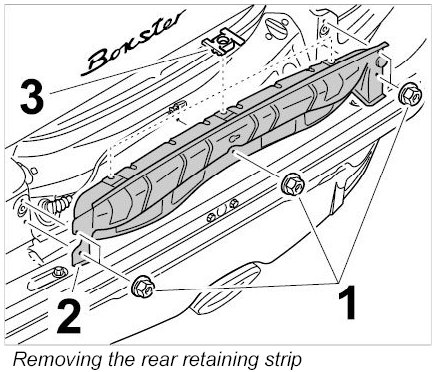
Removing the rear retaining strip
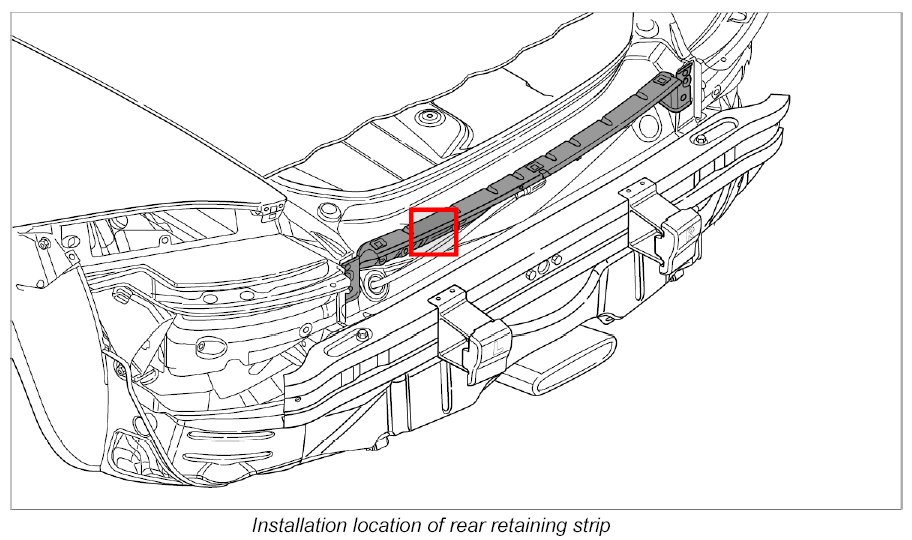
1. Unclipping wiring harness for rear apron
2. Unscrew fastening nuts -1- and take off rear retaining strip -2-. Check sheetmetal nuts -3-, replace if necessary.
Installing the rear retaining strip
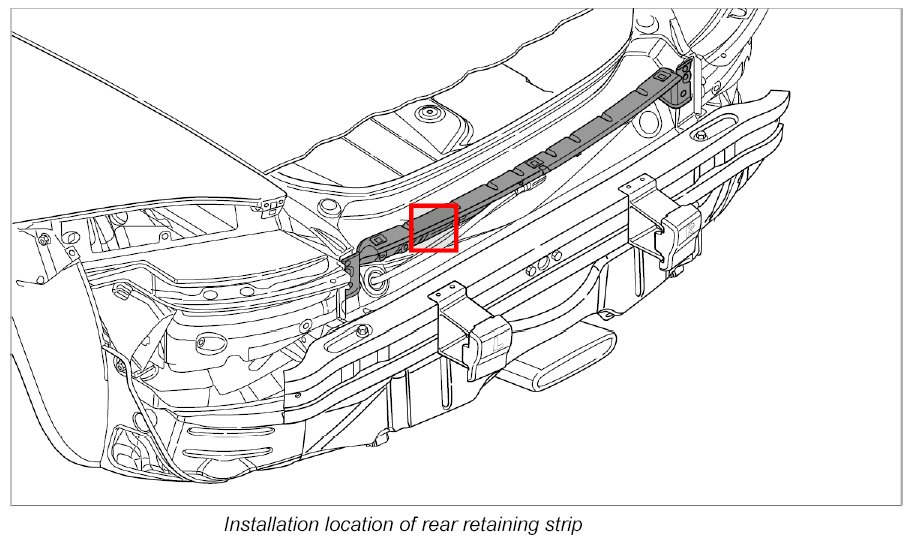
1. Position rear retaining strip -2- with fastening nut attached -3-.
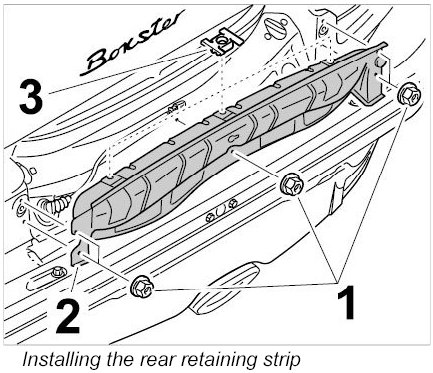
2. Position fastening nuts -1- carefully.
3. Adjust the rear retaining strip. Refer to Removing and installing rear retaining strip
4. Tighten fastening nuts -1-. Tightening torque: 7 ftlb.
5. Clip in wiring harness for rear apron.
Additional assembly instructions for installing rear retaining strip
Function dimensions for rear retaining strip
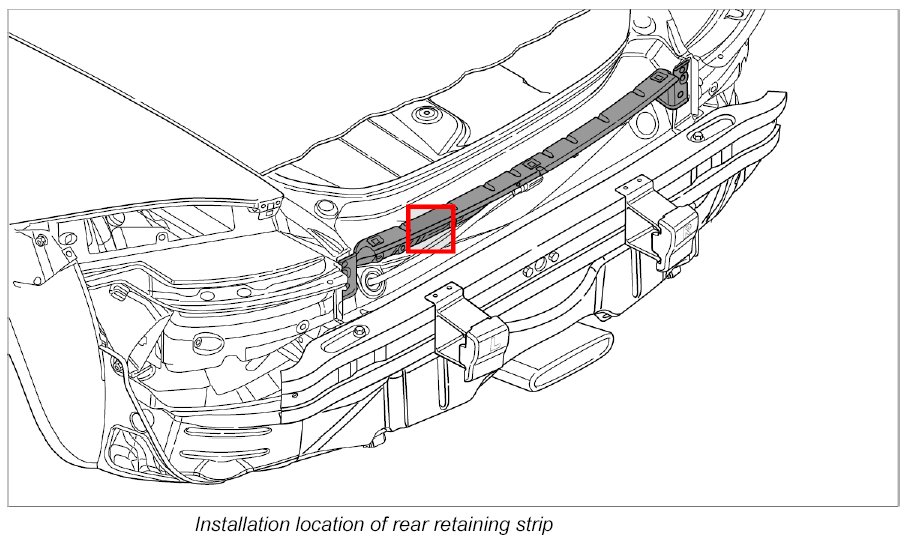
INFORMATION: However, the precondition for precise positioning of the retaining strip is that the rear lid is optimally adjusted and correctly locked in the lock in accordance with the joining plan and the functional dimensions, before the rear retaining strip is assembled.
1. Check the function dimensions for the rear lid, and correct if necessary. Refer to Adjusting the rear lid
2. Move in assembly fixtures -1- at the measuring point -A = 276 mm- between the retaining strip -2- and rear lid -3-.
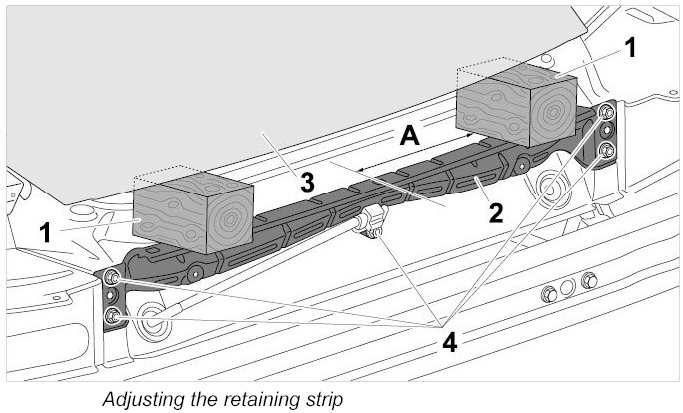
INFORMATION: Ensure that the distance from the retaining strip to the side panel is uniform on the right and the left.
3. Push retaining strip -2- upwards and screw down the two fastening nuts -4-. Tightening torque: 7 ftlb.
Subsequent work
Install rear apron. Refer to Removing and installing rear apron