Removing and Installing Rear Apron (I-No. XAL)
Removing And Installing Rear Apron (I-No. XAL)
Technical values

General warning notes
General warning notes for rear apron, Refer to safety instructions
Preliminary work
1. Remove tail light on right and left. Refer to Removing and installing tail light
2. Remove rear spoiler. Refer to Removing and installing rear spoiler (I-no. XAL)
3. Push rear spoiler in and down.
Removing rear apron
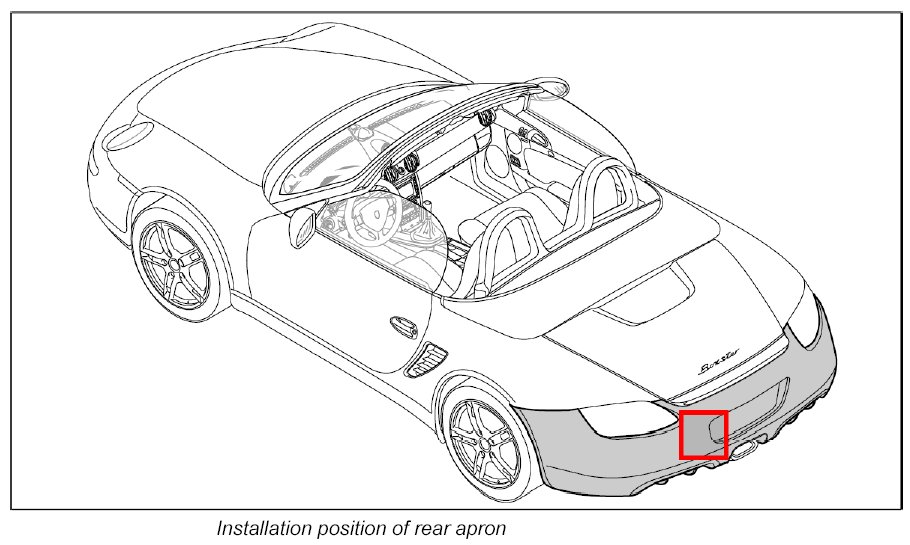
1. Unscrew fastening screws -1- at the sides of the rear apron -2-.
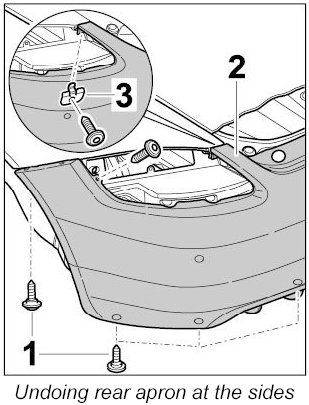
2. Remove retainer plate -3-.
INFORMATION: Two persons are needed to disengage and engage the rear apron.
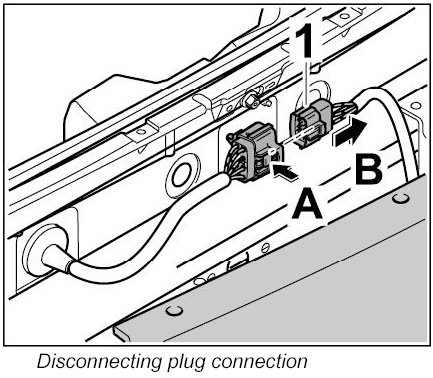
3. Unclip rear apron at the sides and carefully pull it to the rear until the plug connection -1- can be reached.
4. Press locking lug on plug connection -1- ( -arrow A- ) and disconnect it -arrow B-.
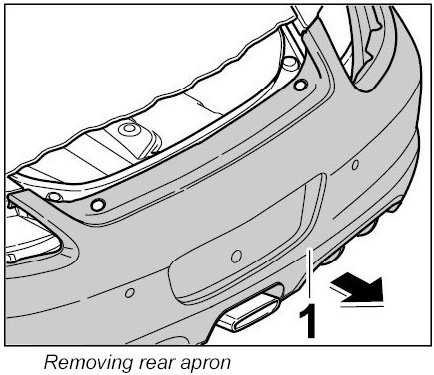
5. Remove rear apron -1- ( -arrow- ).
Installing rear apron
Safety instructions for the heat shield
CAUTION: Assembly of deformed heat shields.
- Damage will be caused through heat build up if deformed heat shields are installed.
- Check heat shields for deformation, fixing of the aluminium braided cord, tears and missing or damaged fixing tabs.
- Damaged or distorted heat shields must be straightened or replaced.
Installing rear apron
1. Before installing the rear apron, the following steps must be carried out:
1.1. Check heat shields on the vehicle and replace them if necessary. Refer to Removing and installing rear bumper
1.2. Check position of rear lid and re-adjust it if necessary. Refer to Adjusting rear lid
1.3. Check position of rear retaining strip and re-adjust it if necessary. Refer to Removing and installing rear retaining strip
1.4. Check mounting points (fastening nuts) for rear apron and replace them if necessary.
INFORMATION: Two persons are needed to disengage and engage the rear apron.
2. Position rear apron on the vehicle until the plug connection -1- can be connected -arrow-.
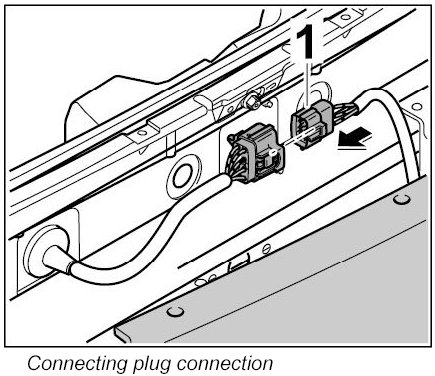
INFORMATION: Insert rear apron right and left into rail.
3. Position rear apron -1- fully on the vehicle -arrow-.
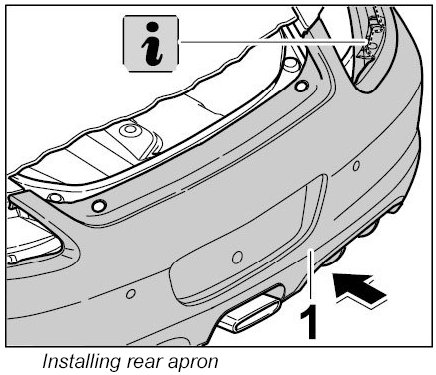
4. Engage retainer plate -3- in the square opening.
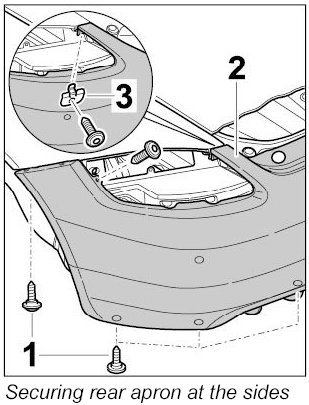
5. Screw in fastening screws -1- at the top and bottom of the rear apron -2-. Tightening torque: 2.8 Nm (2 ftlb.) ± 20 %
Dimensions of tailpipes
Gap dimensions of tailpipe
1. Check gap dimensions of tailpipe -1- with respect to the rear apron -2-, and adjust the tailpipe if necessary.
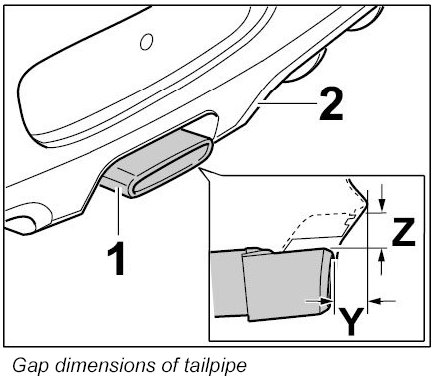
Projection from rear spoiler: -Y = 26.2 ± 2 mm-.
Distance from rear apron: -Z = 27 mm-.
Centre distance at the sides evenly to the left and right.
Subsequent work
1. After fitting the rear apron, check that the heat shields are fitted correctly, and adjust them if necessary. Refer to Removing and installing rear bumper
2. Check rear gap dimensions and make adjustments if necessary. Refer to Diagram - body gap dimensions
3. Install rear spoiler. Refer to Removing and installing rear spoiler (I-no. XAL)
4. Install tail light on right and left. Refer to Removing and installing tail light