Rear Compartment Lid Emblem/Nameplate Replacement (PLATINUM)
WARNING: This page is about a different car, the 2009 Cadillac DTS. However, it is still accessible from the selected car via links, so may be relevant.
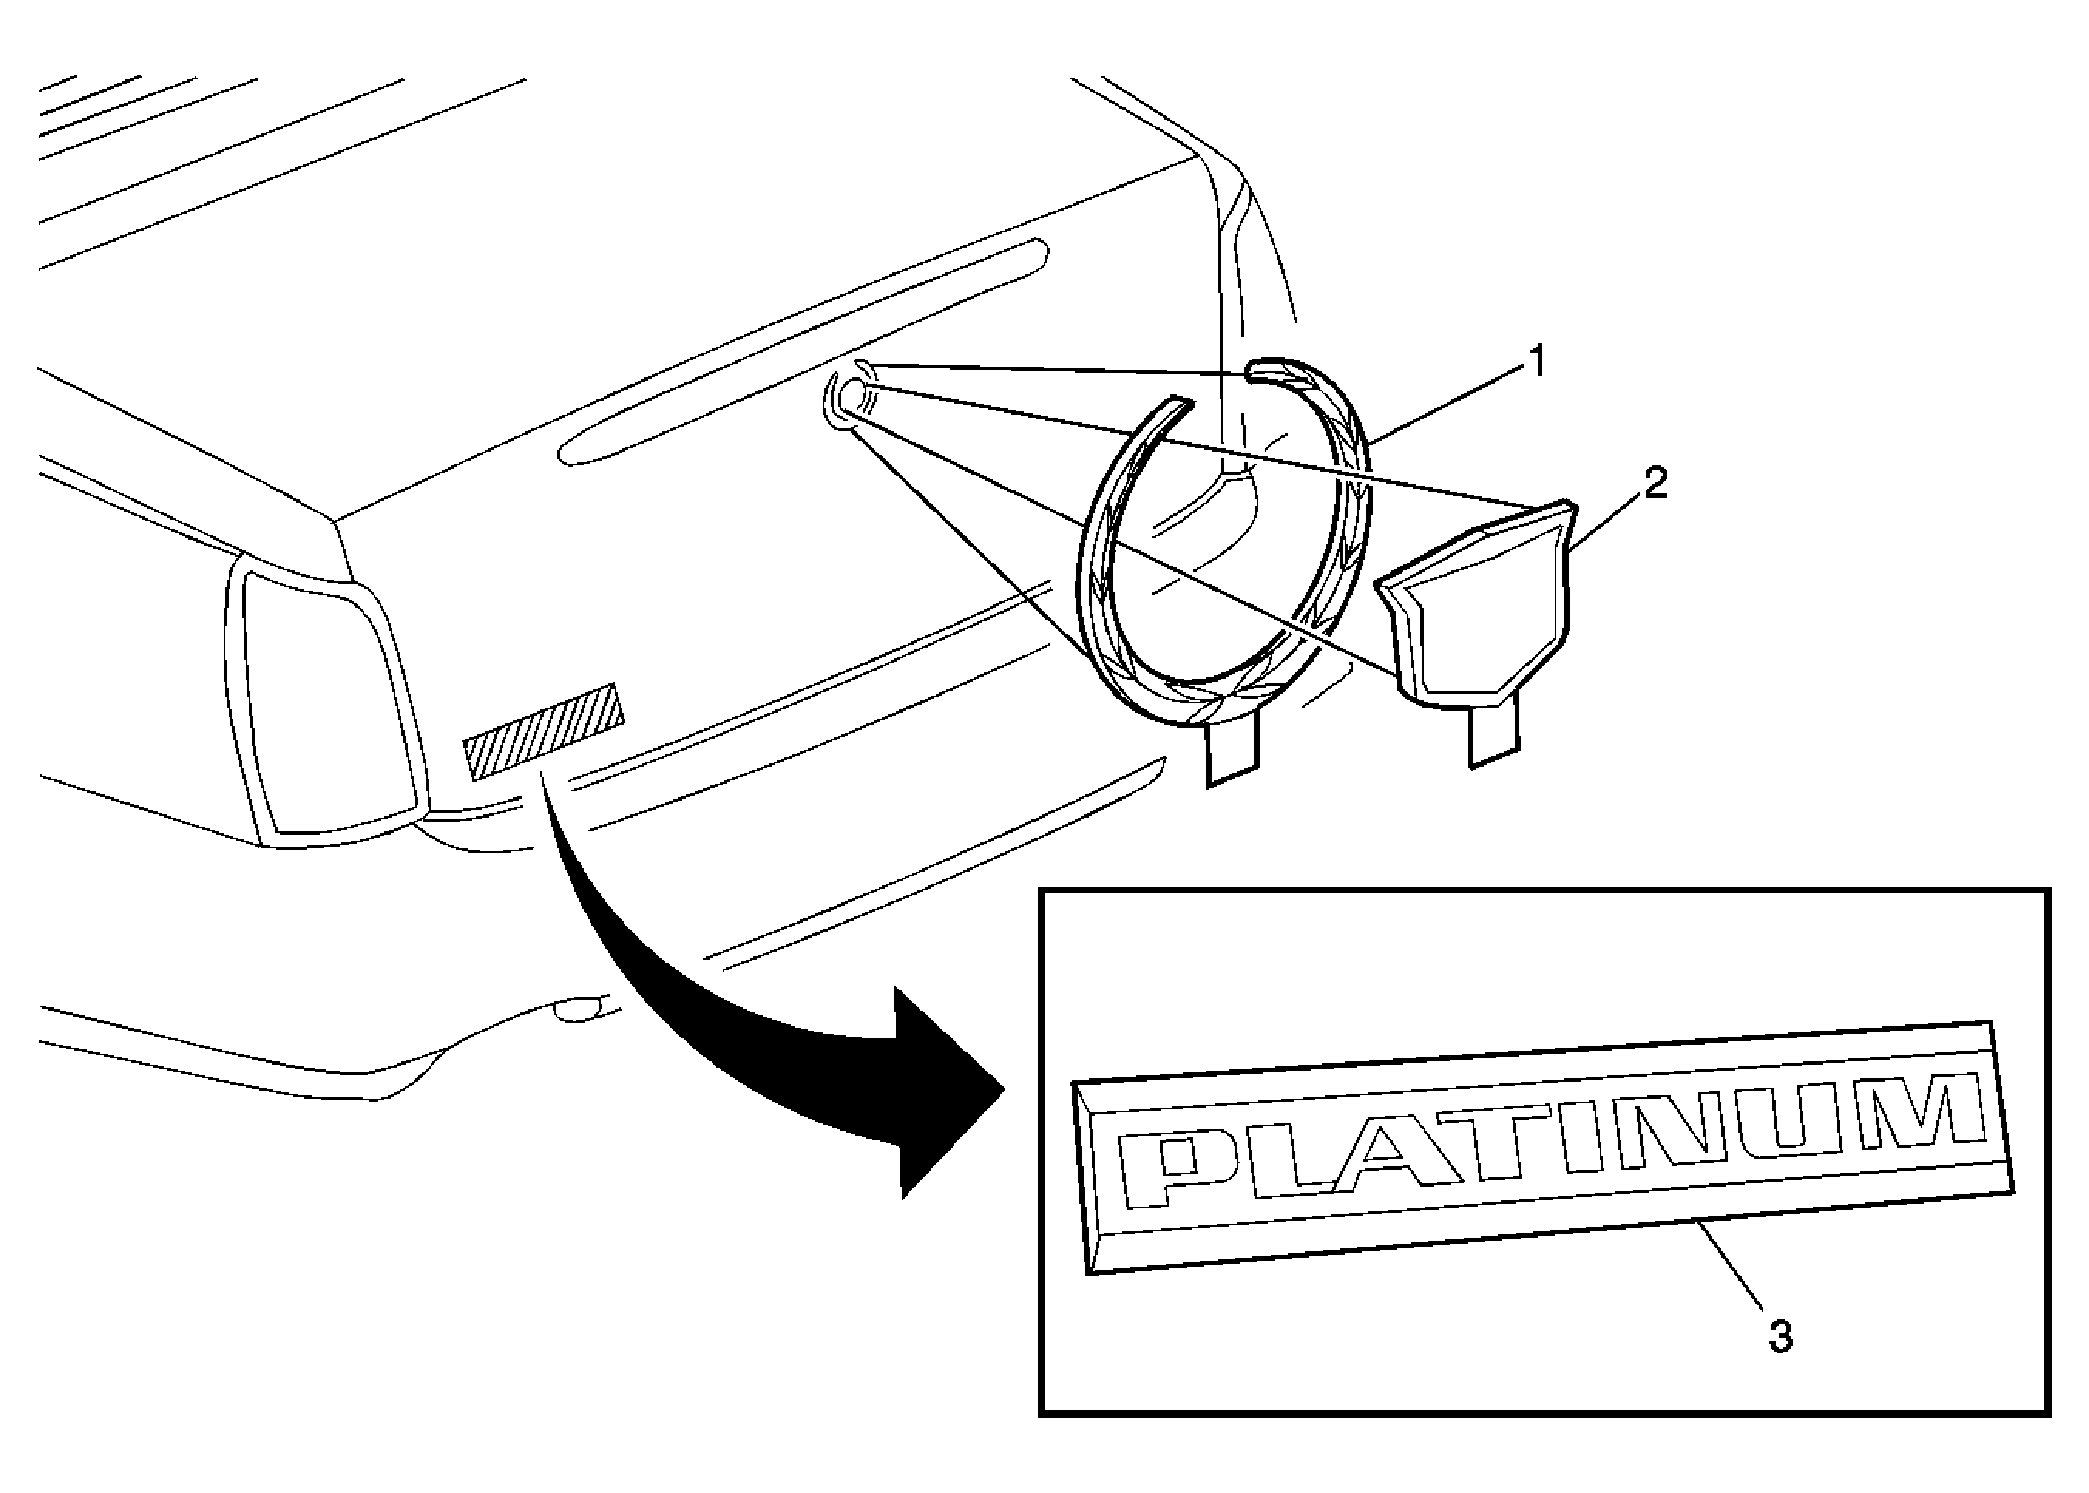 Courtesy of GENERAL MOTORS CORP.
| Callout |
Component Name |
| 1 |
Rear Compartment Lid Emblem (Wreath) Procedure
- When removing protective liners from adhesive tape, be careful not to touch tape with hands and do not allow tape to come in contact with dirt or any foreign matter prior to adhesion.
- Use a J 25070
or equivalent to remove the old emblem/nameplate. Clean all adhesive from rear compartment lid, wipe surface dry with a clean lint-free towel prior to installing the new emblem/nameplate.
- Apply the new emblem/nameplate with the rear compartment lid in the closed position.
- Apply pressure to the emblem/nameplate to ensure full adhesion is made to the compartment lid.
|
| 2 |
Rear Compartment Lid Emblem (Crest) Procedure
- When removing protective liners from adhesive tape, be careful not to touch tape with hands and do not allow tape to come in contact with dirt or any foreign matter prior to adhesion.
- Use a J 25070
or equivalent to remove the old emblem/nameplate. Clean all adhesive from rear compartment lid, wipe surface dry with a clean lint-free towel prior to installing the new emblem/nameplate.
- Apply the new emblem/nameplate with the rear compartment lid in the closed position.
- Apply pressure to the emblem/nameplate to ensure full adhesion is made to the compartment lid.
|
| 3 |
Rear Compartment Lid Nameplate (PLATINUM) Procedure
- When removing protective liners from adhesive tape, be careful not to touch tape with hands and do not allow tape to come in contact with dirt or any foreign matter prior to adhesion.
- Use a J 25070
or equivalent to remove the old emblem/nameplate. Clean all adhesive from rear compartment lid, wipe surface dry with a clean lint-free towel prior to installing the new emblem/nameplate.
- Apply the new emblem/nameplate with the rear compartment lid in the closed position.
- Apply pressure to the emblem/nameplate to ensure full adhesion is made to the compartment lid.
|