Installation Procedure
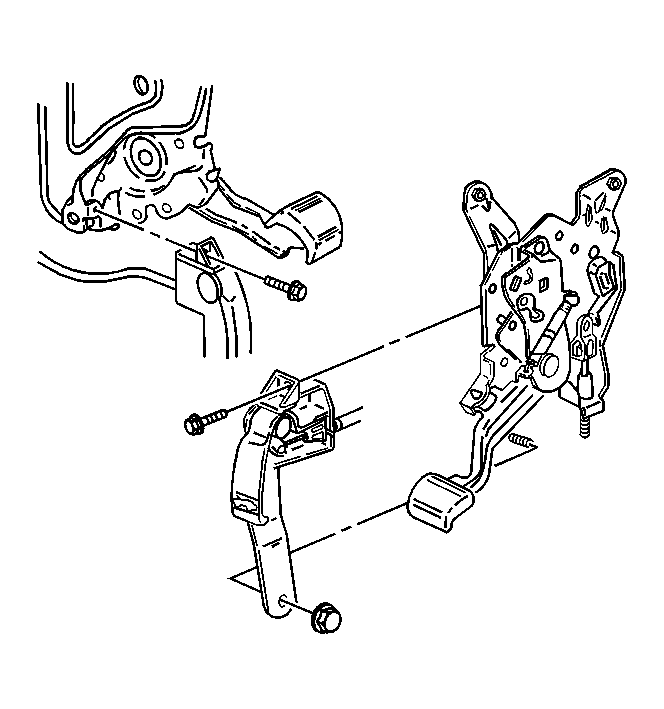 Courtesy of GENERAL MOTORS CORP.
- Tie the hood latch release cable to a wire or string. Route the hood latch release cable grommet through the dash panel.
- Apply strip caulk sealer or equivalent around the grommet.
- Install the hood latch release cable to the hood release handle.
- Install the cable assembly into the hood release handle assembly until you hear the tabs click.
- Pull the carpet back.
- Install the front left carpet retainer. Refer to Front Carpet Retainer Replacement
.
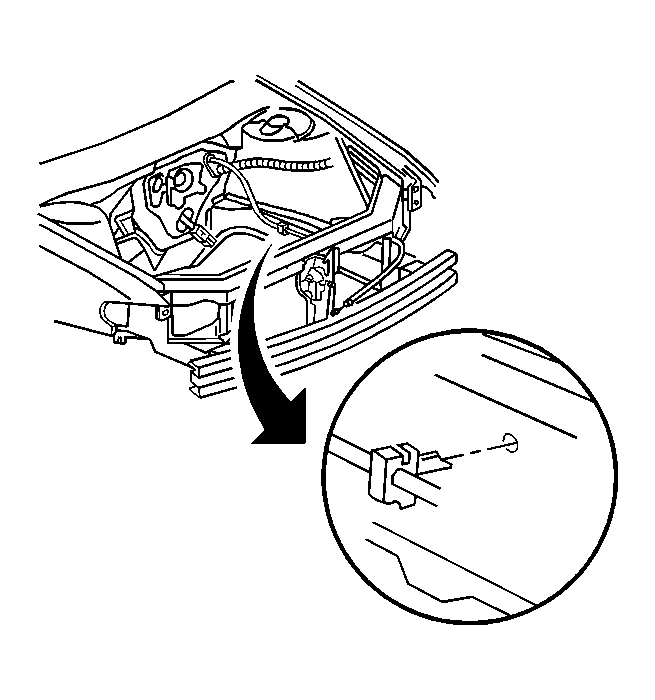 Courtesy of GENERAL MOTORS CORP.
- Install the hood latch release cable retainers to the engine compartment side rail retainers.
- Route the hood latch release cable through the radiator support.
- Install the air cleaner. Refer to Air Cleaner Assembly Replacement
.
- Install the front sheet metal diagonal brace. Refer to Front Fender Upper Diagonal Brace Replacement .
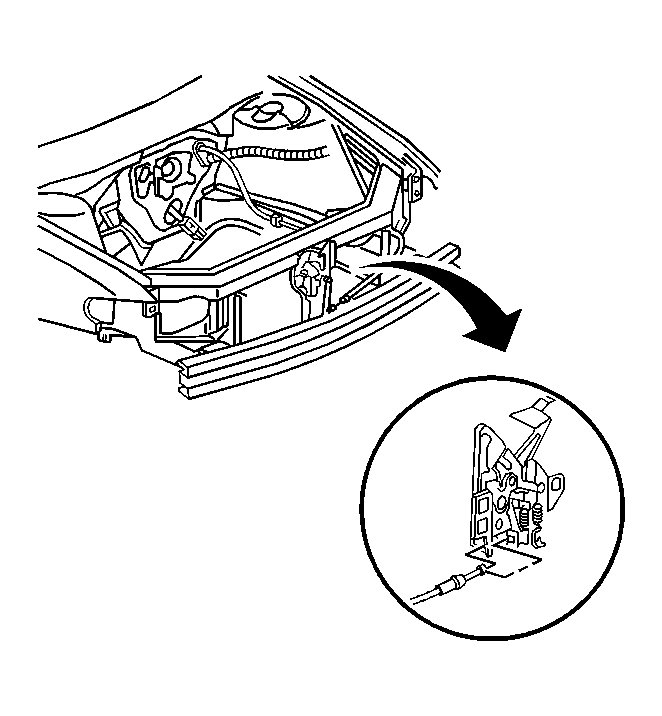 Courtesy of GENERAL MOTORS CORP.
- Install the release cable to the hood latch.
- Install the hood latch. Refer to Hood Latch Replacement .
- Install the left front headlamp. Refer to Headlamp Assembly or Headlamp Bulb Replacement (GT)
.
- Remove the block from the latch mechanism.
- Inspect the hood latch for proper operation.
- Close the hood.