Axle Beam: Service and Repair
Rear Axle Replacement (Front Wheel Drive)Removal Procedure
Caution: When removing the rear springs, do not use a twin-post type hoist. The swing arch tendency of the rear axle assembly when certain fasteners are removed may cause it to slip from the hoist which may cause personal injury.
Important: Place the vehicle lift pads where they will not obstruct the removal of the rear axle control arm bolts.
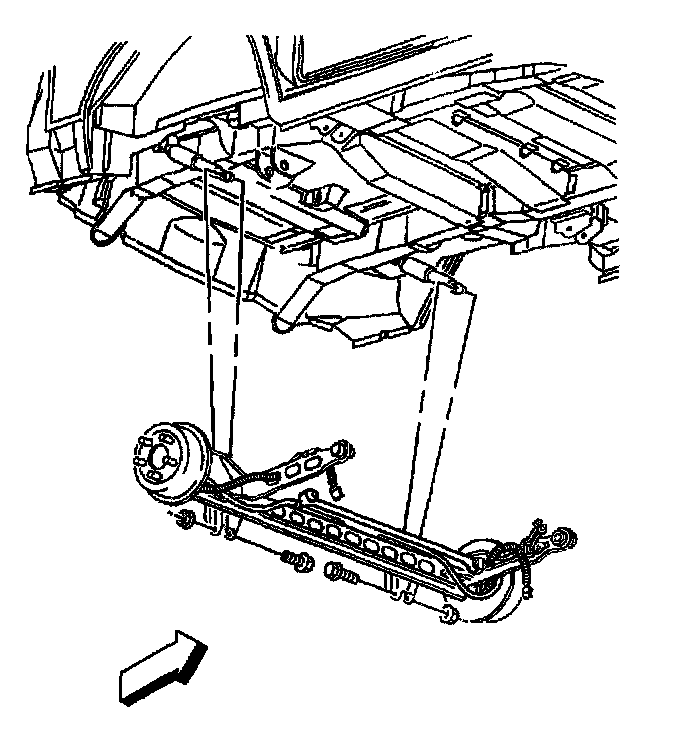
1. Raise and support the vehicle.
2. Remove the rear tires and wheels.
3. Use a utility stand in order to support the rear axle.
4. Remove the rear axle coil springs, the spring seats and the spring insulators.
5. Remove the backing plate or the park brake support.
- For front-wheel drive vehicles, refer to Brake Backing Plate Replacement in Brakes and Traction Control.
- For all-wheel drive vehicles, refer to Park Brake Shoe Replacement (Rear Disc) in Brakes and Traction Control.
6. Remove the park brake cables from the rear axle.
7. Disconnect the intermediate brake hoses from the rear axle brake pipes.
8. Use the utility stand in order to lower the rear axle.
9. Remove the utility stand.
10. Lower the vehicle until the rear axle contacts the ground.
11. Remove the rear axle control arm bolts and nuts.
12. Remove the control arms from the vehicle.
13. Remove the rear axle.
14. Remove the brake pipes from the rear axle.
Installation Procedure
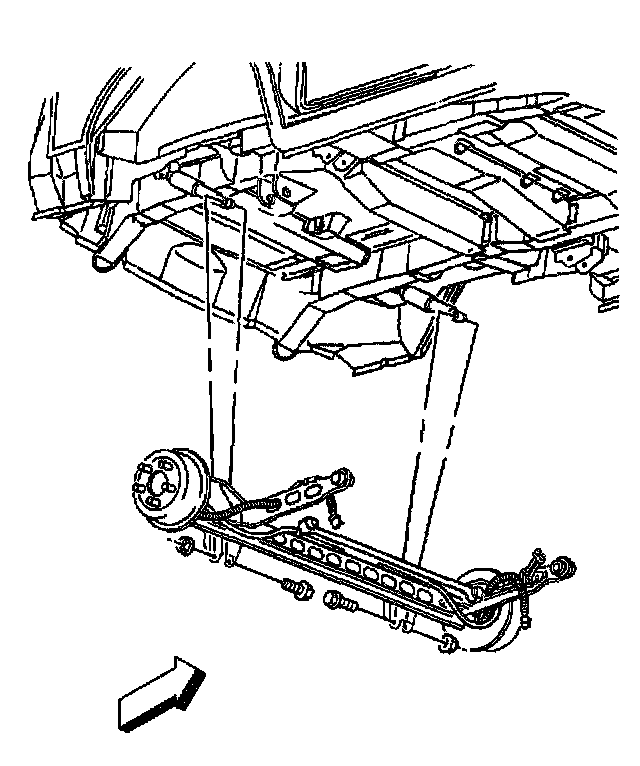
1. Install the brake pipes to the rear axle.
2. Position the rear axle under the vehicle.
3. Install the control arms to the vehicle.
4. Install the control arm bolts.
Notice: Refer to Fastener Notice in Service Precautions.
Important: This is a prevailing torque type fastener. This fastener may be reused ONLY if:
- The fastener and its counterpart are clean and free from rust.
- The fastener develops 4 Nm (37 inch lbs.) of torque (drag) against its counterpart prior to the fastener seating.
If the fastener does not meet these criteria, REPLACE the fastener.
5. Install the control arm nuts.
- Tighten the control arm nuts to 220 Nm (162 ft. lbs.).
6. Raise and support the vehicle.
7. Use the utility stand in order to raise the rear axle.
8. Install the rear axle coil springs, the spring seats and the spring insulators.
9. Install the backing plate or the park brake support.
- For front wheel drive vehicles, refer to Brake Backing Plate Replacement in Brakes and Traction Control.
- For all wheel drive vehicles, refer to Park Brake Shoe Replacement (Rear Disc) in Brakes and Traction Control.
10. Install the park brake cables to the rear axle.
11. Install the intermediate brake hoses to the rear axle brake pipes.
12. Bleed the brake system.
13. Install the rear tires and wheels.
14. Lower the vehicle.