Power Steering Gear Replacement
Removal ProcedureNotice: The front wheels of the vehicle must be maintained in the straight ahead position and the steering column must be in the LOCK position before disconnecting the steering column or intermediate shaft. Failure to follow these procedures will cause improper alignment of some components during installation and result in damage to the SIR coil assembly.
1. Raise and support the vehicle.
2. Remove the stabilizer shaft.
3. Remove the tie rod ends from the steering knuckles.
Caution: Failure to disconnect the intermediate shaft from the rack and pinion stub shaft can result in damage to the steering gear and/or intermediate shaft. This damage can cause loss of steering control which could result in personal injury.
Notice: The front wheels of the vehicle must be maintained in the straight ahead position and the steering column must be in the LOCK position before disconnecting the steering column or intermediate shaft. Failure to follow these procedures will cause improper alignment of some components during installation and result in damage to the SIR coil assembly.
4. Disconnect the steering intermediate shaft from the steering gear.
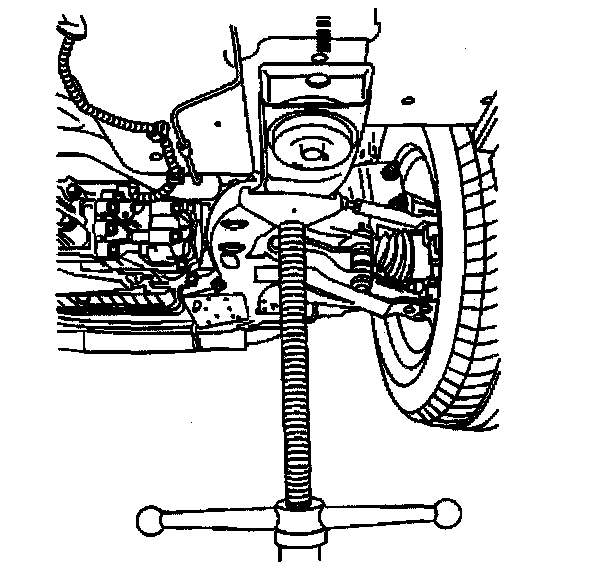
5. Use a utility stand in order to support the frame.
6. Remove and DISCARD the frame rear bolts.
Notice: Do not lower the rear of the frame too far as damage to the engine components nearest to the cowl may result.
7. Use the utility stand in order to lower the frame and the powertrain.
8. Remove the power steering gear heat shield.
9. Remove the power steering gear cooler pipe from the steering gear.
10. Remove the power steering gear pressure hose from the power steering gear.
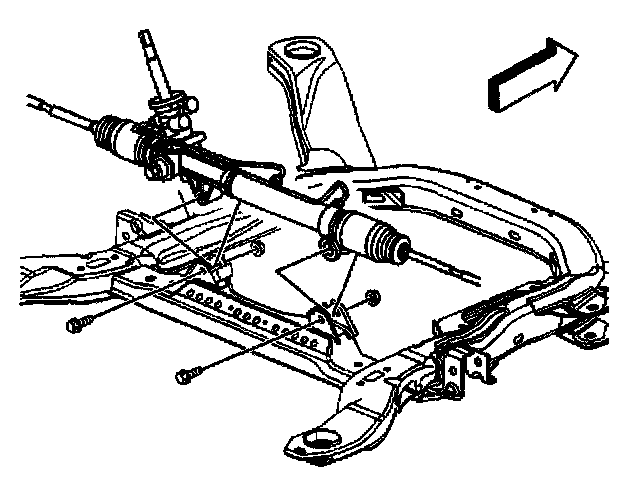
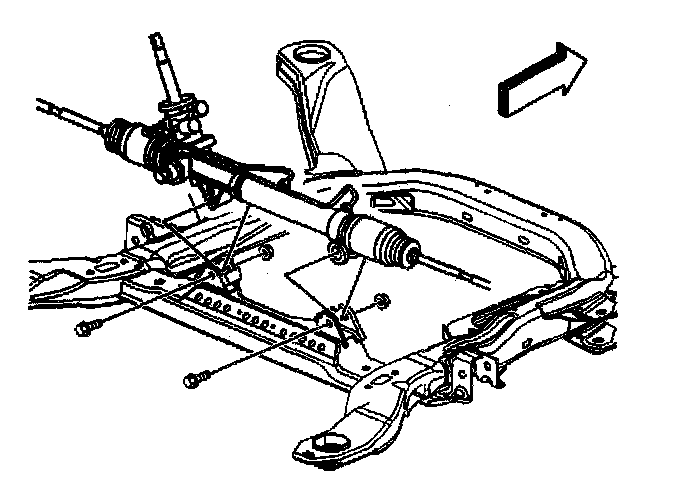
11. Remove the power steering gear nut(s).
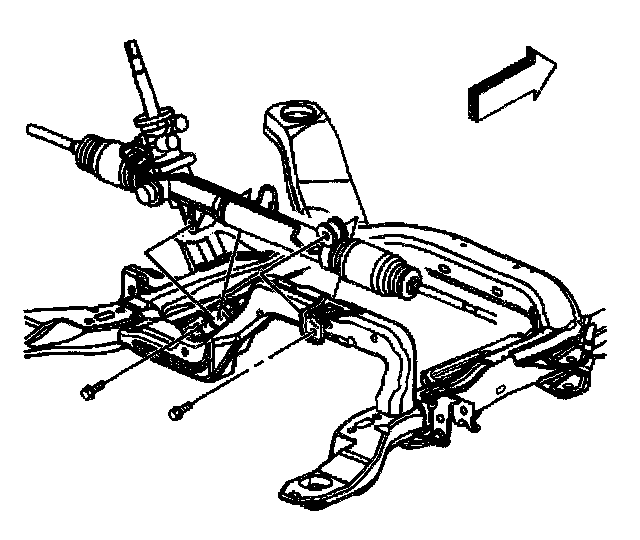
12. Remove the power steering gear bolts.
13. Remove the power steering gear through the vehicle left side wheel opening.
Installation Procedure
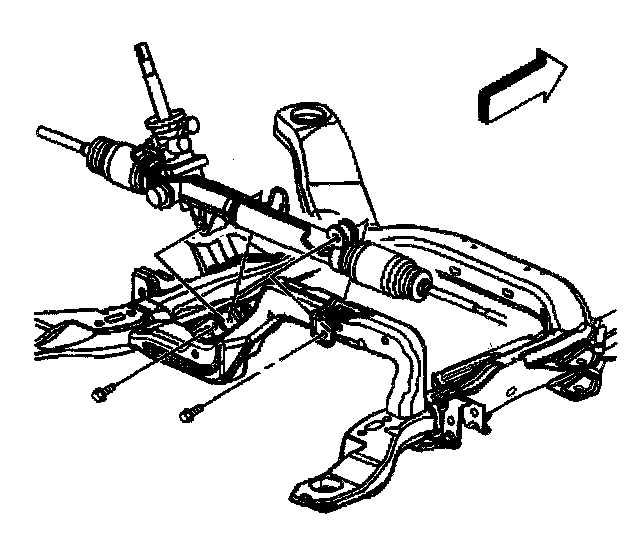
1. Install the power steering gear through the vehicle left side wheel opening to the frame.
Notice: Refer to Fastener Notice in Service Precautions.
2. Install the power steering gear bolts.
- Tighten
If the vehicle is equipped with all wheel drive, tighten the power steering gear right side bolt to 80 Nm (59 ft. lbs.).
Important: This is a prevailing torque type fastener. This fastener may be reused ONLY if:
- The fastener and its counterpart are clean and free from rust
- The fastener develops 2 Nm (18 inch lbs.) of torque (drag) against its counterpart prior to the fastener seating.
If the fastener does not meet these criteria, REPLACE the fastener.
3. Install the power steering gear nut(s).
- Tighten the power steering gear nut(s) to 80 Nm (59 ft. lbs.).
4. Install the power steering gear pressure hose to the power steering gear.
5. Install the power steering gear cooler pipe to the power steering gear.
6. Install the power steering gear heat shield.
7. Use the utility stand in order to raise the frame and the powertrain.
8. Install the NEW frame rear bolts.
9. Remove the utility stand from the frame.
10. Install the intermediate steering shaft to the steering gear.
11. Install the tie rod ends to the steering knuckles.
12. Install the stabilizer shaft.
13. Lower the vehicle.
14. Fill the power steering system.
15. Bleed the air from the power steering system.
16. Inspect and adjust the toe as necessary.