Removal & Installation
- Remove console, if equipped. On all models, remove 2 screws from instrument panel accessory trim plate. Pull trim plate rearward to release 2 steel retainers. Rotate trim plate rearward and up to release 2 tabs at top edge.
- Remove ventilation control assembly. Set parking brake. If equipped with column shift, move shift lever to L1. On all models, tilt column to lowest position. Remove tilt lever. Insert screwdriver into slot in trim plate directly under headlight switch. Push screwdriver down and release plastic tab. Pull plate rearward.
- Grasp trim plate at right end below right center A/C outlet. Carefully pull plate to release clip. Remove screw. Grasp trim plate bottom edge on both sides of steering column and pull to release 2 additional steel clips. Disconnect electrical connector from lighter. Insert screwdriver into slot at left upper corner and raise handle. Pull rearward at center of top edge to disengage plastic clip on trim plate. Remove trim plate.
- Remove 2 push-pin retainers at top of cluster. Rotate top of cluster rearward and disengage locating pins on bottom of cluster at instrument panel. Disconnect electrical connector. See Fig 1. To install, reverse removal procedure.
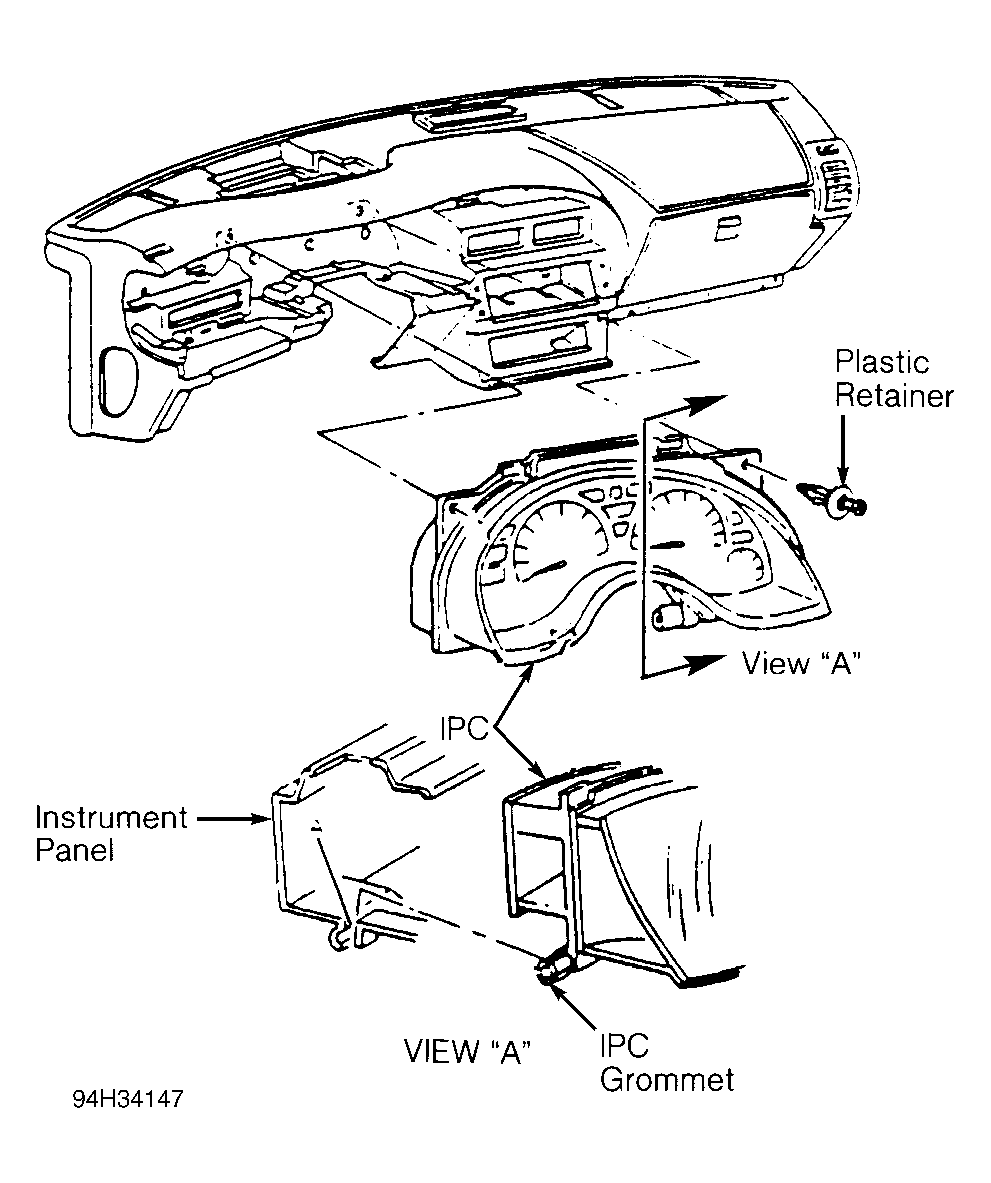 Courtesy of GENERAL MOTORS CORP.