Rear Crankshaft Main Bearing Seal: Service and Repair
Fig. 15 Rear main bearing oil seal installation. Thin seal:
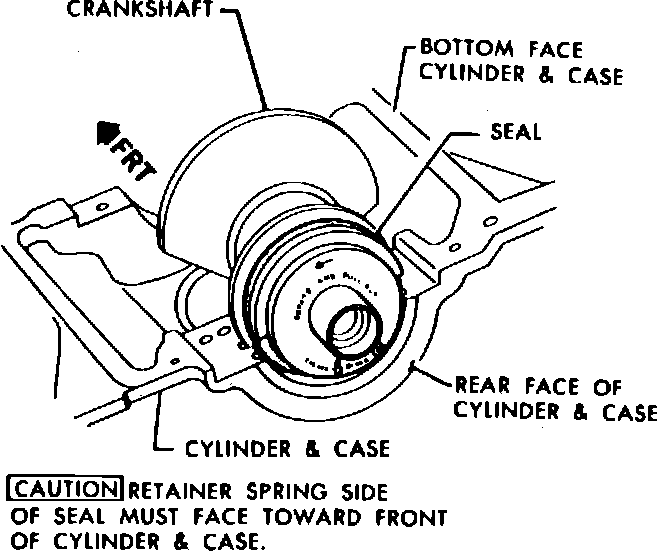
THIN SEAL
1. Remove engine as outlined under ``Engine, Replace'' procedure.
2. Remove oil pan and oil pump assembly.
3. Remove water pump and timing chain.
4. Remove connecting rod and main bearing caps, then the crankshaft and oil seal.
5. Coat outer diameter of new seal with sealant 1052756 or equivalent.
6. Position seal/tool assembly on rear of crankshaft, ensuring arrows on tool face toward cylinder and case assembly, Fig. 15.
7. Install crankshaft, discard tool, then coat crankshaft journals with engine oil.
8. Apply a 1 mm bead of anaerobic sealant to bearing cap surface.
9. Reinstall rear main cap, main bearing caps and connecting rod caps and torque to specifications.
10. Reverse removal procedure to complete installation.
Fig. 16 Rear main bearing oil seal installation. Thick seal:
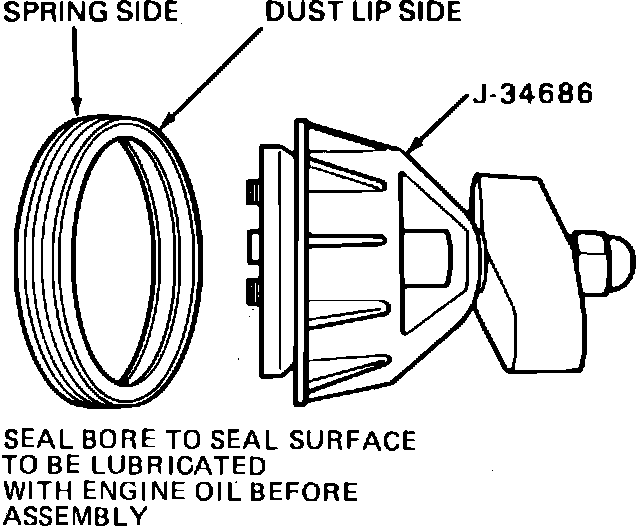
THICK SEAL
1. Remove transaxle and flexplate.
2. Using a screwdriver or similar tool, pry out old seal. Use care to avoid damaging crankshaft. File all burrs or nicks as required.
3. Install new seal using tool J34686, Fig. 16, as follows:
a. Apply a light coat of engine oil to I.D. of oil seal.
b. Slide seal over tool mandrel until dust lip bottoms squarely against collar of tool.
c. Align dowel pin of tool with dowel pin hole in crankshaft, Fig. 16, then attach tool to crankshaft with screw provided.
d. Turn handle of tool until seal is pushed into bore and collar is positioned firmly against case. Remove tool.
4. Install flywheel and transmission, then start engine and check for leaks.