Camshaft & Rocker Arms: Installation
- Install rocker arms and lash adjusters. Lubricate camshafts with engine oil. Intake camshaft has a slit in the rear to drive crank angle sensor. Install camshafts with dowel pin area (for camshaft sprockets) facing toward the top, away from cylinder head.
- Bearing caps No. 2 and 5 are the same shape. All bearing caps, except No. 1 bearing cap, are numbered on top for location. All bearing caps are stamped either with an "I" for intake camshaft, or an "E" for exhaust camshaft.
- Install bearing caps in numerical order. Tighten bearing cap bolts in 2 steps to specification, using proper sequence. See TORQUE SPECIFICATIONS at end of article. See Fig 1. Ensure rocker arm is positioned on lash adjuster and valve.
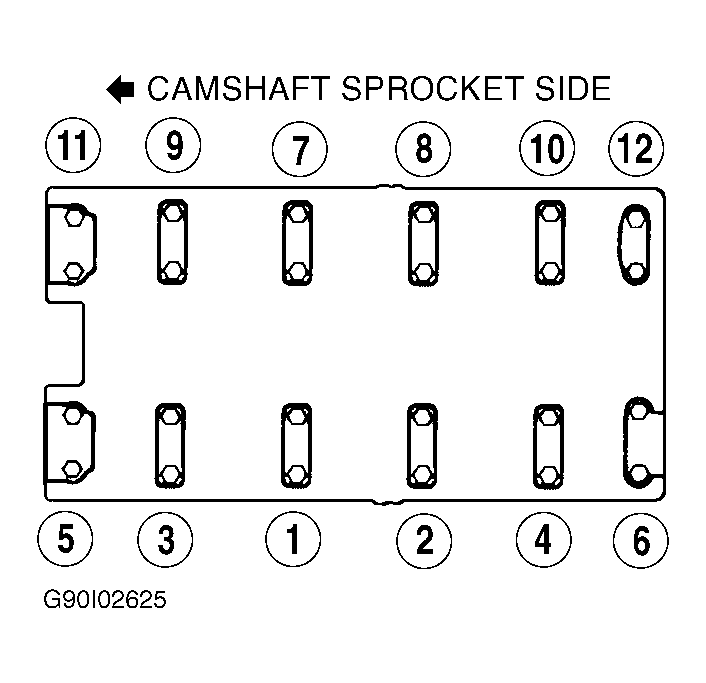 Courtesy of CHRYSLER MOTORS.
- Install Guide (MD998307) on camshaft. Coat camshaft oil seal with oil and install on guide. Place oil seal against cylinder head. Using Seal Installer (MD998306), install seal into cylinder head.
- Ensure dowel for intake camshaft sprocket faces upward (12-o'clock position) away from cylinder head. Align punch mark on crank angle sensor housing with notch in plate. See Fig 2. Install crank angle sensor on cylinder head.
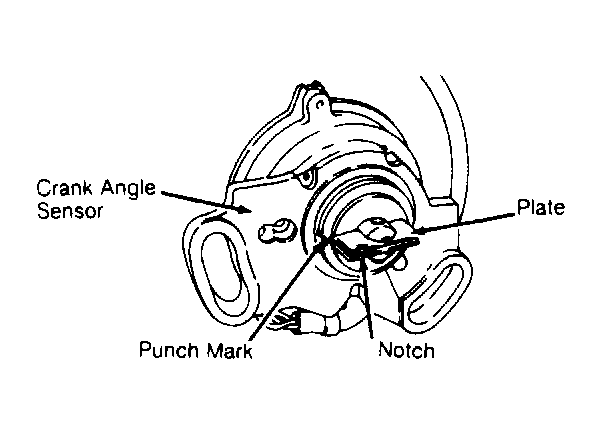 Courtesy of CHRYSLER MOTORS.
- To install remaining components, reverse removal procedure. Apply sealant to inside of semi-circular packing and cylinder head before installing. Apply sealant at valve cover gasket-to-camshaft bearing cap contact areas before installing.
 Courtesy of CHRYSLER MOTORS.