Cylinder Head: Removal
- Release fuel pressure. See FUEL PRESSURE RELEASE . Disconnect negative battery cable. Drain cooling system.
- Remove air cleaner. Disconnect vacuum lines, control cables and electrical connections from throttle body. Disconnect fuel lines. Remove power steering belt and remove power steering pump.
- Disconnect vacuum hoses and electrical connections at intake manifold. Disconnect coolant hose at crossover tube. Disconnect exhaust pipe at manifold or turbo.
- Disconnect dipstick tube from thermostat housing and rotate bracket from stud. If equipped with A/C, remove all accessory drive belts. Remove A/C compressor (with lines connected) and support to one side.
- Remove alternator pivot bolt, disconnect wiring and remove alternator. Remove A/C compressor idler pulley.
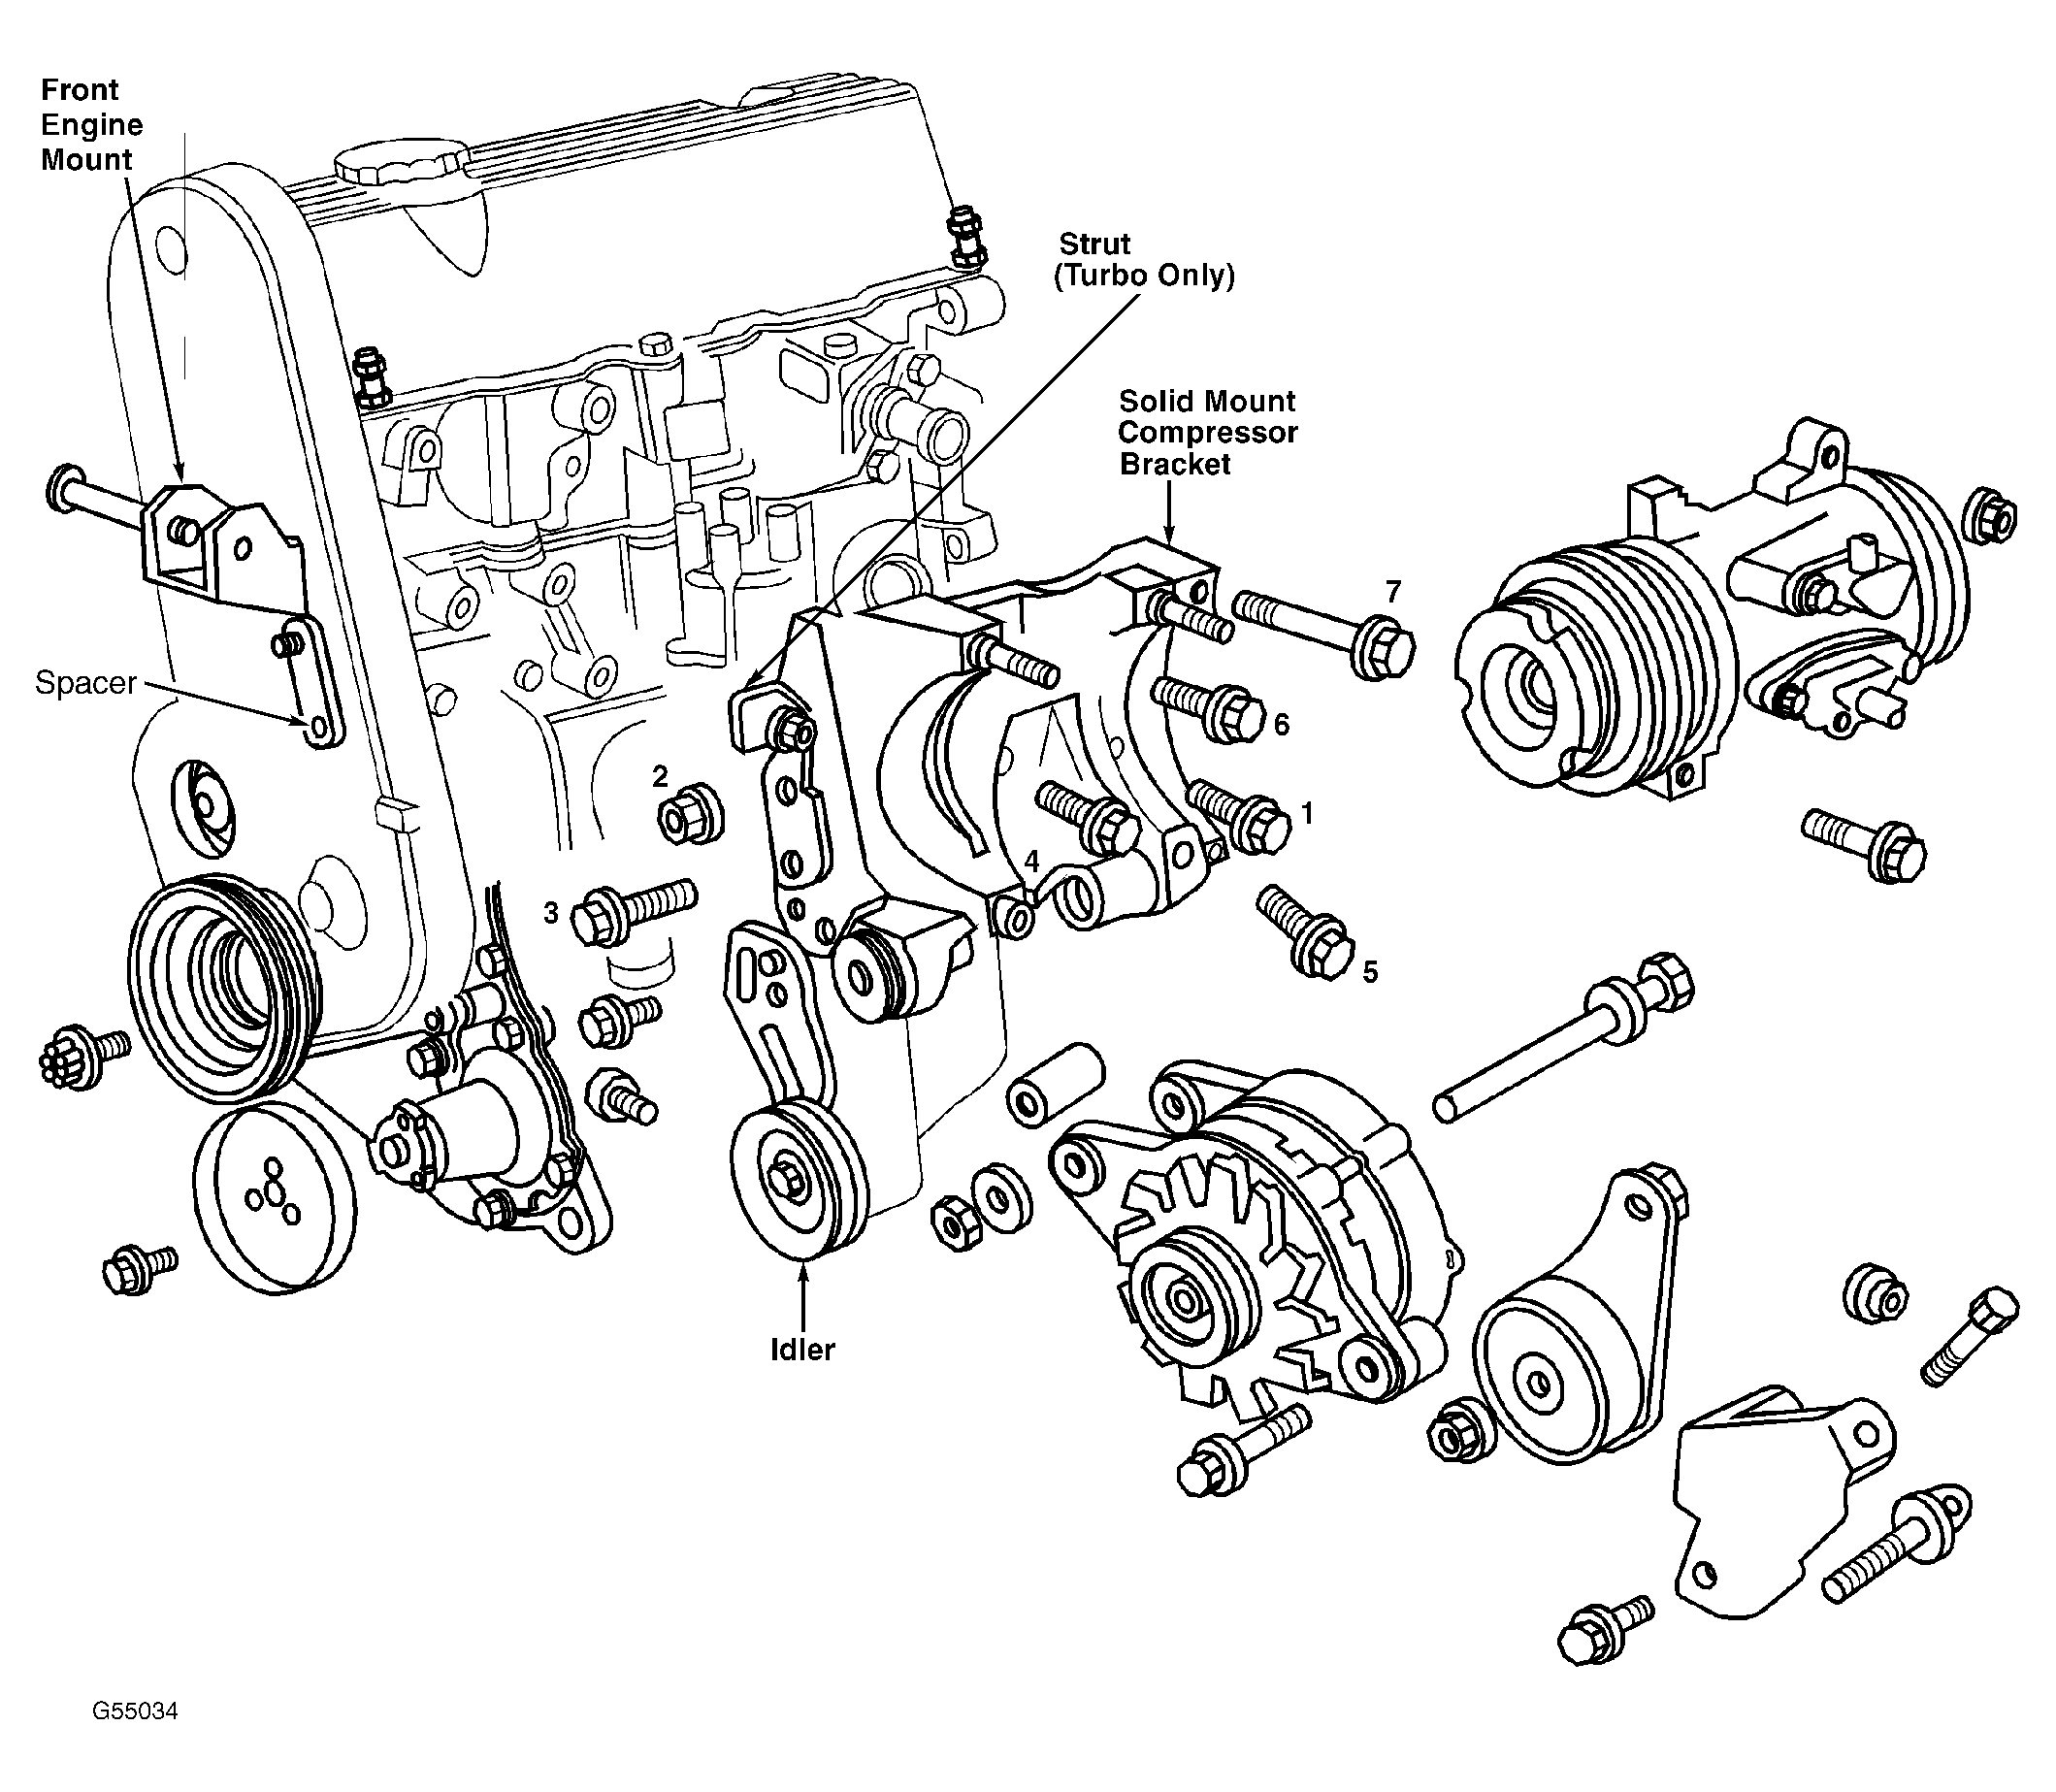
- On 2.5L and turbo models, remove right engine mount yoke screw securing isolator support bracket to engine mount bracket. On all models, remove side mounting bolts No. 1, 4, 5, 6, and 7 from solid mount compressor bracket. See Fig 1.
 Courtesy of CHRYSLER MOTORS.
- Remove front mounting nut No. 2 and remove (or loosen) front bolt No. 3. Rotate solid mount compressor bracket away from engine and slide on stud (No. 2 mounting stud) until free.
- The front mounting bolt, strut (turbo models) and spacer will be removed with bracket.
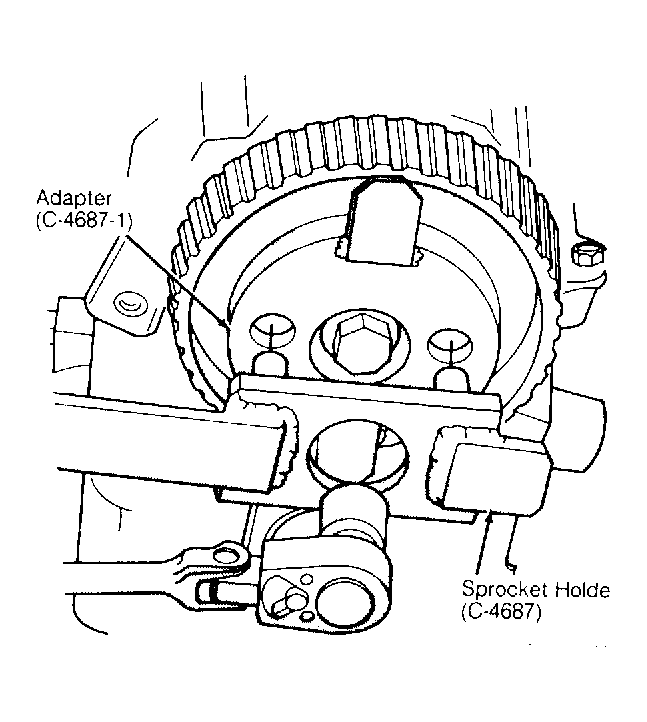
- Remove upper timing belt cover. Using Sprocket Holder (C-4687) with Adapter (C-4687-1), hold camshaft sprocket and remove sprocket bolt. See Fig 2. Remove camshaft sprocket, maintaining camshaft, intermediate shaft and crankshaft timing with belt. See Figure. It may be necessary to remove timing belt. See TIMING BELT .
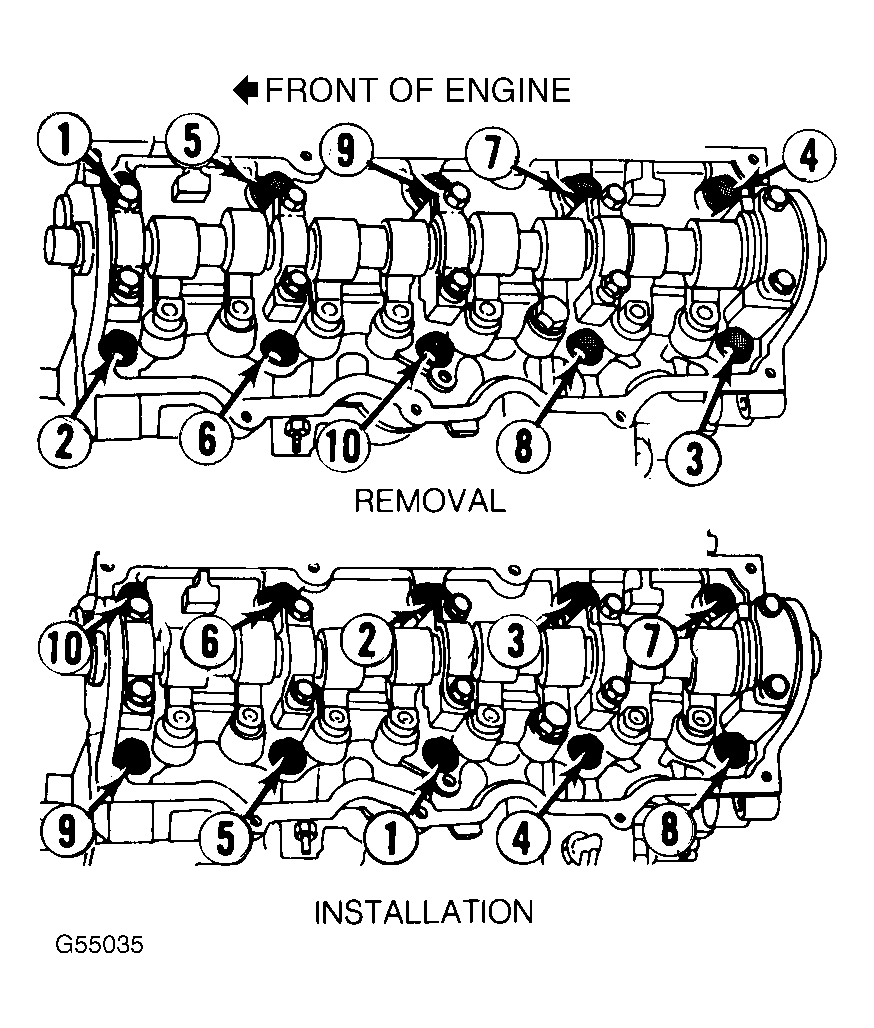
- Remove valve cover and oil baffle (if equipped). Remove cylinder head bolts in proper sequence as shown. See Fig 3. Remove cylinder head and gasket.
 Courtesy of CHRYSLER MOTORS.
 Courtesy of CHRYSLER MOTORS.