Timing Belt: Installation
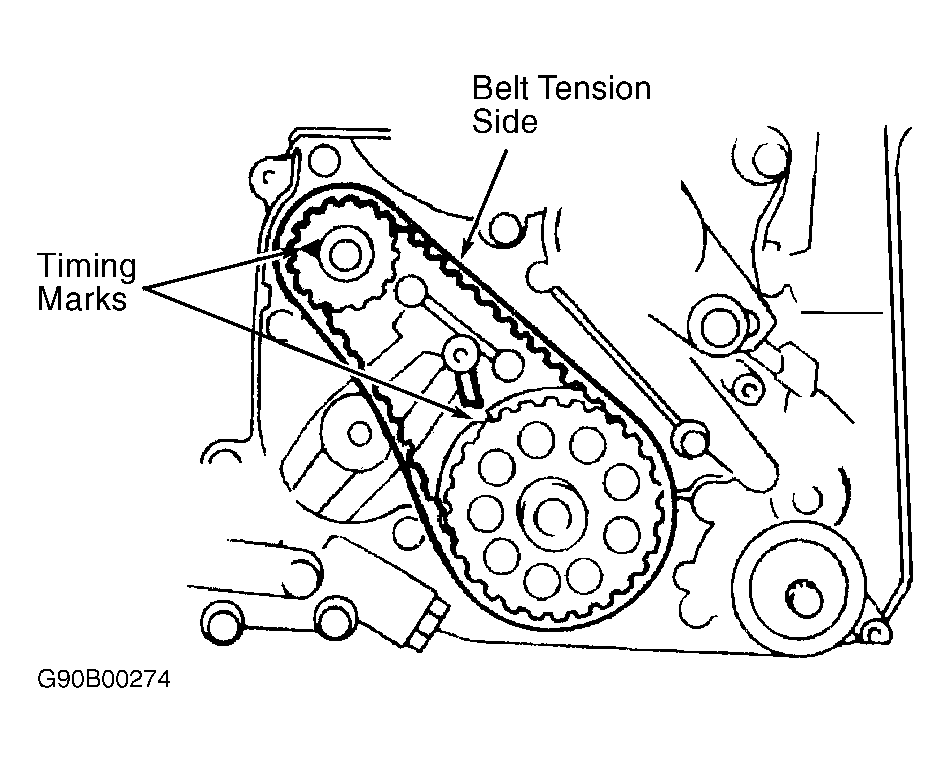
- Install timing belt tensioner assembly. Rotate tensioner toward water pump and temporarily tighten retaining bolts. Ensure camshaft and crankshaft timing marks are aligned. See Figure. Install timing belt on crankshaft sprocket.
- Apply pressure on tension side of belt while installing belt on oil pump sprocket. Install timing belt on crankshaft sprocket. Apply counterclockwise force on camshaft sprocket to apply tension on tension side of belt. Ensure all timing marks are aligned.
- Loosen pivot side bolt on belt tensioner and then slot side bolt to place tension on timing belt. Rotate camshaft sprocket clockwise until timing mark is offset by 2 teeth to apply tension on belt. Ensure all timing marks are aligned. Tighten tensioner bolt.
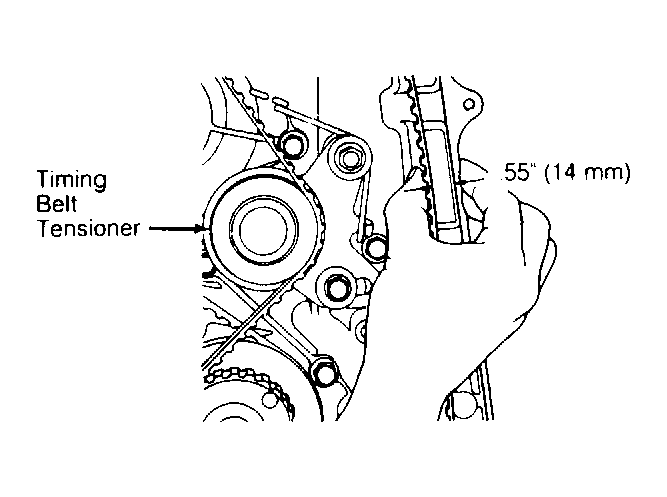
- Tighten tensioner spacer. To check belt tension, hold belt tensioner and timing belt together and apply slight thumb pressure at center point of belt tensioner. See Fig 1. Ensure that belt cog will reach 1/4 of the width of the slot side of belt tensioner. To install remaining components, reverse removal procedure.
 Courtesy of CHRYSLER MOTORS.
- Install flange on rear crankshaft with chamfered edge facing away from cylinder block if removed. Install rear crankshaft sprocket and silent shaft. Install silent shaft sprocket (if equipped). Install rear timing belt and ensure timing marks are aligned. See Fig 1.
- Install rear tensioner but do not tighten bolts. Hold tensioner tight against belt while tightening bolts. Depress belt with finger to ensure that deflection is between .20-28" (5-7 mm). Install crankshaft and oil pump sprocket. Install camshaft and oil pump sprocket. Tighten camshaft sprocket retaining bolts to specification while holding hexagon area of camshaft. Install idler pulley.
 Courtesy of CHRYSLER MOTORS.
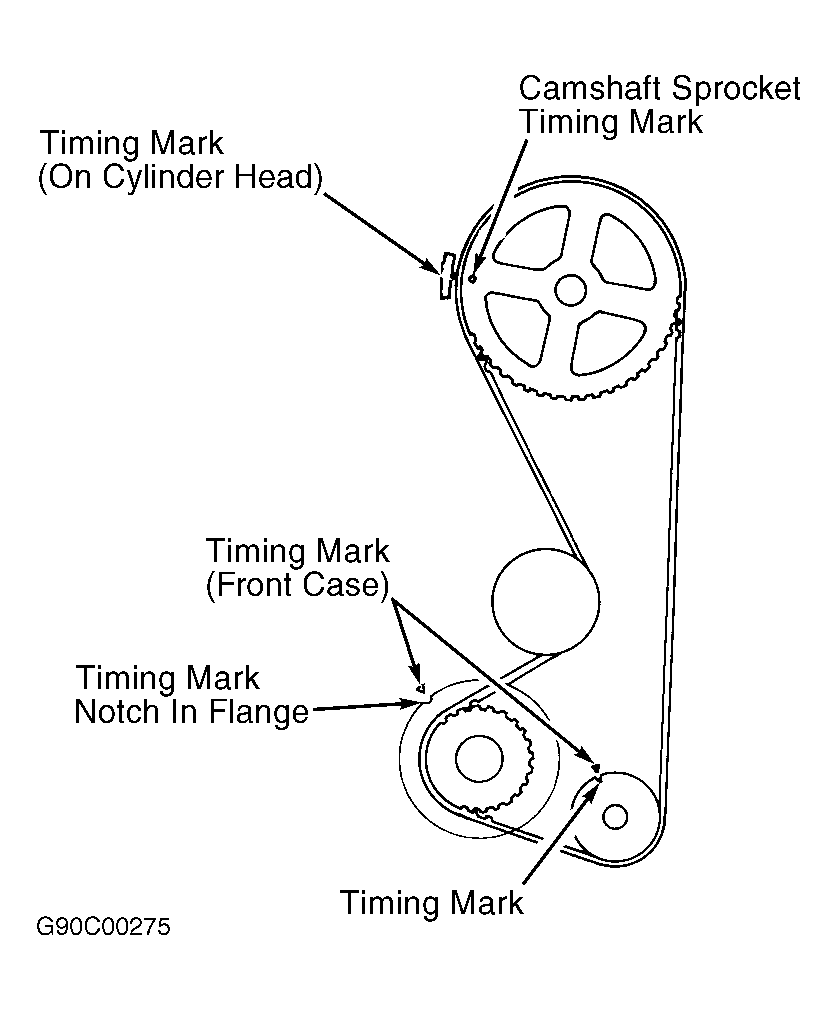
- Install belt tensioner, tension spring and spacer. Ensure spring is properly engaged against front case. Rotate tensioner toward water pump and temporarily tighten retaining bolts. Ensure camshaft and crankshaft timing marks are aligned. See Fig 2. Install timing belt on crankshaft.
- Apply pressure on tension side of belt while installing belt on camshaft sprocket. Loosen tensioner to allow spring pressure application to timing belt. Rotate camshaft sprocket clockwise until timing mark is offset by 2 teeth to apply tension on belt. Ensure all timing marks are aligned. Tighten tensioner bolt.
- Tighten tensioner spacer. To check belt tension, apply slight thumb pressure to measure deflection between camshaft and oil pump sprocket. Belt deflection should be .55" (14 mm). To install remaining components, reverse removal procedure.
 Courtesy of CHRYSLER MOTORS.