Rocker Assembly & Camshaft: Installation
- Lubricate camshaft lobes and camshaft bearing journals and install camshaft into cylinder head. Check camshaft endplay. Endplay should be.002"-.006" (.05-.15 mm).
- Install distributor drive gear. Install rocker arm assembly to cylinder head. Camshaft should be positioned with keyway at 41° position. See Fig 1.
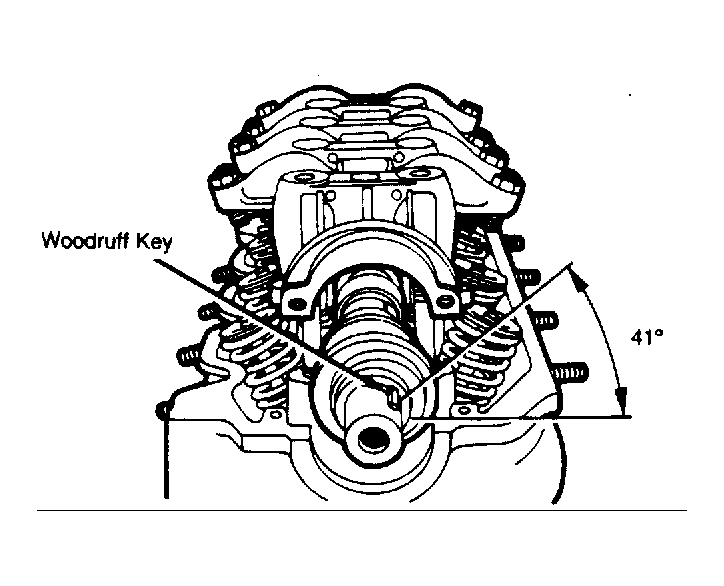 Courtesy of CHRYSLER LLC
- Insert camshaft bearing caps and tighten bolts to 7 ft. lbs. (10 N.m) in sequence of center, 2, 4, front and rear. Repeat sequence, tightening to specified torque.
- Using seal installer (MD998248), drive camshaft oil seal in until installer touches distributor drive gear. Install upper inner cover, camshaft spacer and camshaft sprocket.
- If dowel pin hole on camshaft sprocket is not in alignment with dowel pin, lightly strike projections at No. 2 exhaust cam with a screwdriver to turn camshaft.
- Complete installation by reversing removal procedure. Temporarily set valve clearance to cold engine settings. Readjust to hot engine settings when engine reaches normal operating temperature. Install valve cover, air cleaner and breather hoses.