Removal and Installation: Removal
- Remove selector lever knob. Refer to
"REMOVAL AND INSTALLATION
".
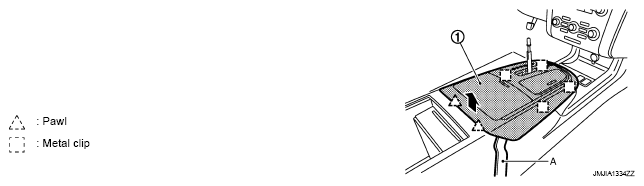
- Remove console finisher assembly.
- Open the console lid.
- Remove console finisher assembly (1) fixing pawls and metal clips with remover tool (A).
- Pull up console finisher assembly.
- Disconnect harness connectors.
 Courtesy of NISSAN MOTOR CO., U.S.A.
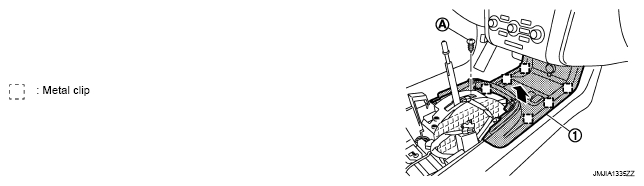
- Remove front console pocket.
- Remove front console pocket (1) fixing screw (A).
- Pull up front console pocket, and then disengage metal clips.
- Disconnect harness connectors.
 Courtesy of NISSAN MOTOR CO., U.S.A.
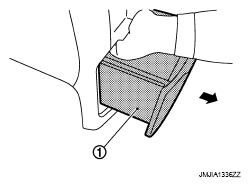
- Remove rear console pocket.
- Open the rear console pocket (1).
- Release rear console pocket lock.
 Courtesy of NISSAN MOTOR CO., U.S.A.
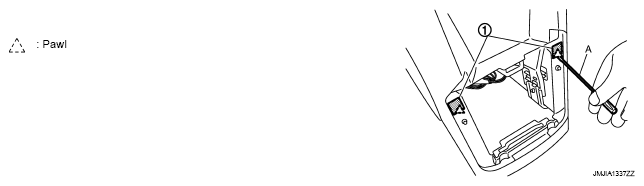
- Remove console rear finisher.
- Remove console mask (1) with flat-blade screwdriver (A).
 Courtesy of NISSAN MOTOR CO., U.S.A.
- Remove console rear finisher (2) fixing screws (A).
- Pull back console rear finisher.
- Disconnect harness connectors.
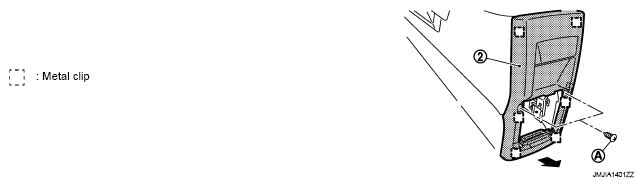 Courtesy of NISSAN MOTOR CO., U.S.A.
- Remove center console assembly.
- Remove center console assembly (1) fixing screws (A).
- Lift up back side and pull back.
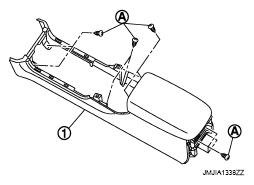 Courtesy of NISSAN MOTOR CO., U.S.A.
- Remove instrument lower cover LH/RH.
- Disengage instrument lower cover LH (1) fixing pawls.
- Pull back instrument lower cover LH.
- Disengage instrument lower cover RH (2) fixing pawls and clip.
- Pull the instrument lower cover RH crosswise.
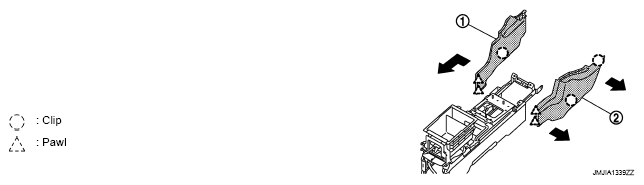 Courtesy of NISSAN MOTOR CO., U.S.A.
- Remove lower console finisher LH/RH.
- Remove lower console finisher LH (1) fixing screws (A).
- Remove lower console finisher LH fixing clip (B).
- Remove lower console finisher LH fixing clip (C).
- Pull the console finisher LH crosswise.
- Remove lower console finisher RH (2) fixing screws (D).
- Remove lower console finisher RH fixing clip (E).
- Remove lower console finisher RH fixing clip (F).
- Pull the console finisher RH crosswise.
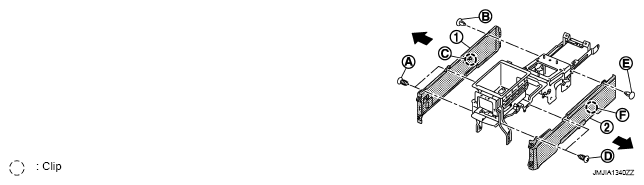 Courtesy of NISSAN MOTOR CO., U.S.A.
- Remove lower console assembly.
- Remove lower console assembly (1) fixing screws (A).
- Remove lower console assembly fixing bolts (B).
- Disconnect harness connectors.
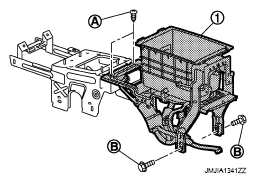 Courtesy of NISSAN MOTOR CO., U.S.A.
- Remove DVD player. Refer to
"REMOVAL AND INSTALLATION
".
- Remove control device assembly. Refer to
"REMOVAL AND INSTALLATION
".
- Remove console reinforcement.
- Remove console reinforcement (1) fixing nuts (A).
- Remove console reinforcement fixing bolts (B).
- Remove harness clip.
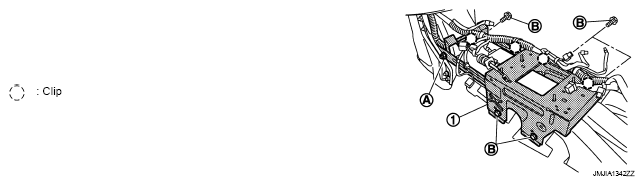 Courtesy of NISSAN MOTOR CO., U.S.A.
- Remove instrument stay LH fixing nuts, and then remove instrument stay LH.
- Remove front console bracket fixing bolt and nuts, and then remove front console bracket.