Instrument Panel Assembly: Removal
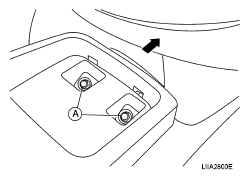
- Remove center console mat and remove screws (A).
- <= : Front
 Courtesy of NISSAN MOTOR CO., U.S.A.
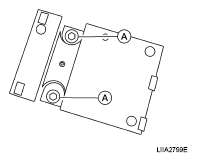
- Open center console lid, remove center console tray and remove the center console screws (A).
 Courtesy of NISSAN MOTOR CO., U.S.A.
- Pull parking brake control handle up engaging the parking brake, then remove the center console.
- Remove instrument lower finisher screw, remove instrument lower finisher, disconnect diagnostic connector and hood release cable.
- Remove the shifter knob. Refer to
"SELECTOR LEVER KNOB REMOVAL AND INSTALLATION
" (CVT),
"COMPONENTS OF CONTROL DEVICE AND CABLE
" (MT).
- Remove the CVT or MT finisher.
- Remove the controller and controller finisher, disconnect the controller finisher connectors.
- Remove the cluster lid C upper mask (base).
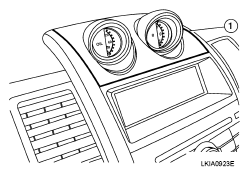
- Remove the double meter (1) (SE-R).
 Courtesy of NISSAN MOTOR CO., U.S.A.
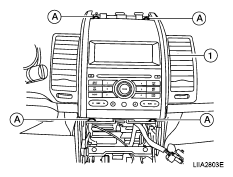
- Remove cluster lid C (1).
- Remove cluster lid C screws (A).
- Pull out cluster lid C (1) to disconnect harness connector and remove cluster lid C (1).
 Courtesy of NISSAN MOTOR CO., U.S.A.
- Remove the instrument panel trim (RH).
- Remove glove box lower finisher screws, remove glove box lower finisher.
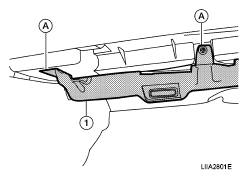 Courtesy of NISSAN MOTOR CO., U.S.A.
- Remove the glove box assembly.
- Remove the two lower glove box assembly screws (A).
- Open the glove box and remove the four upper glove box assembly screws (B).
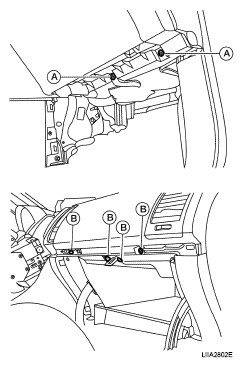 Courtesy of NISSAN MOTOR CO., U.S.A.
- Remove instrument lower covers (LH and RH).
- Remove the instrument lower cover (center) screws and remove the instrument lower cover (center).
- Remove the instrument upper cover screws, remove the instrument upper cover.
- Remove steering lock escutcheon (1), remove steering column cover screws (A) and remove steering column cover upper and steering column cover lower (2).
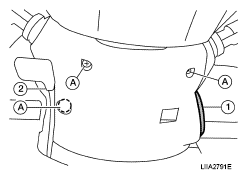 Courtesy of NISSAN MOTOR CO., U.S.A.
- Disengage the metal clips, and then remove cluster lid A.
- Remove the combination meter screws (A), pull out the combination meter (1) to disconnect the connector, remove the combination meter (1).
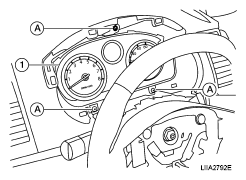 Courtesy of NISSAN MOTOR CO., U.S.A.
- Remove the front pillar garnish. Refer to
"BODY SIDE TRIM
".
- Remove the steering wheel. Refer to
"STEERING WHEEL
".
- Remove the headlamp control switch. Refer to
"REMOVAL AND INSTALLATION
".
- Remove the wiper control switch. Refer to
"REMOVAL AND INSTALLATION OF FRONT WIPER AND WASHER SWITCH
".
- Remove the passenger air bag module bolt (A) from the steering member.
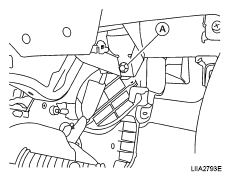 Courtesy of NISSAN MOTOR CO., U.S.A.
- Remove the instrument panel lower RH screw (A).
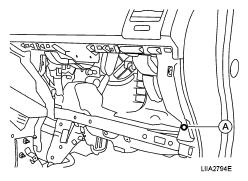 Courtesy of NISSAN MOTOR CO., U.S.A.
- Remove the instrument panel screw inside the combination meter opening.
- Remove the instrument panel screw at the upper LH corner.
- Remove the instrument panel lower LH screw.
- Remove the front speakers (LH and RH). Refer to
"AUDIO UNIT
".
- Remove the upper instrument panel bolts located near the front speakers (RH and LH).
- Disconnect the audio antenna.
- Remove the instrument panel assembly.