Oil Pan: Service and Repair
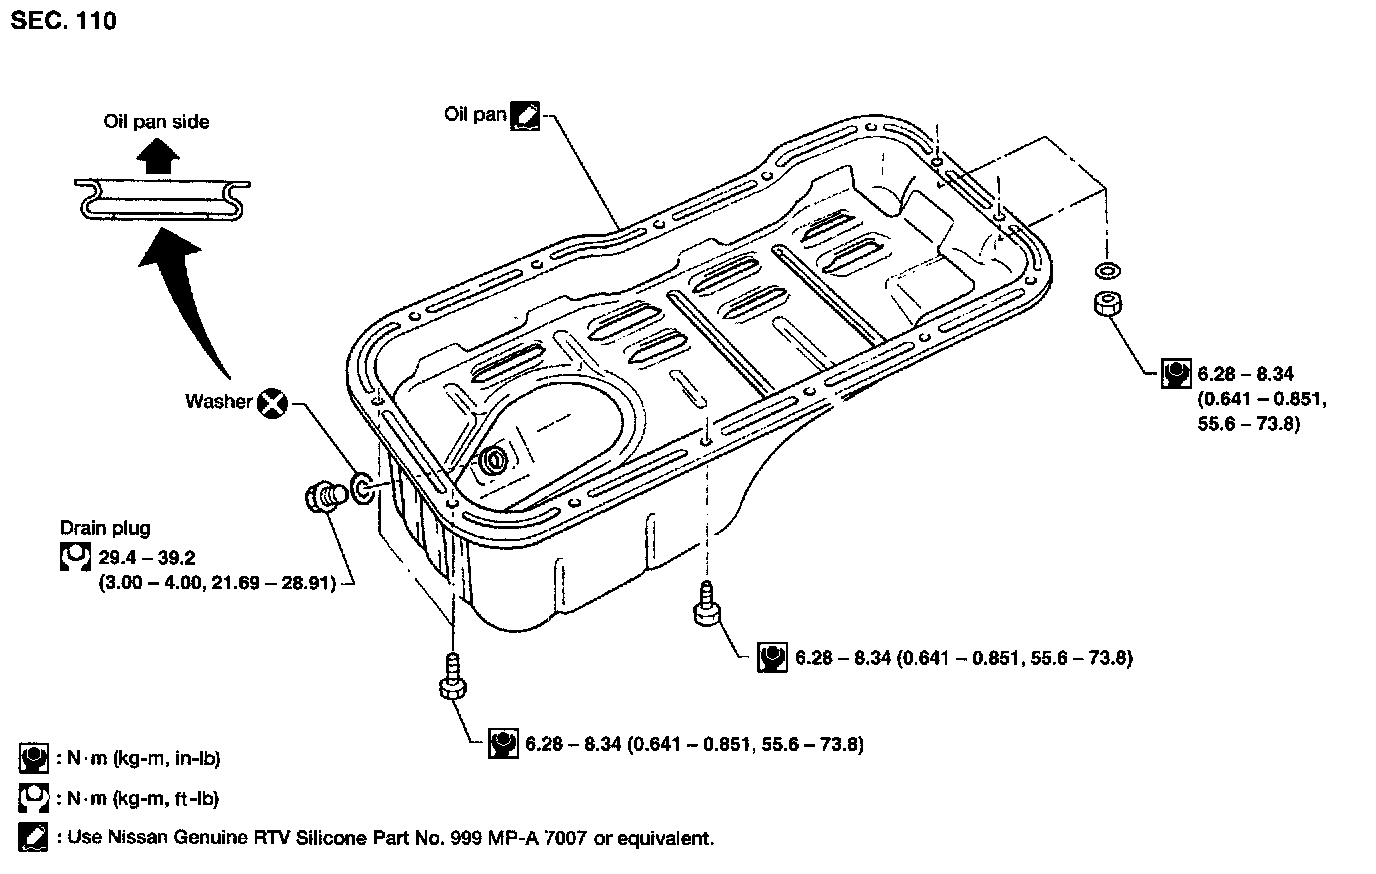
Removal
1. Remove engine RH side cover and under covers.
2. Drain engine oil.
3. Remove front exhaust tube.
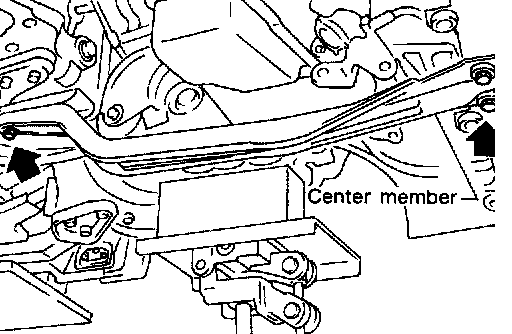
4. Set a suitable transmission jack under transaxle and lift engine with engine slinger.
5. Remove center member.
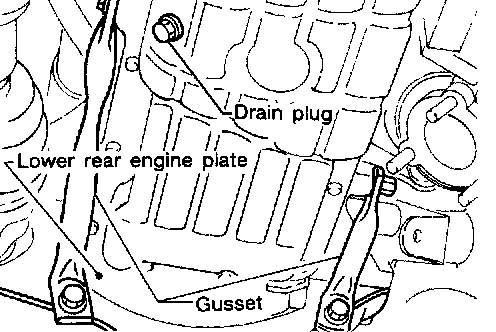
6. Remove front and rear engine gussets.
7. Remove rear plate cover (A/T models).
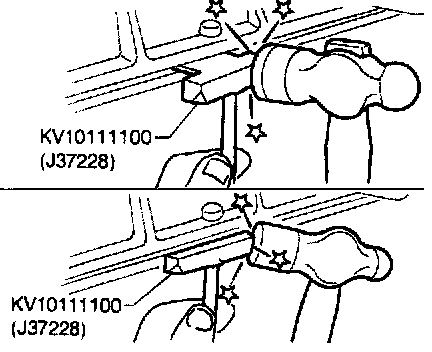
8. Remove oil pan.
a. Insert Tool between cylinder block and oil pan.
- Be careful not to damage aluminum mating face.
- Do not insert screwdriver, or oil pan flange will be damaged.
b. Slide Tool by tapping on the side of the Tool with a hammer.
Installation
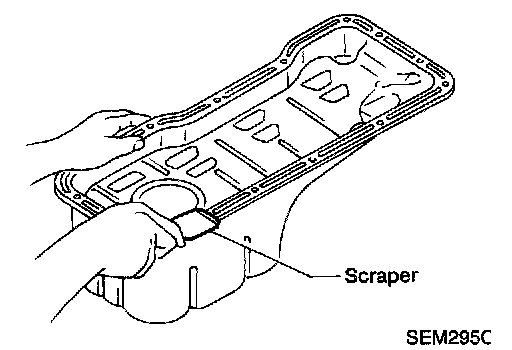
1. Use a scraper to remove old liquid gasket from mating surface of oil pan.
- Also remove old liquid gasket from mating surface of cylinder block.
2. Apply a continuous bead of liquid gasket to mating surface of oil pan.
- Use Nissan Genuine RTV silicone sealant part no. 999MP-A7007 or equivalent.
- Apply to groove on mating surface.
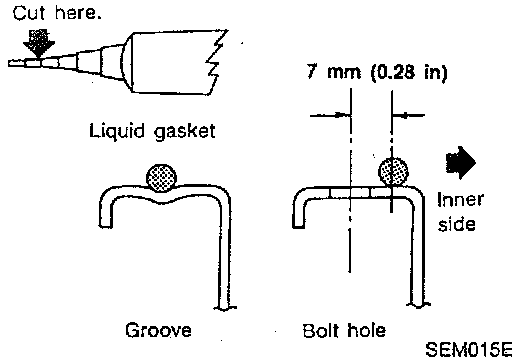
- Allow 7 mm (0.28 inch) clearance around bolt holes.
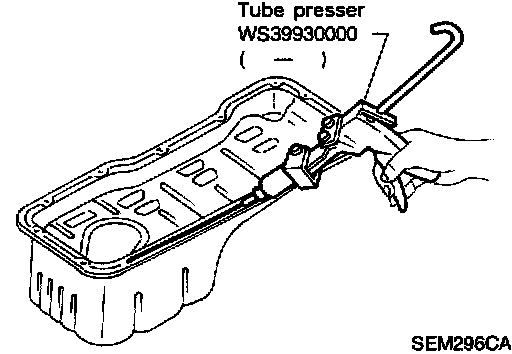
- Be sure liquid gasket diameter is 3.5 to 4.5 mm (0.138 to 0.177 inch).
- Attaching should be done within 5 minutes after coating.
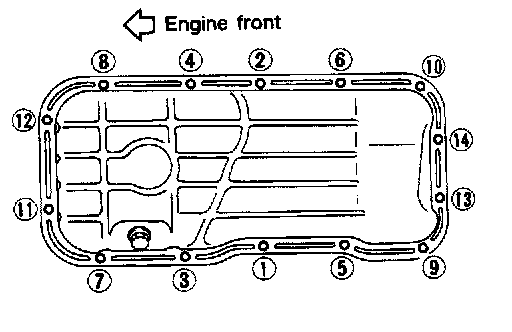
3. Install oil pan.
- Tighten oil pan nuts and bolts in the numerical order.
- Wait at least 30 minutes before refilling engine oil.
4. Install parts in reverse order of removal.