Rear
PAD REPLACEMENTWARNING: Clean brake pads with a vacuum dust collector to minimize the hazard of airborne materials.
CAUTION:
- When cylinder body is open, do not depress brake pedal, otherwise caliper piston will pop out.
- Be careful not to damage piston boot or get oil on rotor. Always replace shims when replacing pads.
- If shims are rusted or show peeling of rubber coat, replace them with new shims.
- It is not necessary to remove connecting bolt except for disassembly or replacement of caliper assembly. In this case, suspend cylinder body with wire so as not to stretch brake hose
- Carefully monitor brake fluid level because brake fluid will return to reservoir when pushing back piston.
- Burnish the brake contact surfaces after refinishing or replacing drums or rotors, after replacing pads or linings, or if a soft pedal occurs at very low mileage.
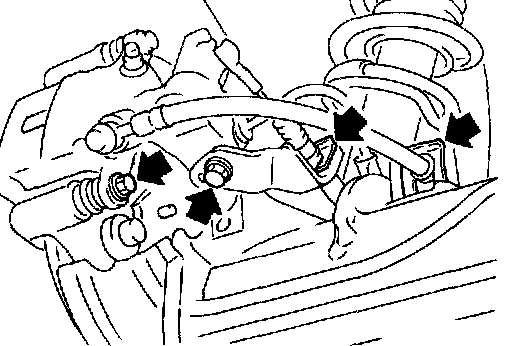
1. Remove master cylinder reservoir cap.
2. Remove brake cable lock spring.
3. Remove cable guide from caliper assembly.
4. Disconnect cable.
5. Remove lock spring from brake hose. Then remove brake hose from bracket.
6. Remove lower pin bolt.
Rear Disc Pad Assembly:
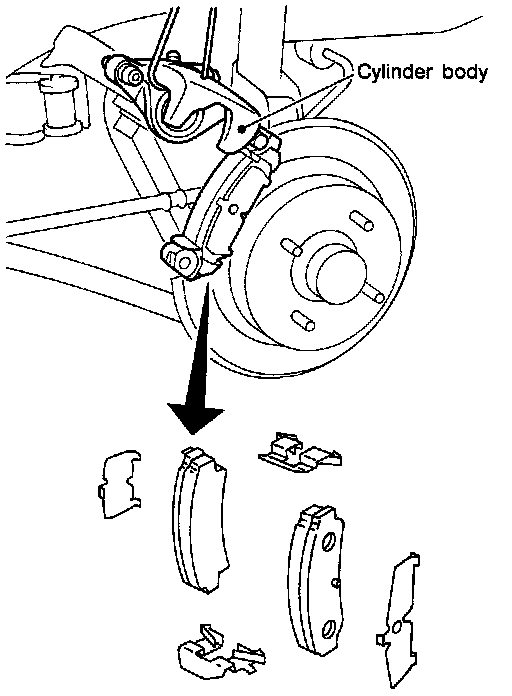
7. Open cylinder body upward. Then remove pad retainers, and inner and outer shims.
Standard pad thickness: 10 mm (0.39 inch)
Pad wear limit: 1.5 mm (0.059 inch)
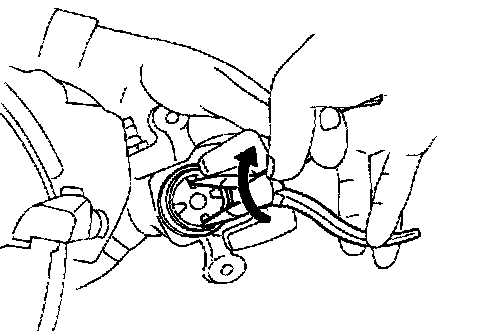
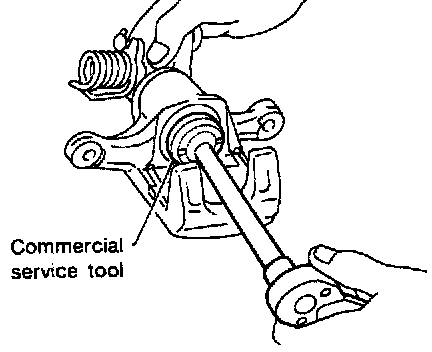
8. When installing new pads, push piston into cylinder body by turning piston clockwise.
Carefully monitor brake fluid level because brake fluid will return to reservoir when pushing back piston.
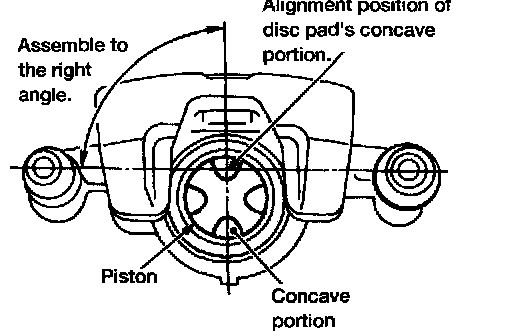
9. Adjust the piston to the right angle as shown in the figure.
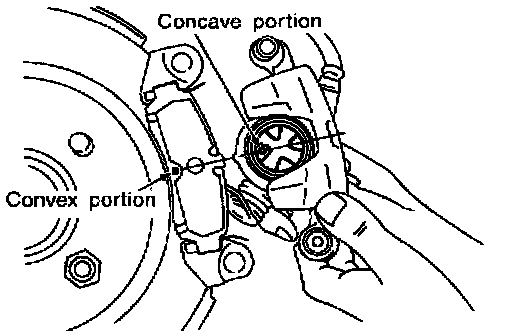
10. As shown in the figure, align the piston's concave portion to the pad's convex portion, then install the cylinder body to the torque member.