Control Arm: Service and Repair
REMOVAL AND INSTALLATION1. Remove wheel bearing lock nut.
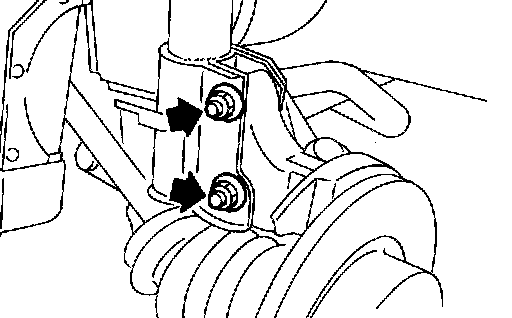
2. Remove strut lower mounting bolts.
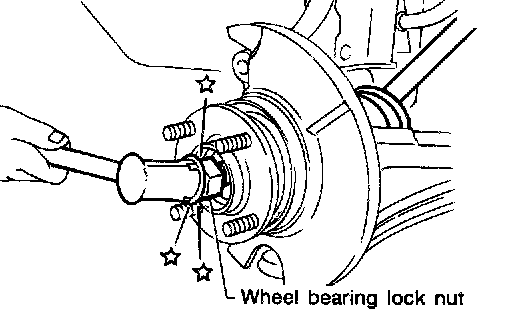
3. Separate drive shaft from knuckle by lightly tapping it. If it is hard to remove, use a puller.
- Cover boots with shop towel to prevent damage to them when removing drive shaft.
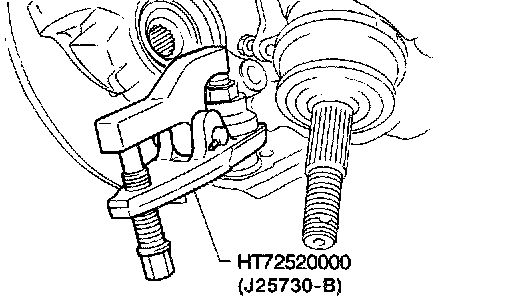
4. Separate lower ball joint stud from knuckle with Tool.
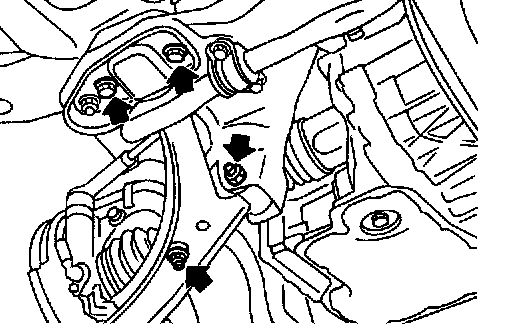
5. Remove bolts and nuts as shown.
6. During installation, final tightening must be carried out at curb weight with tires on the ground.
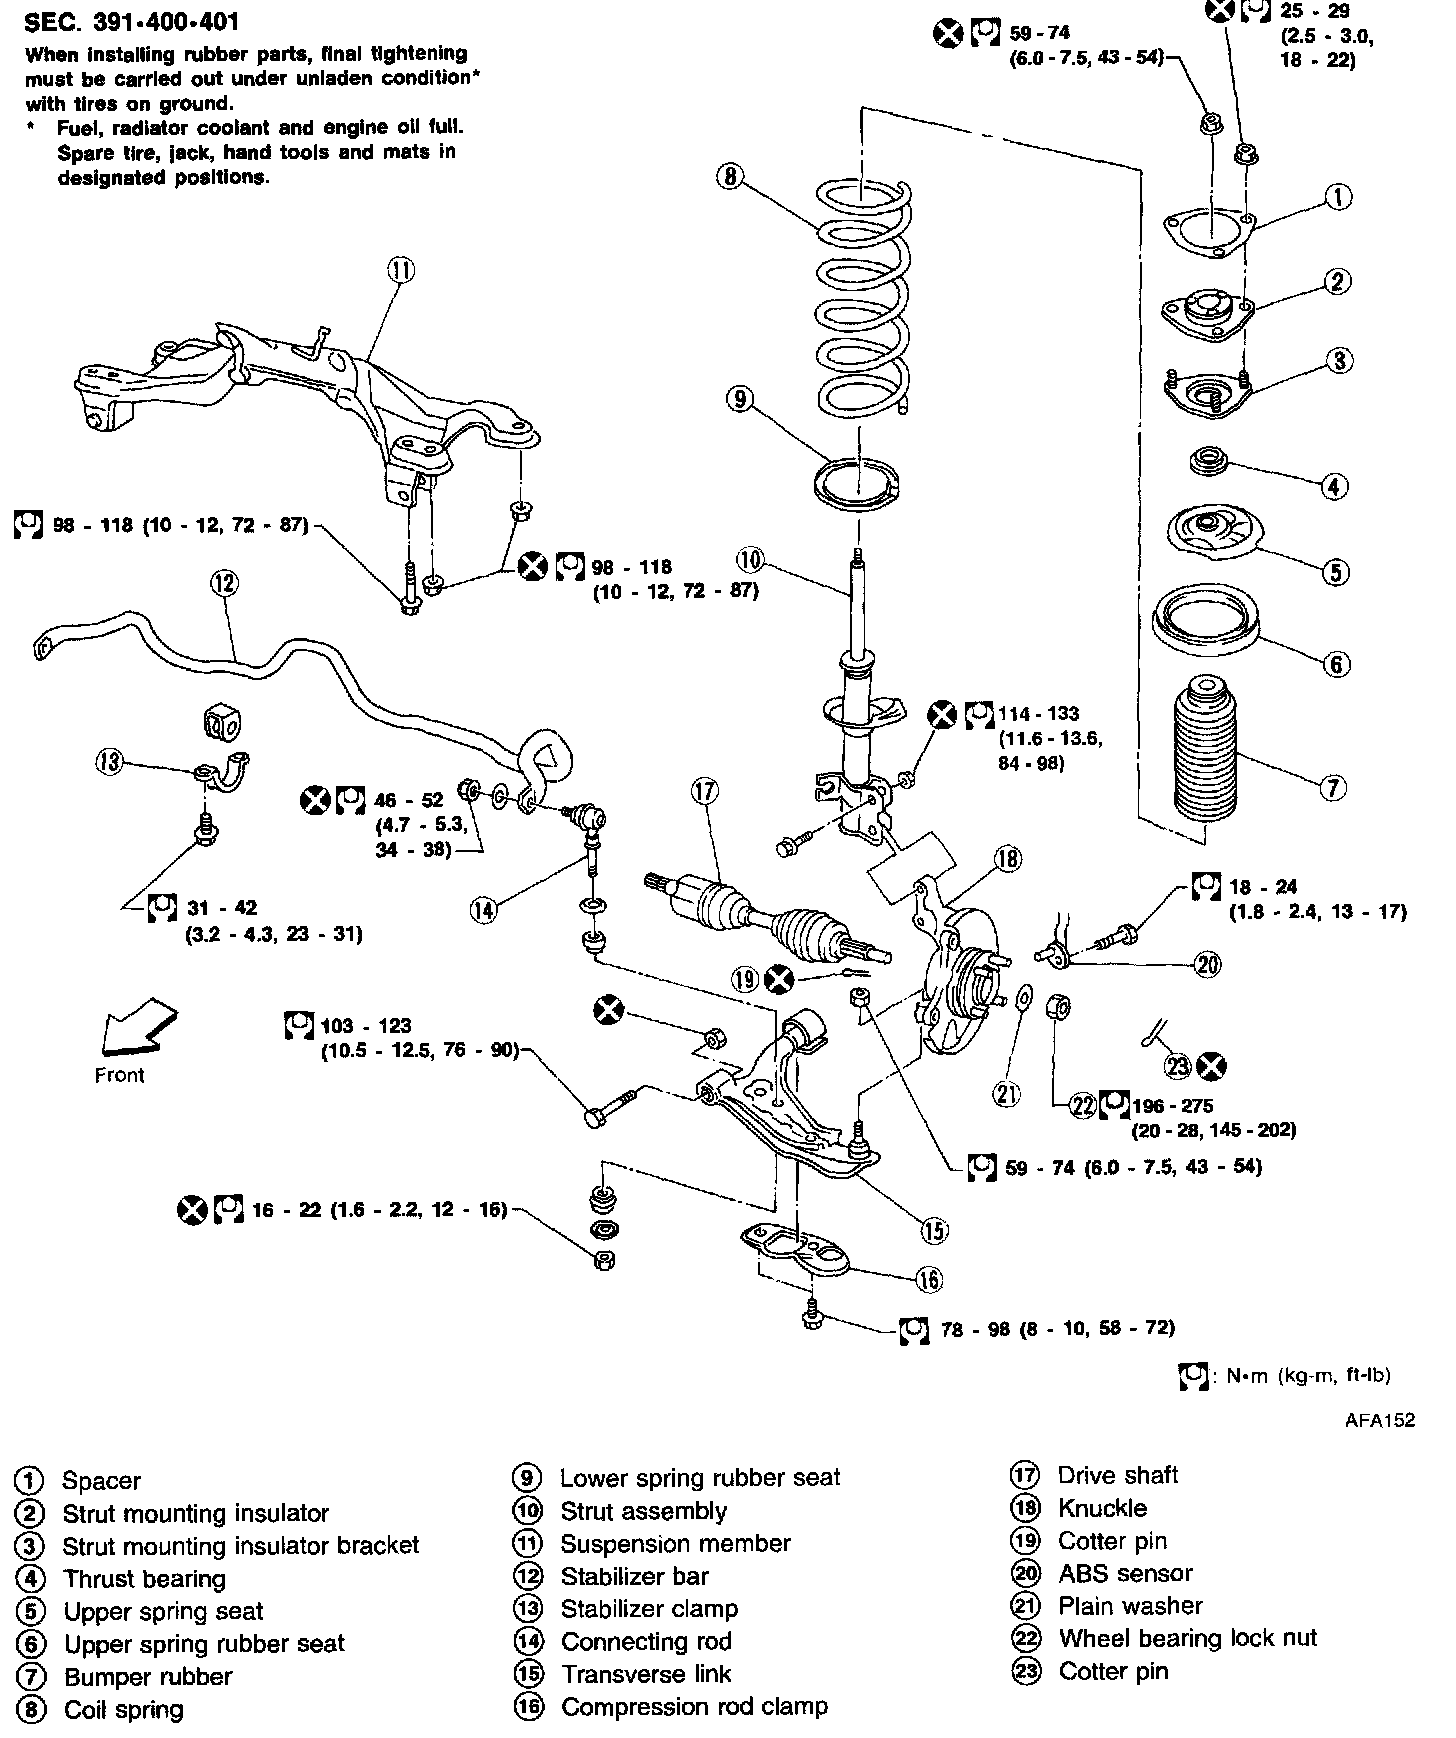
Tightening torque
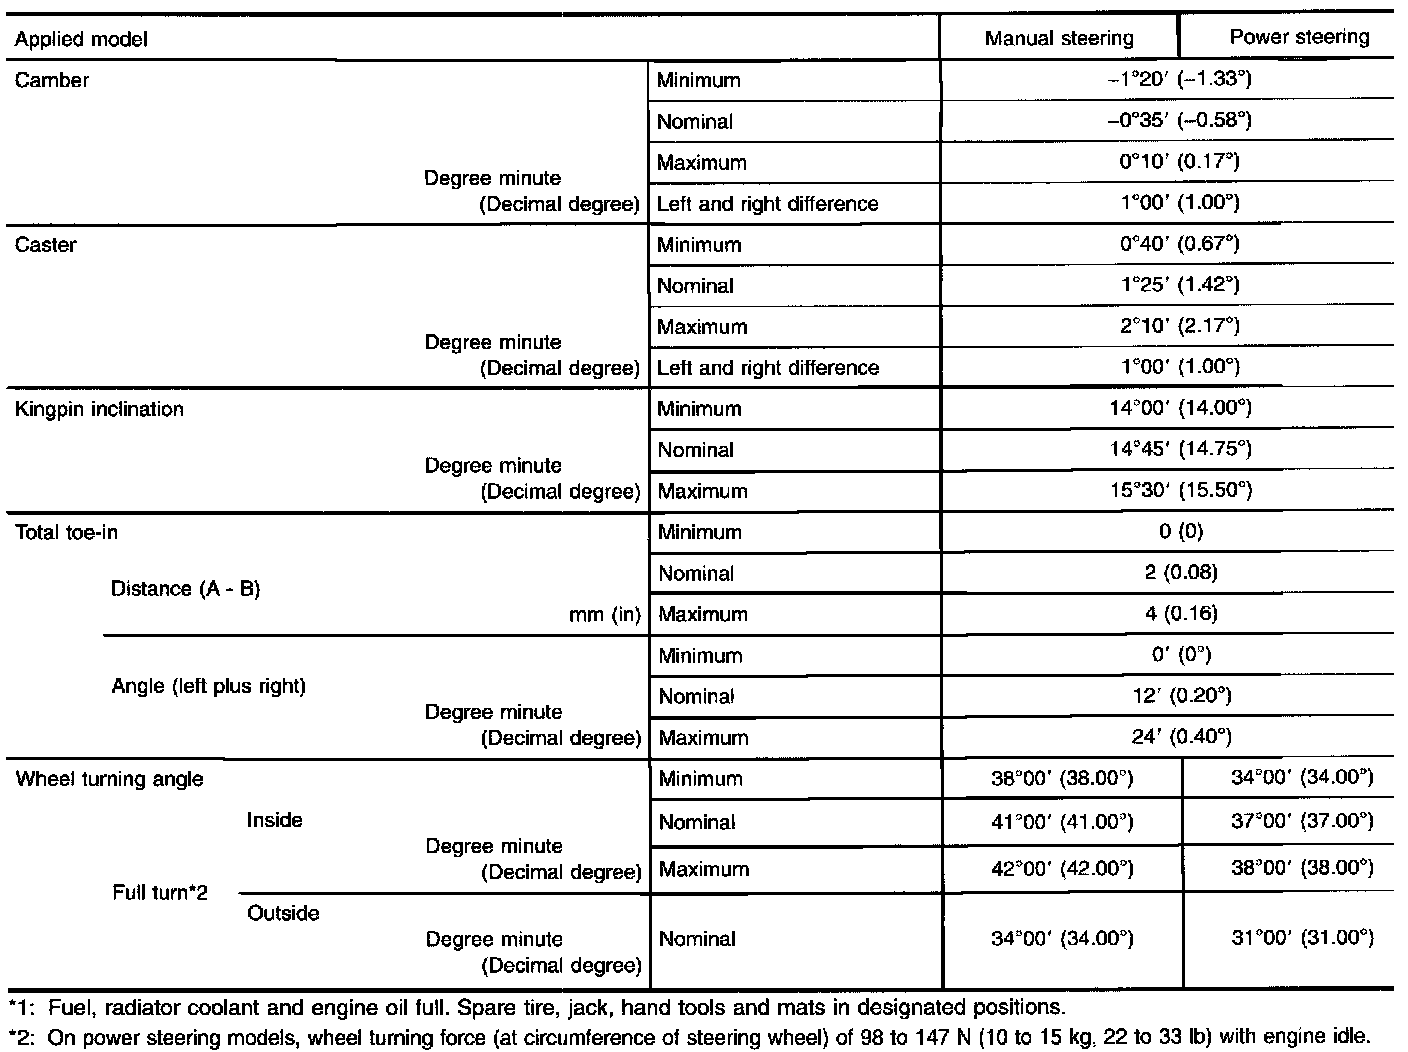
7. After installation, check wheel alignment.
INSPECTION
- Check transverse link for damage, cracks and deformation. Replace if necessary.
- Check rubber bushing for damage, cracks and deformation. Replace transverse link if necessary.
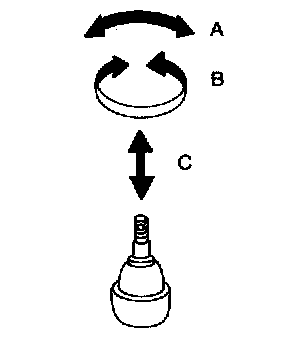
- Check ball joint for play. Replace transverse link assembly if any of the following exists:
- Ball stud is worn.
- Joint is hard to swing.
- Play in axial direction is excessive.
Before checking, turn ball joint at least 10 revolutions so that ball joint is properly broken in.
Swinging force "A": (measuring point: cotter pin hole of ball stud)
7.8 - 57.9 Nm (0.8 - 5.9 kg, 1.8 - 13.0 lbs.)
Turning torque "B":
0.5 - 3.4 Nm (5 - 35 kg-cm, 4.3 - 30.4 inch lbs.)
Vertical end play "C":
0 mm (0 inch)
- Check dust cover for damage. Replace it and cover clamp if necessary.