A - PNC P8141
SERVICE PROCEDURE A - PNC P8141 (verify PNC in SERVICE COMM)Removal
NOTE:
Be sure that the ignition is OFF and the parking brake is set.
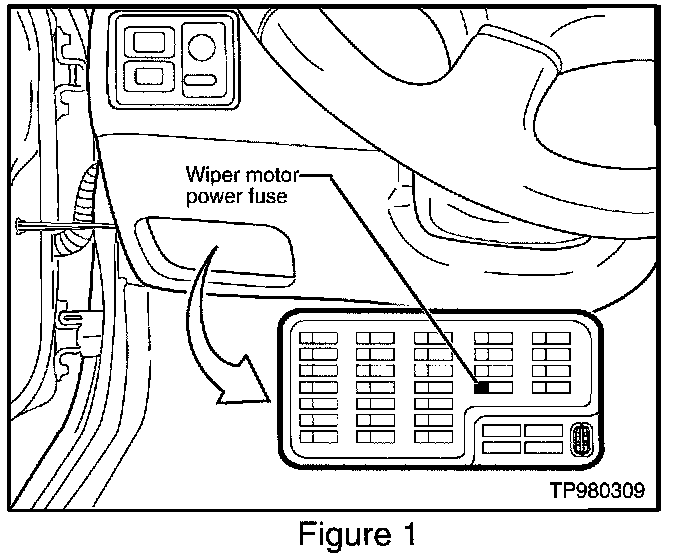
A1. Disconnect power to the wiper motor to prevent accidental cycling of the wiper arms by removing the yellow (20A) fuse at position # 19 in the fuse block on the lower driver's side dash panel (see Figure 1).
A2. Turn the ignition to the "ON" position. Verify that the power to the wiper motor is off by turning the wiper switch on. The wipers should not operate.
A3. Turn the ignition switch "OFF".
A4. Open hood and set the support rod in place.
A5. Remove the wiper arm bolt cover caps from both wiper arms and both wiper arm nuts.
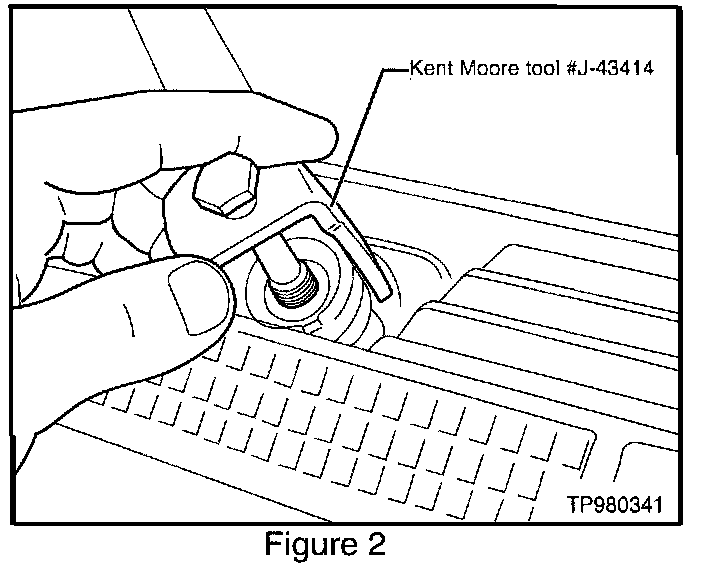
A6. Remove both wiper arms using Kent Moore tool # J-43414 (see Figure 2).
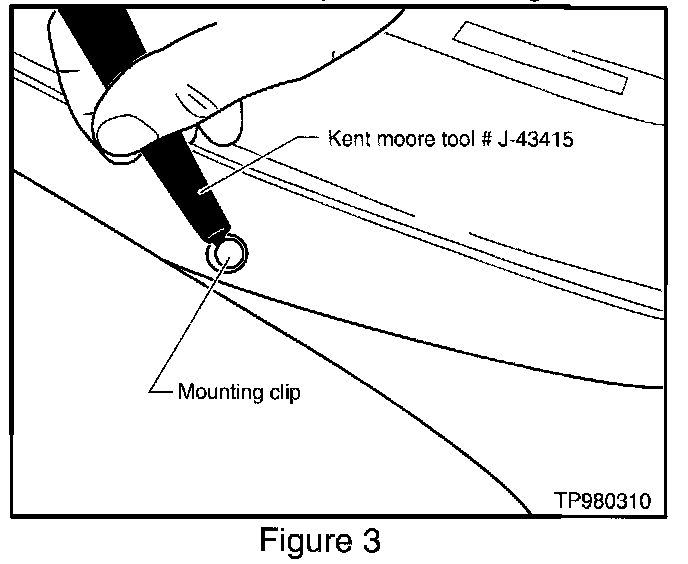
A7. Beginning at the outer edge of the driver's side, use Kent Moore tool # J-43415 as a lever to pry the mounting clips from the driver's and passenger's side cowl covers (see Figure 3).
CAUTION:
Be careful not to scratch the paint or damage the windshield.
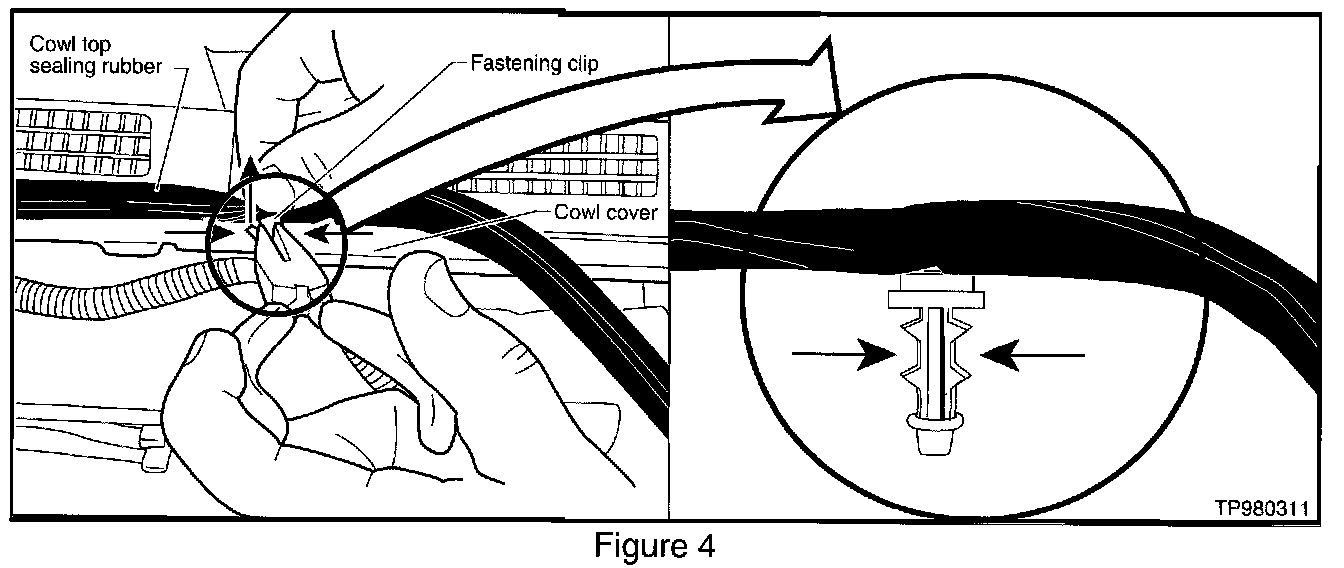
AB. Remove the cowl top sealing rubber strip. Use a pair of needle nose pliers to pinch and lift the clips which secure the rubber strip to the cowl cover (see Figure 4).
A9. Remove the cowl top covers.
CAUTION:
The passenger's side cowl cover is secured by 2 additional clips on the underside, at the leading edge, near the windshield. Use a door trim tool to assist in removal of the cover, do NOT pry on the windshield.
A10. Remove the black plastic cover located over the wiper motor on the passenger's side.
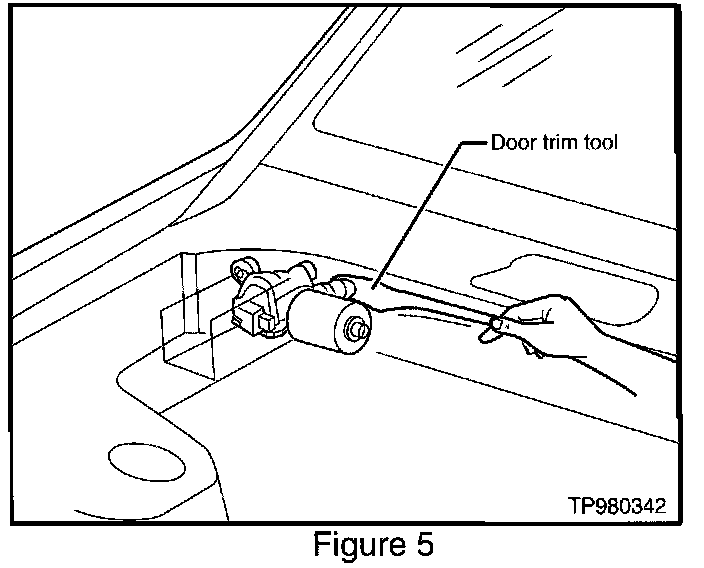
A11. Use a door trim remover tool to "pop" the passenger's side link assembly out of the ball joint located on the wiper motor (see Figure 5).
A12. Repeat step A 11 for the ball joint at the driver's side link assembly.
A13. Remove the three nuts which secure the center wiper pivot to the cowl.
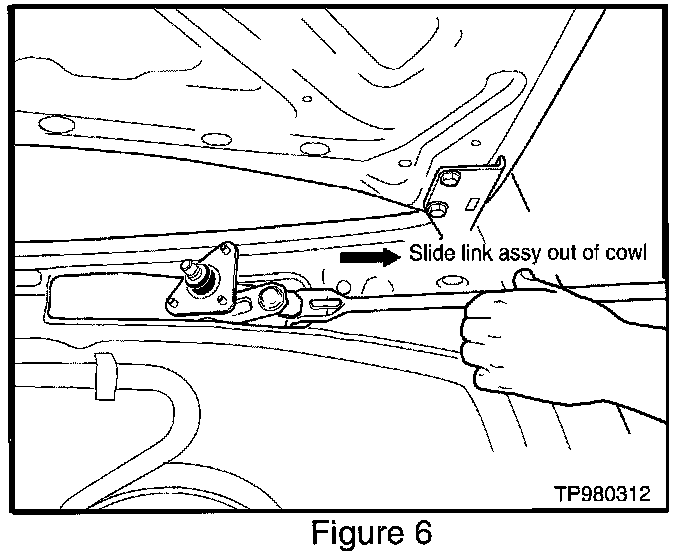
A14. Slide the detached link and center pivot assembly out through the driver's side duct (see Figure 6).
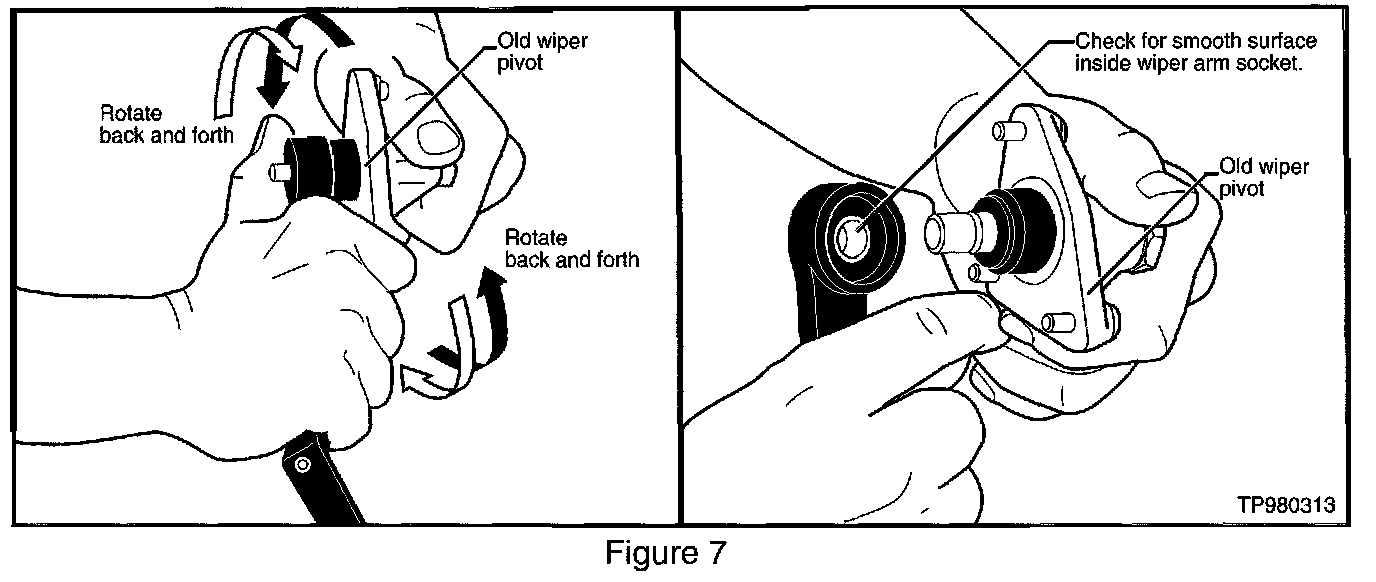
A15. While holding the old center pivot in one hand, fit the socket of one of the wiper arms onto the pivot shaft. Firmly hold the pivot arm to prevent the shaft from turning, then manually turn the wiper arm back and forth until the inside surface of the socket is smooth (see Figure 7). Wipe the inside of the wiper arm socket to remove any debris. Repeat the process for the other wiper arm and pivot.
NOTE:
The purpose of this action is to remove the spline marks in the wiper arm to ensure proper alignment of the arms during reassembly.
Link Installation
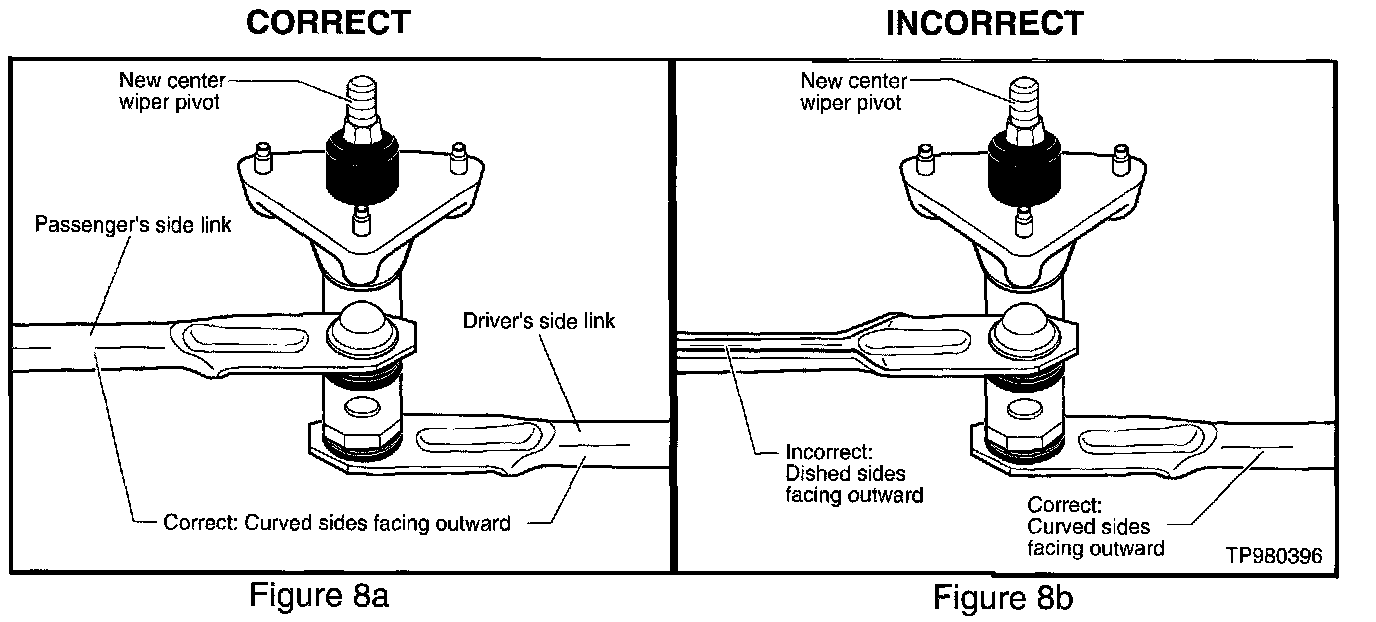
A16. Connect the end of the new driver's side link assembly (the longer of the two links) into the bottom socket of the new center pivot assembly (see Figure 8a).
A17. Connect the new passenger's side link assembly (the shorter link) to the top socket of the center pivot assembly (see Figure 8a).
NOTE:
Install the links with the curved side facing outwards, as shown in Figure 8a. Do not install them with the dished side facing outward, as shown in Fig. 8b.
A18. Slide the new assembly into the cowl and reinstall the 3 nuts of the center pivot. Torque Specification: 33.9 - 45.1 in-lb
A19. Inspect the wiper motor and passenger's side links to ensure that a small amount of grease is present. White lithium grease is suitable if needed.
A20. Connect (snap into place) the driver's side link to the driver's side pivot.
A21. Connect (snap into place) the passenger's side link to the socket on the wiper motor.
A22. Move each link in all directions to ensure proper installation.
Seal Installation and Reassembly
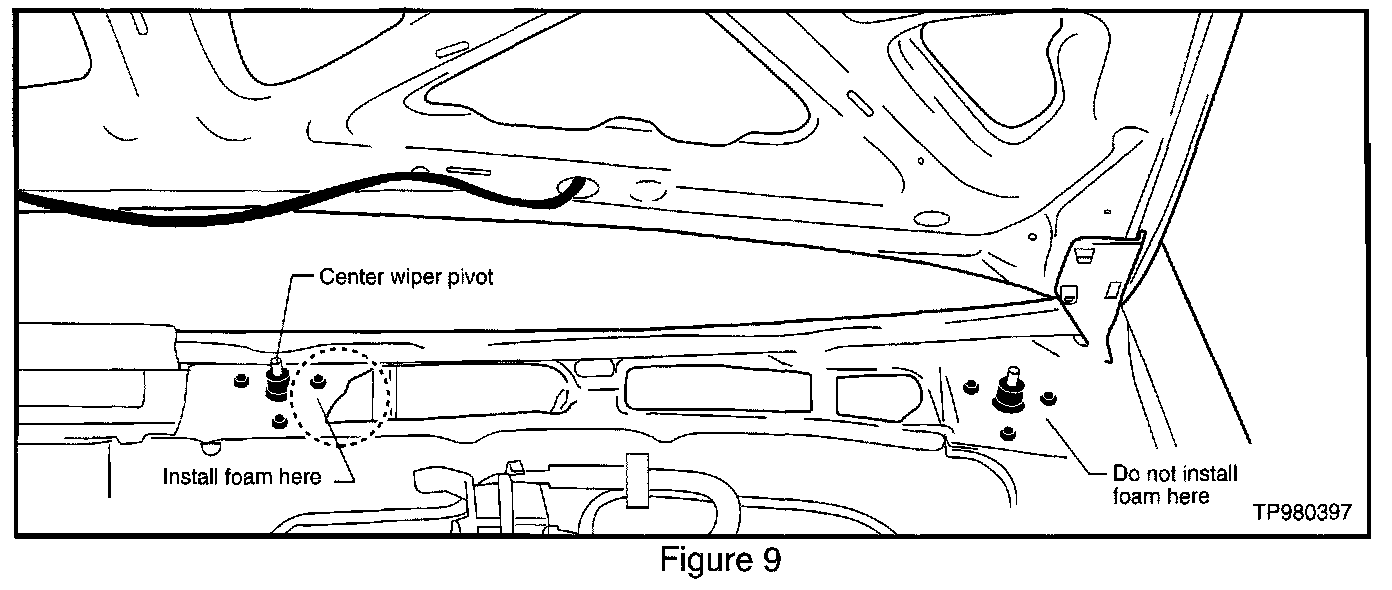
A23. Identify the area where the seal is to be applied. It is next to the center wiper pivot, as shown by the circled area in Figure 9.
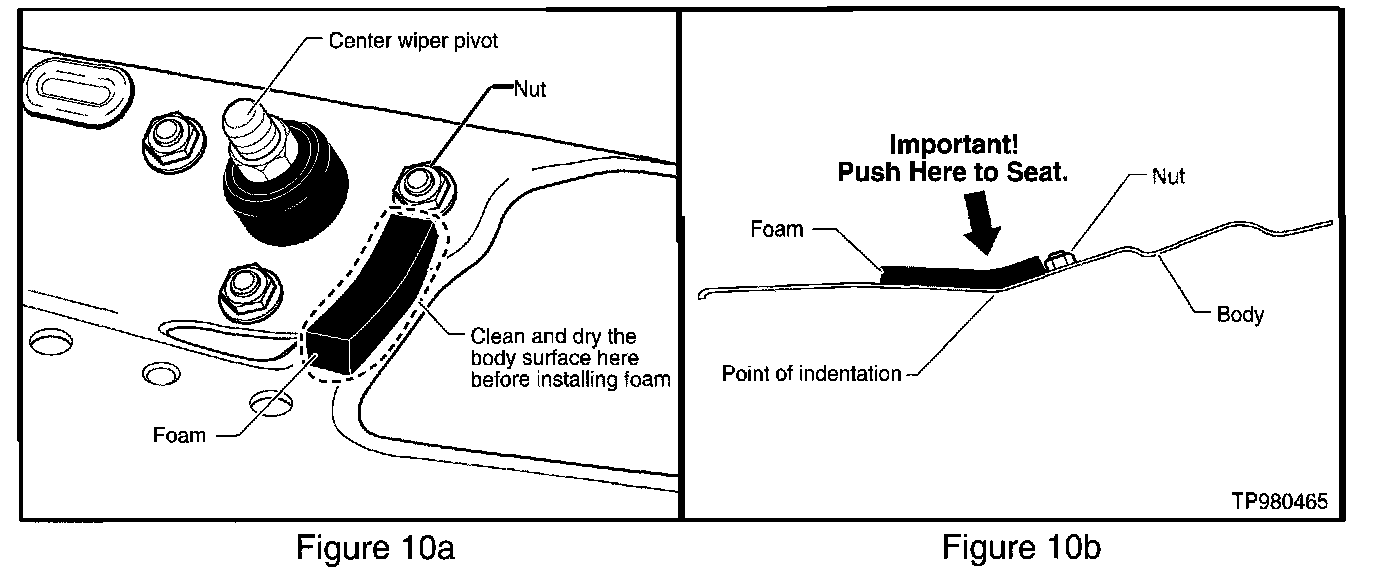
A24. Remove all moisture, dirt and debris from the seal area, shown within the circled area in Figure 10a. Clean the area, using isopropyl (rubbing) alcohol and a clean rag.
CAUTION:
Do NOT damage the painted surface.
A25. Install the new foam seal directly below the top driver's side nut of the center wiper pivot.
NOTE:
Press firmly down on the seal at the point of indentation on the cowl to ensure there is no gap between the seal and the vehicle body (see Figure 10b).
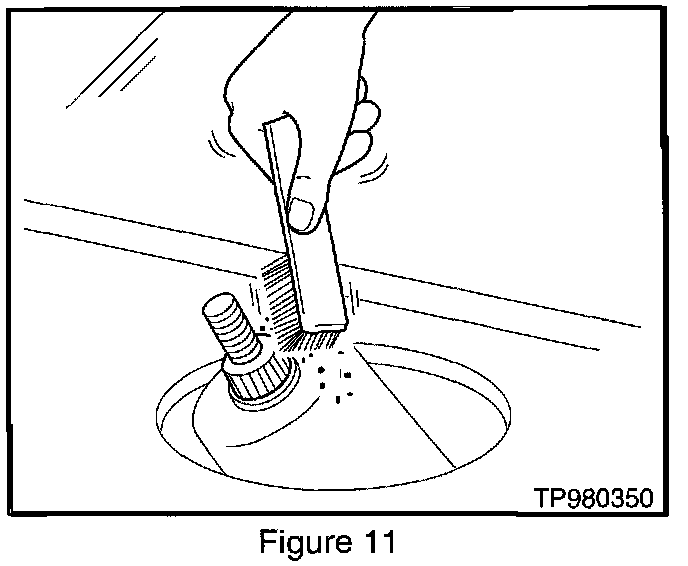
A26. Remove all debris from both wiper pivot shafts with a clean, dry wire brush to ensure the wiper arm fits onto the shaft securely (see Figure 11).
A27. Replace the yellow fuse (20A) into slot 19 in the fuse block.
A28. Turn the ignition to the "ON" position.
A29. Turn the wiper switch ON, then OFF to check operation of the wiper motor and ensure that the wiper pivots return to the correct park position.
NOTE:
The wiper links should operate normally and without unusual noise.
A30. Turn the ignition OFF.
A31. Reinstall the motor cover.
A32. Reinstall the driver's side cowl top cover and secure with the mounting clips. Repeat for passenger's side cowl top cover.
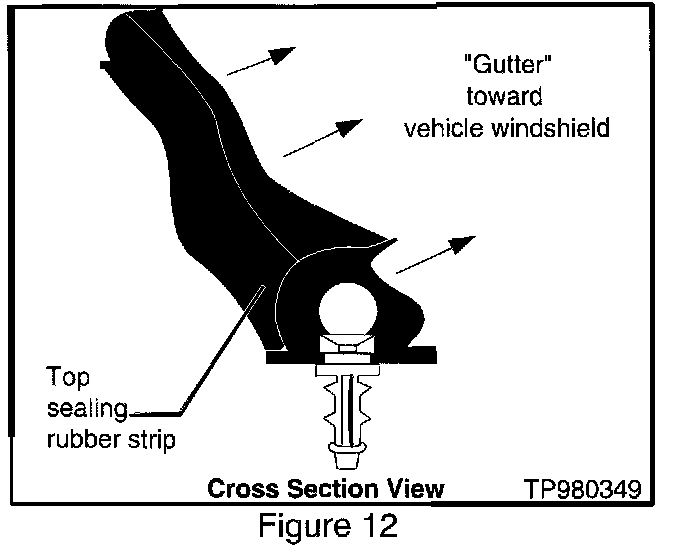
A33. Reinstall the clips of the cowl top sealing rubber strip to secure the strip to the cowl top cover.
NOTE:
Ensure that the "gutter" of the rubber strip is facing toward the windshield of the vehicle (see Figure 12).
A34. Reinstall the wiper arms and loosely secure them with the wiper arm nuts, but do not tighten the nuts at this time.
A35. Lift each wiper blade up and then gently set them down onto the glass surface.
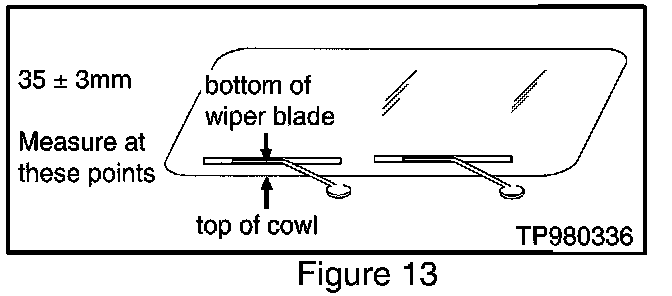
A36. Measure the distance from the point at which the top cowl cover meets the windshield glass to the point where the wiper arm connects to the wiper blade (see Figure 13).
Clearance Specification: 35 mm +/- 3 mm
A37. Tighten the wiper arm nuts. Torque Specification: 15 - 20 ft-lb
A38. Turn the ignition ON and operate the windshield washer. Allow wipers to operate through the full cycle. Once the wipers have stopped, turn the ignition OFF.
A39. Confirm that the wiper blades do not strike the bottom of the windshield at the cowl cover.
A40. Reinstall the wiper arm bolt cover caps and close the hood.
Quality Assurance Checklist
Visually inspect for:
^ Proper wiper alignment
^ Proper cowl cover installation
^ No chips or scratches on the windshield glass or paint caused by this procedure
^ All parts secured