Front
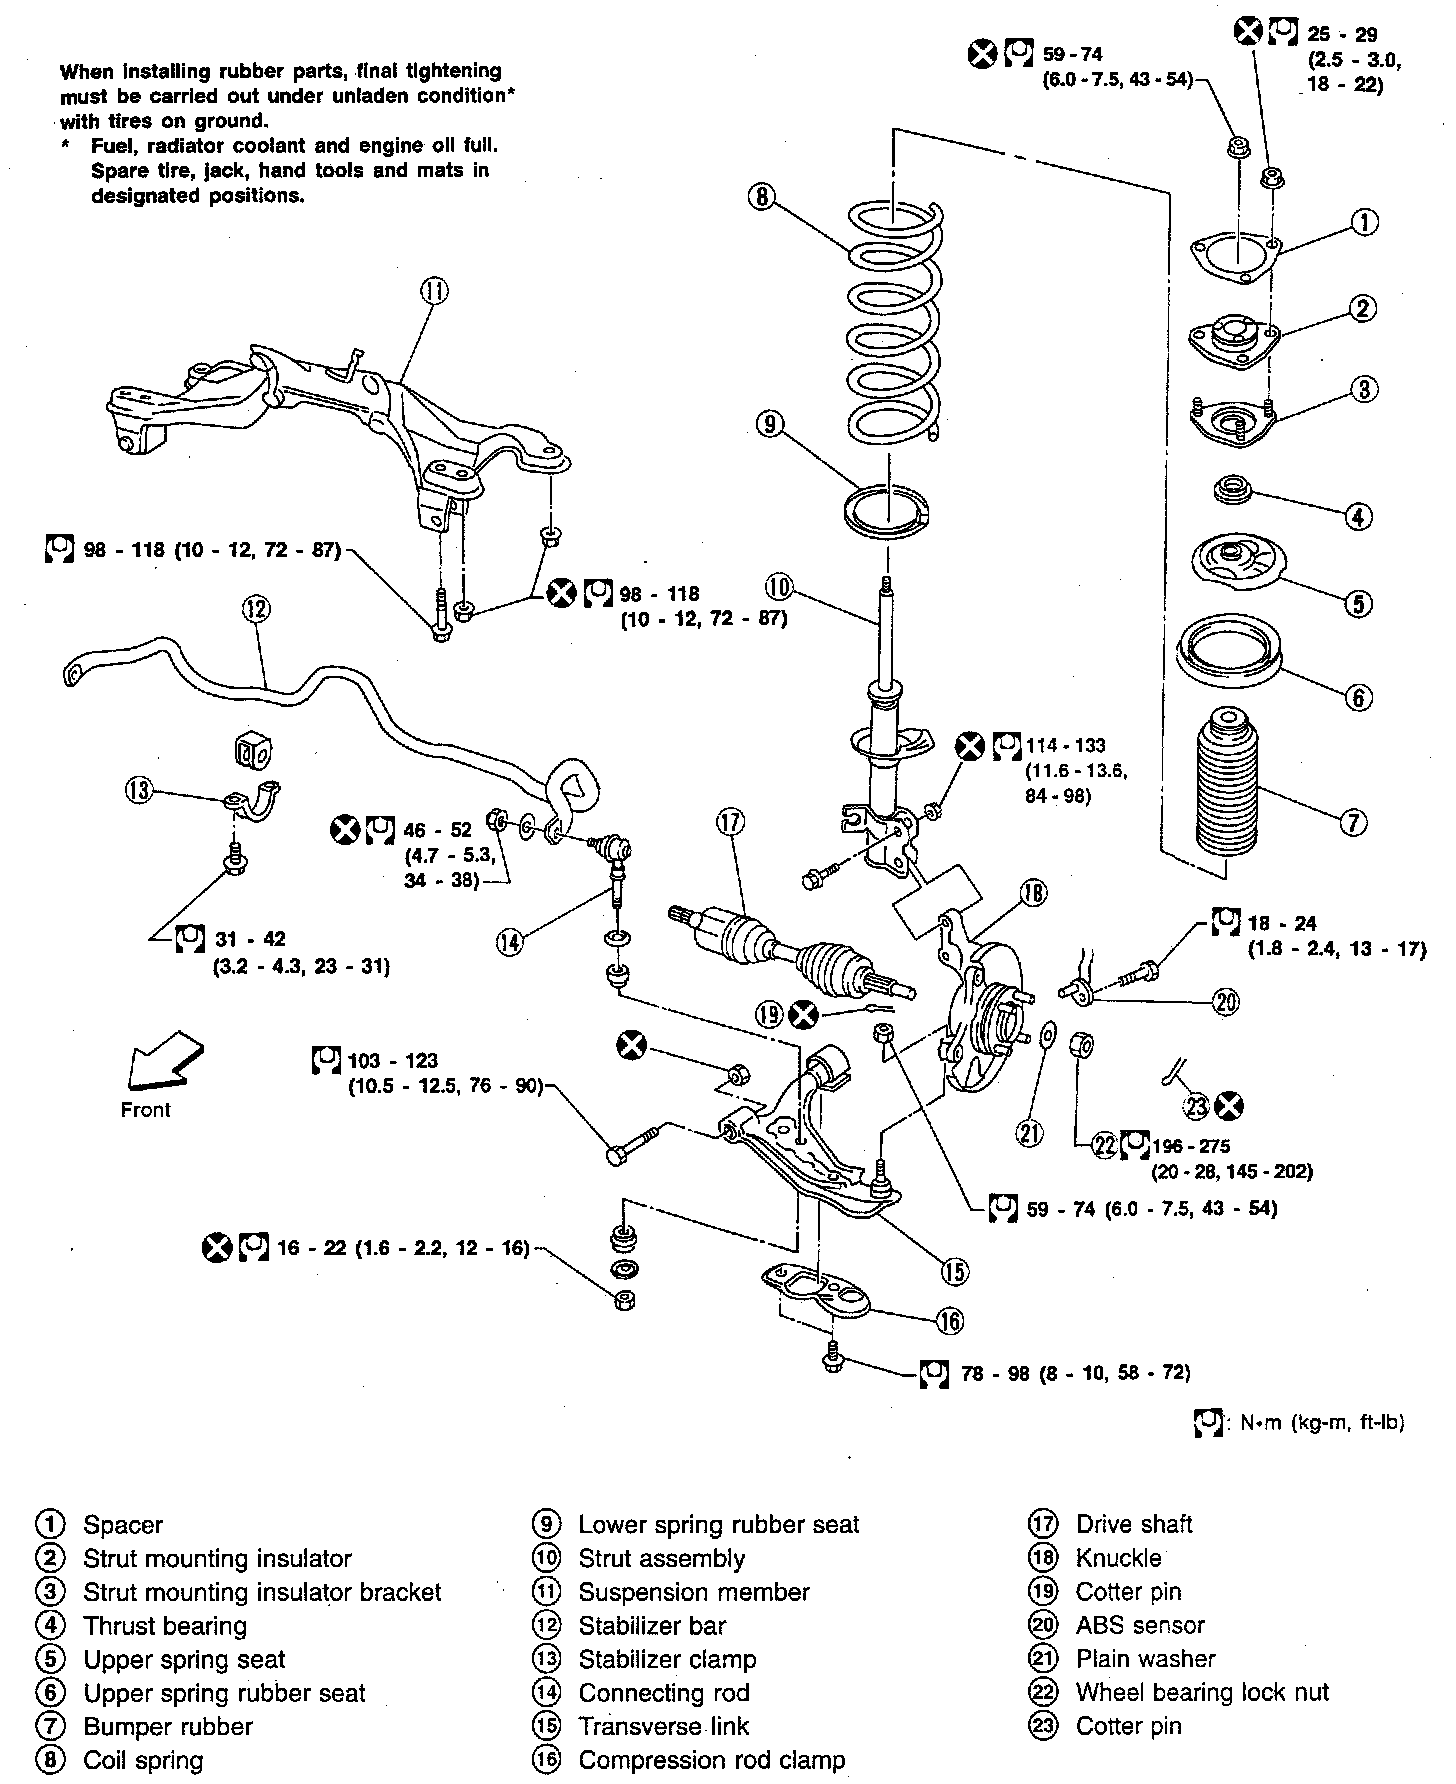
COIL SPRING AND STRUT ASSEMBLY
REMOVAL AND INSTALLATION
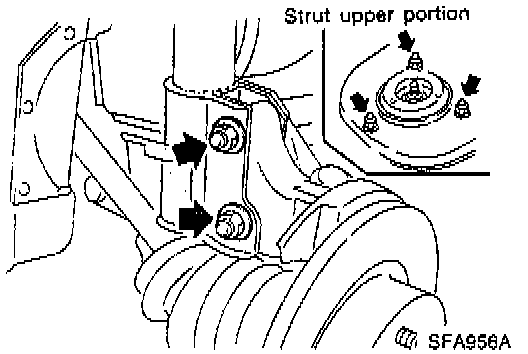
^ Remove strut assembly fixing bolts and nuts (to hood ledge).
WARNING:
Do not remove piston rod lock nut on vehicle.
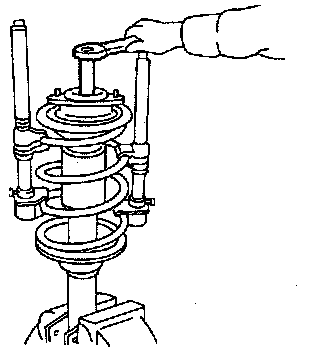
DISASSEMBLY
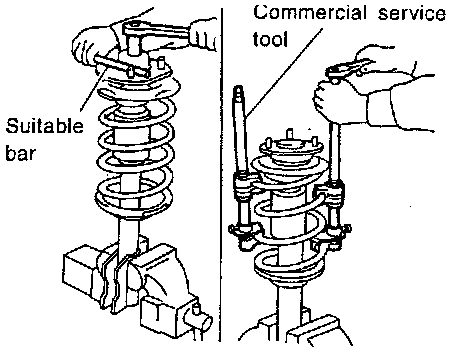
1. Set strut assembly on vise with strut attachment tool No. ST35652000, or equivalent, then loosen piston rod lock nut.
WARNING:
Do not remove piston rod lock nut at this time.
2. Compress spring with spring compression tool No. HT717800, or equivalent, so that the strut mounting insulator can be turned by hand.
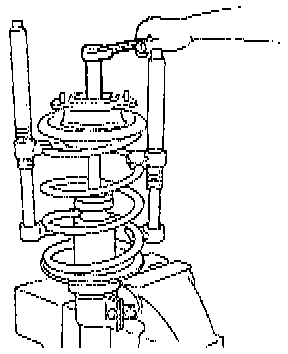
3. Remove piston rod lock nut.
INSPECTION
Strut Assembly
^ Check both compression and extension for smooth operation through a full stroke.
^ Check for oil leakage occurring on welded or gland packing portion.
^ Check piston rod for cracks, deformation and other damage.
^ Replace if necessary.
Strut Mounting Insulator
^ Check cemented rubber-to-metal portion for separation and cracks.
^ Check rubber parts for deterioration.
Thrust Bearing
^ Check thrust bearing parts for abnormal noise or excessive rattle in axial direction.
^ Replace if necessary.
Coil Spring And Insulator
^ Check for cracks, deformation and other damage. Replace if necessary.
ASSEMBLY
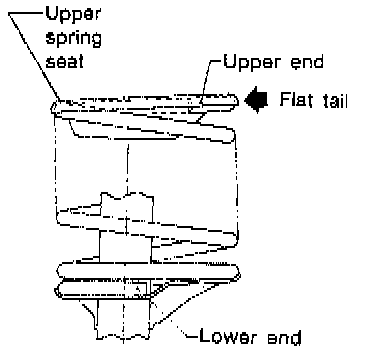
^ When installing coil spring on strut, it must be positioned as shown in the figure.
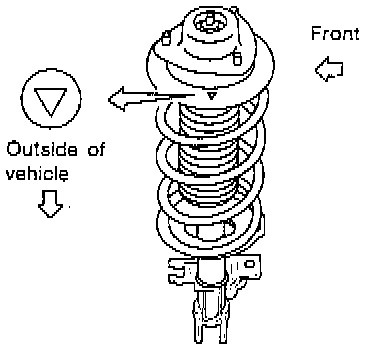
^ Install upper spring seat with alignment mark facing outside of vehicle, in line with strut-to-knuckle attachment points.
^ Replace strut lower mounting nuts.
^ When installing strut-to-knuckle, be sure to hold bolts and tighten nuts.
Torque to 114 - 133 Nm (84 - 98 ft. lbs.)