Booster Replacement
REMOVAL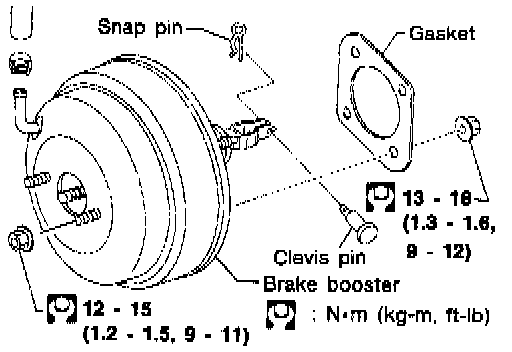
Refer to the illustration when servicing.
CAUTION:
- Be careful not to splash brake fluid on painted areas; it may cause paint damage. If brake fluid is splashed on painted areas, wash it away with water immediately.
- Be careful not to deform or bend brake tubes during removal of booster.
INSPECTION
Output Rod Length Check
Testing For Vacuum At Booster:
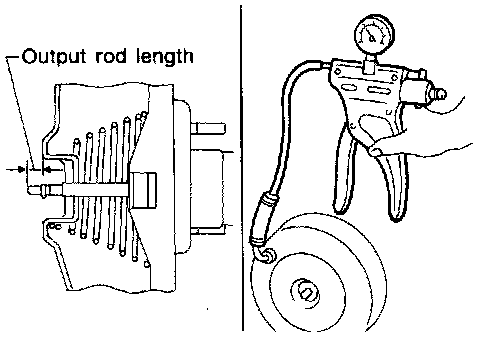
1. Apply vacuum of -66.7 kPa (-500 mmHg, -19.69 inHg) to brake booster with a hand vacuum pump.
2. Check output rod length.
Specified length:
Models M195, S205 and C205: 10.275 - 10.525 mm (0.4045 - 0.4144 inch)
INSTALLATION
CAUTION:
- Be careful not to deform or bend brake tubes during installation of booster.
- Replace clevis pin if damaged.
- Refill with new brake fluid DOT 3.
- Never reuse drained brake fluid.
- Take care not to damage brake booster mounting bolt thread when installing. Due to the narrow angle of installation, the threads can be damaged by the dash panel.
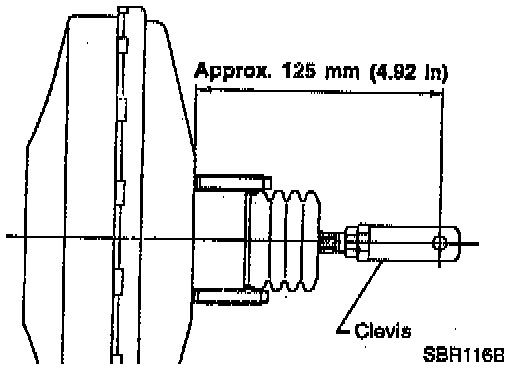
1. Before fitting booster, temporarily adjust clevis to dimension shown. (Does not apply to models with ABS).
2. Fit booster, then secure mounting nuts (brake pedal bracket to brake booster) lightly.
3. Connect brake pedal and booster input rod with clevis pin.
4. Secure mounting nuts to 13 - 16 Nm (9 - 12 ft. lbs.)
5. Install master cylinder.
6. Adjust brake pedal height.
7. Bleed air. Refer to Brake Bleeding Procedure.