1996/1997 Sentra Tail Light Bulb Replace./Owners Manual Update
1996/1997 Sentra Tail Light Bulb Replacement and Owner's Manual Update ProceduresSupplied Parts:
Replacement Bulbs (2) P/N 26717-4B700, Owner's Manual Sticker (1)
NOTE:
Complete the entire procedure for stop lamp bulb removal and replacement for one side of the vehicle, then repeat all steps for the alternate side. The center high-mount stop light is not affected by this campaign.
Bulb Removal:
1. Open the trunk lid.
CAUTION:
If you are outdoors, to avoid injury, have an assistant ensure that the wind can't blow the trunk closed while the vehicle is being serviced.
2. Check the vehicle for a stiff fabric trunk liner installed over the tail lamps. (If the vehicle does not have a trunk liner covering the tail lamps, proceed to step 5.)
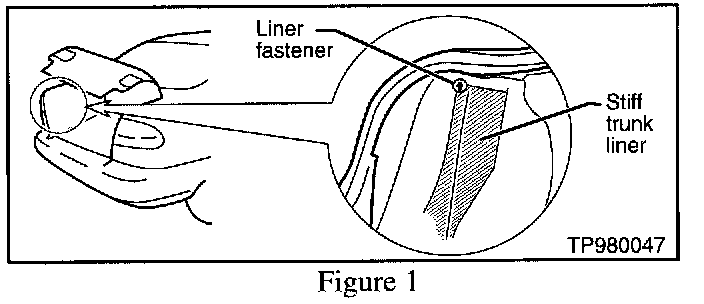
3. Inside the trunk, toward the rear of the vehicle, locate the small gray fasteners (about the size of a dime) which hold the trunk liner in place on both sides of the vehicle (see Figure 1).
4. Remove the fastener on the same side as the bulb being removed:
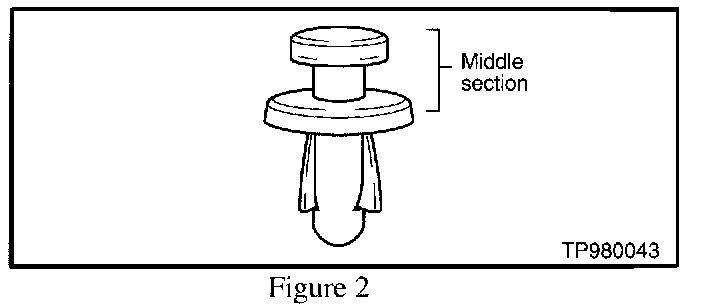
A. Turn the small middle section of the fastener counterclockwise (about 1/4 turn) while pulling out on the whole fastener, and remove the fastener (see Figure 2) Retain the fastener for re-use.
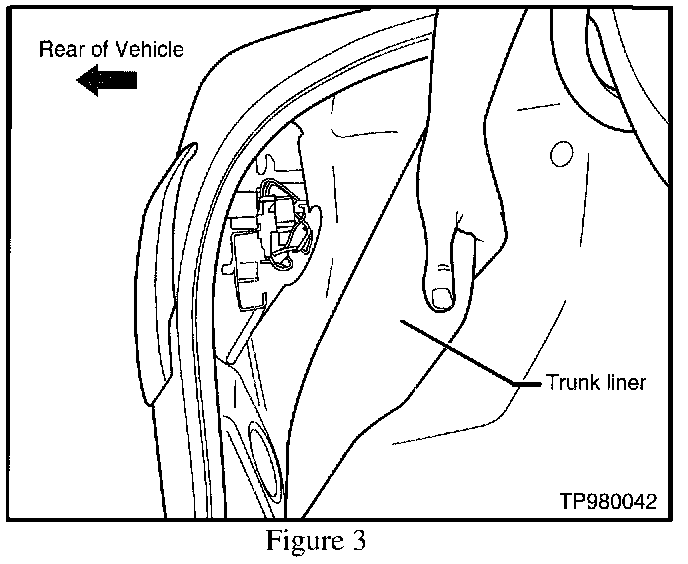
B. Carefully peel back the trunk liner to provide access to the tail light assembly (see Figure 3).
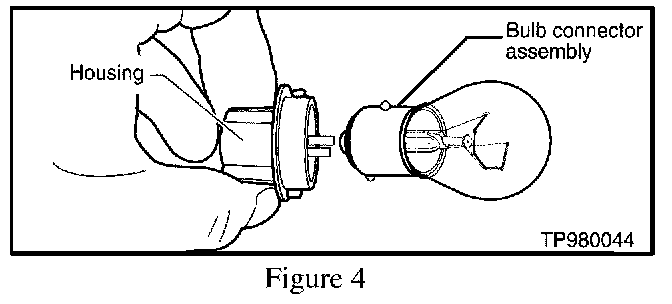
5. Remove the GRAY plastic bulb connector assembly (the one away from the center of the vehicle) by turning it counterclockwise until it stops (about 1/8 turn) and then carefully pull the bulb assembly out of the housing (see Figure 4).
6. CAUTION: To avoid being burned, make sure that the bulb is cool enough to touch before removing it from the assembly. Using a rag or towel to protect your hand, remove the bulb by pushing down on it and turning counterclockwise until it stops rotating (about 1/8 turn) and pops outward. The bulb will then lift out easily.
7. Discard the old bulb to prevent confusing it with the replacement one.
Bulb Replacement:
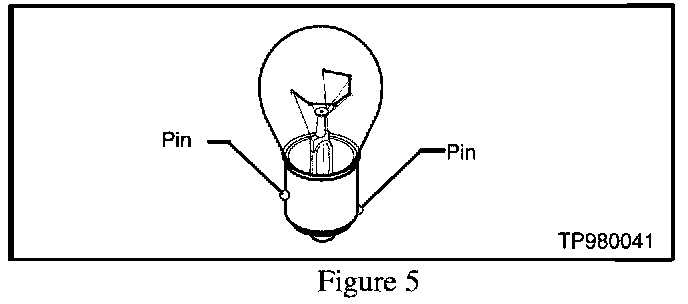
1. Align the replacement bulb pins with the slots in the socket. Notice that the pins have offset placement on the bulb (see Figure 5).
CAUTION:
Always use a rag or towel while installing the new bulb to protect your hand in the event the bulb breaks.
2. Push the bulb in firmly and turn it 1/8 turn clockwise to seat it.
CAUTION:
Don't force the bulb. If it won't turn, using the rag or towel, remove the bulb, check the pin alignment, then reinsert it into the socket.
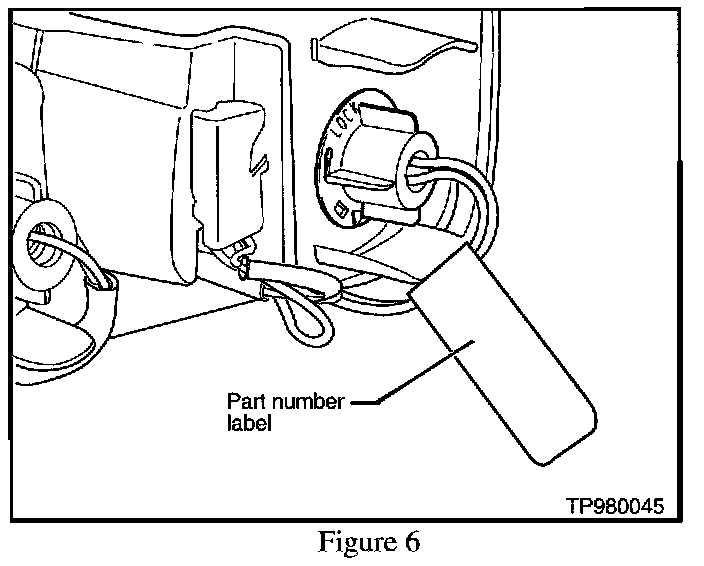
3. Place the part number label onto/over one of the wires at the base of the bulb socket (see Figure 6).
4. Insert the gray plastic bulb connector assembly into the housing (it will only go in one way) and turn it clockwise about 1/8 turn until it stops (see Figure 4).
NOTE:
If your vehicle did not have a trunk liner covering the tail lamp proceed to step 7.
5. Carefully replace the trunk liner and align the mounting holes for the fastener.
NOTE:
Remove the fastener middle section and separate the fastener into two pieces (see Figure 2).
6. Insert the fastener body into the mounting hole, then insert the center part of the fastener and push until it snaps in place. Turn the small middle section of the fastener about 1/4 turn clockwise to secure the fastener.
7. Repeat all steps for the opposite side rear tail light bulb removal and replacement.
Confirm Operation
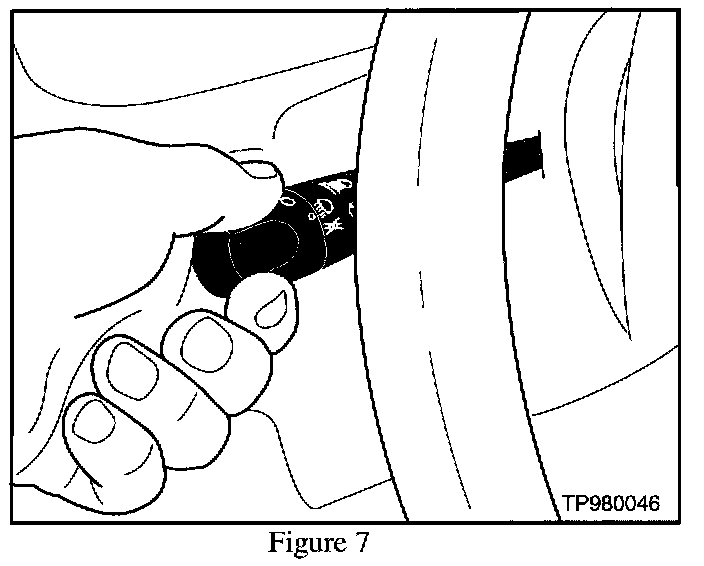
1. Check operation as follows: turn on vehicle headlamps and check that both rear tail lights are on, and that the brake lamps light when depressing the brake pedal.
NOTE:
Remember to turn off the head lamps after the check (Figure 7).
2. Close trunk lid.
3. Apply the light bulb part number update sticker to your owner's manual, page 7-26.