Removal
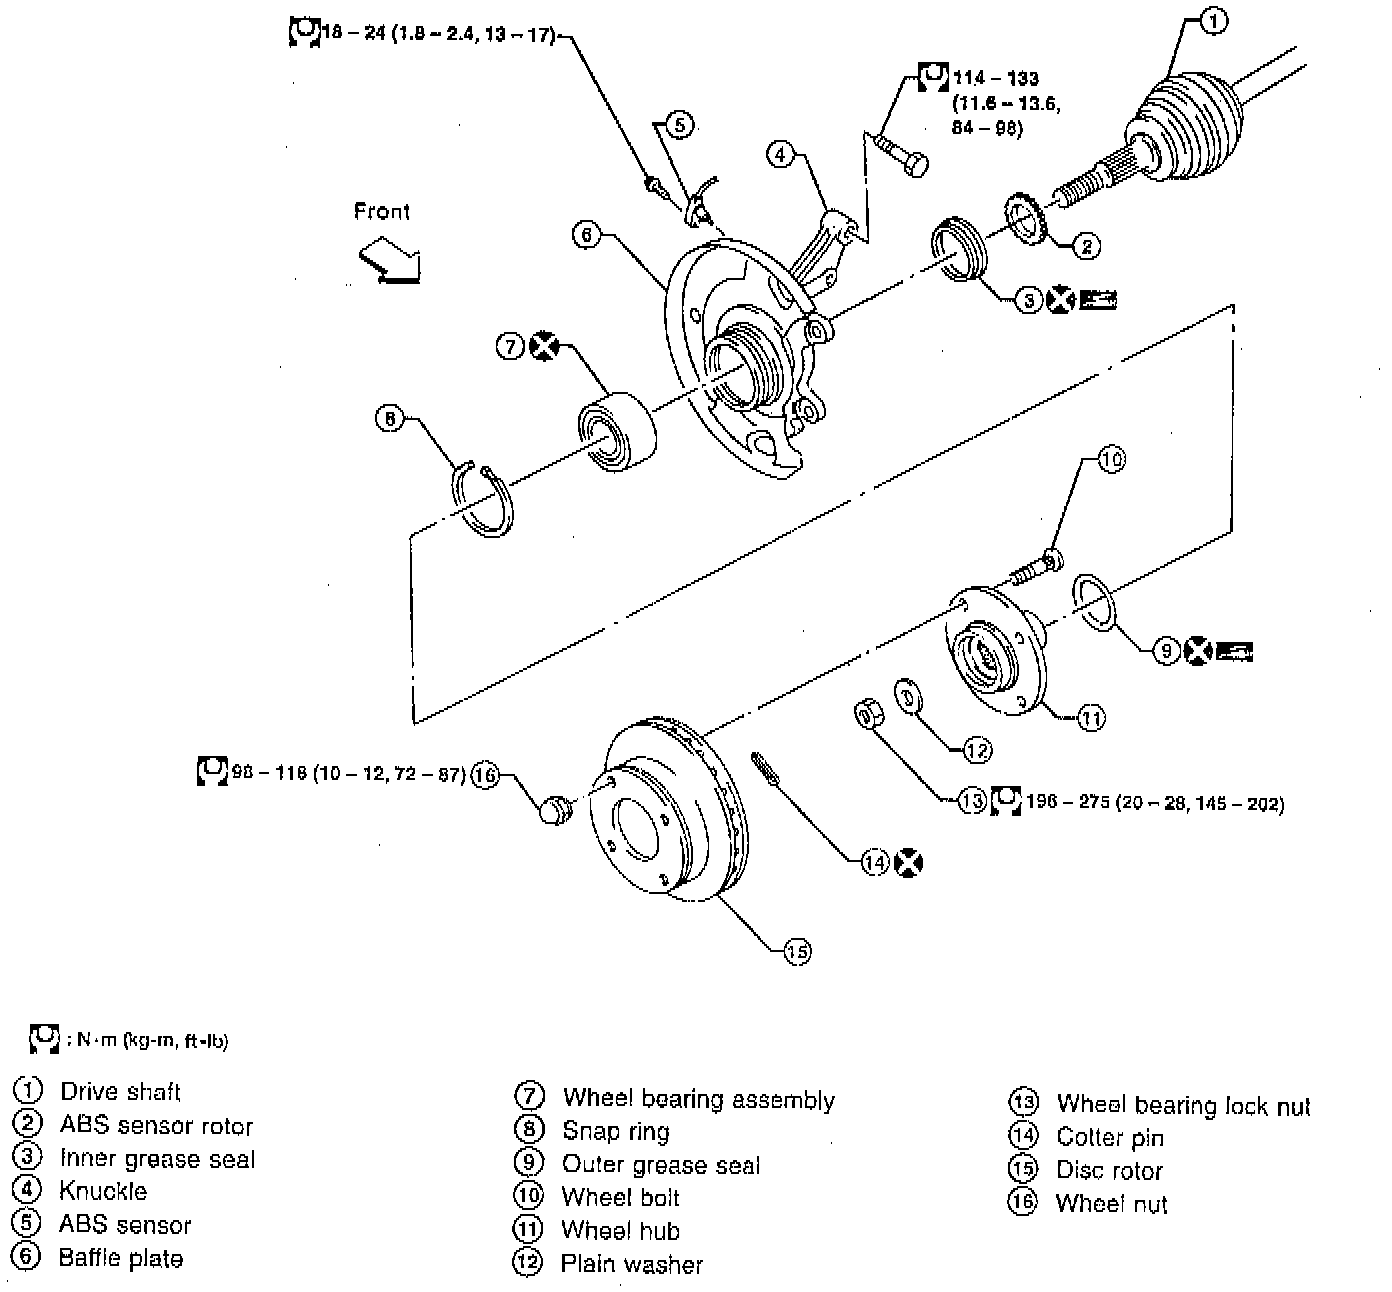
REMOVAL
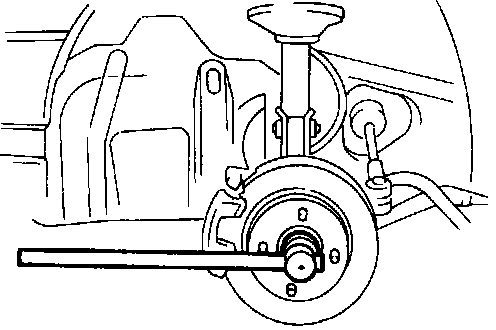
1. Remove wheel bearing lock nut. Tie rod does not need to be disconnected from steering knuckle.
CAUTION:
^ Suspend steering knuckle with wire so as not to stretch brake hose.
^ Do not pull or twist brake hose.
2. Remove clip and separate brake hose from strut.
3. Remove strut lower mounting bolts.
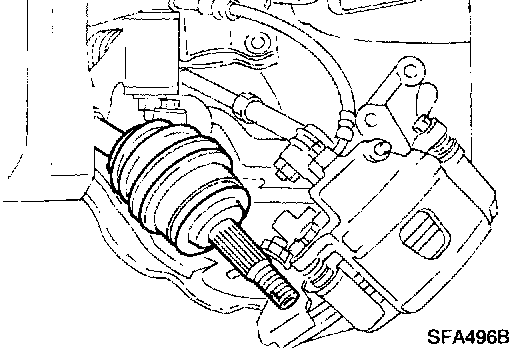
4. Separate drive shaft from steering knuckle by lightly tapping it. If it is hard to remove, use a puller. When removing drive shaft, cover boots with shop towel to prevent damage to them.
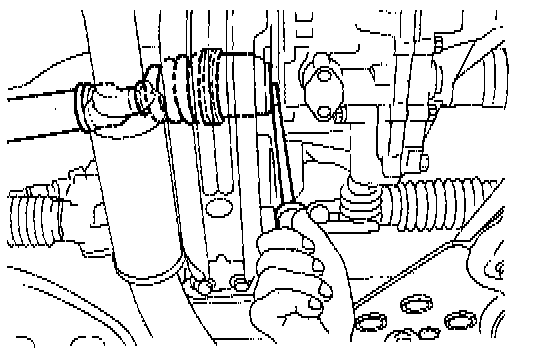
5. Remove right drive shaft from transaxle. Pry drive shaft from transaxle as shown.
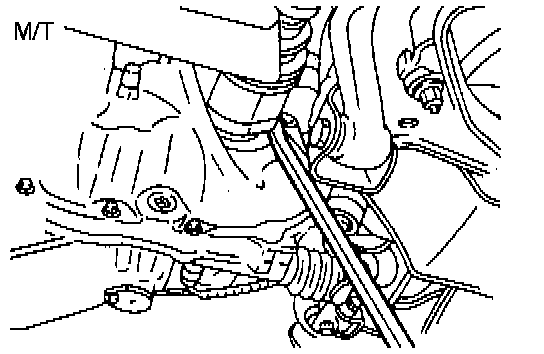
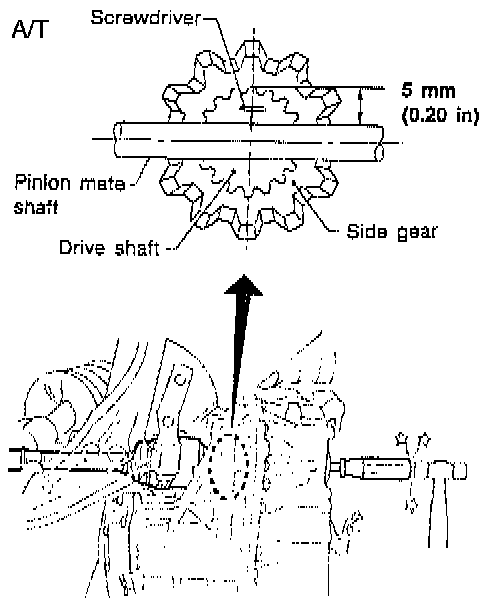
6. Remove left driveshaft from transaxle.
^ For M/T models, pry drive shaft from transaxle as shown.
^ For A/T models, insert screwdriver into transaxle opening for right drive shaft and strike with a hammer.
CAUTION: Be careful not to damage pinion mate shaft and side gear.
INSTALLATION
Transaxle Side
1. Drive a new oil seal to transaxle.
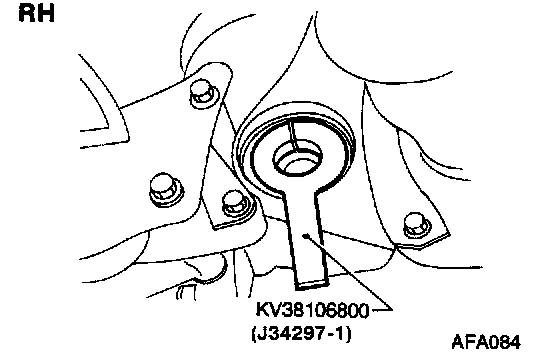
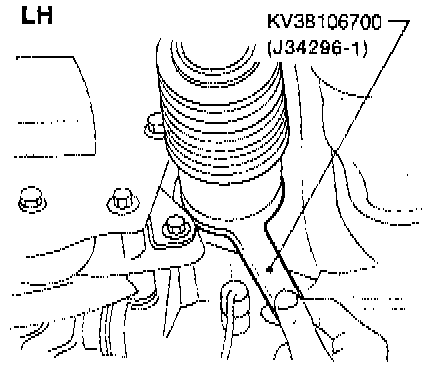
2. Set differential side oil seal protector tool No. KV38106800, or equivalent, along the inner circumference of oil seal.
3. Insert drive shaft into transaxle.
NOTE: Be sure to properly align the serrations and then withdraw differential side oil seal protector.
4. Push drive shaft, then press-fit circular clip on the drive shaft into circular clip groove of side gear.
5. After its insertion, try to pull the slide joint out of the transaxle by hand. If it pulls out, the circular clip is not properly meshed with the side gear.
Wheel Side
1. Install drive shaft into steering knuckle.
2. Tighten wheel bearing lock nut.
3. Circular clips should be properly meshed with differential side gear (transaxle side) and with joint assembly (wheel side). Make sure they will not come out.
CAUTION: Be careful not to damage boots. Use suitable protector or cloth during