Mode II (Self-Diagnostic Results)
DIAGNOSTIC TEST MODE II - SELF-DIAGNOSTIC RESULTSIn this mode, a diagnostic trouble code is indicated by the number of blinks of the MALFUNCTION INDICATOR LAMP as shown below.
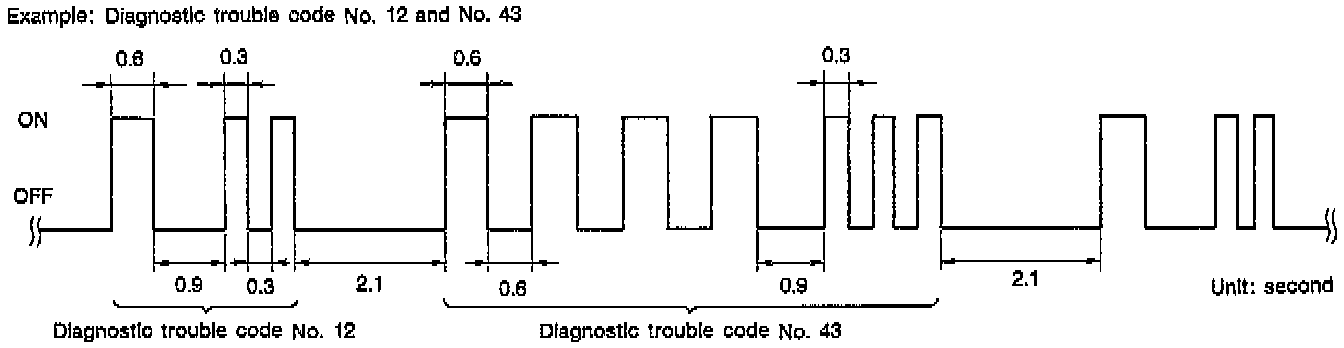
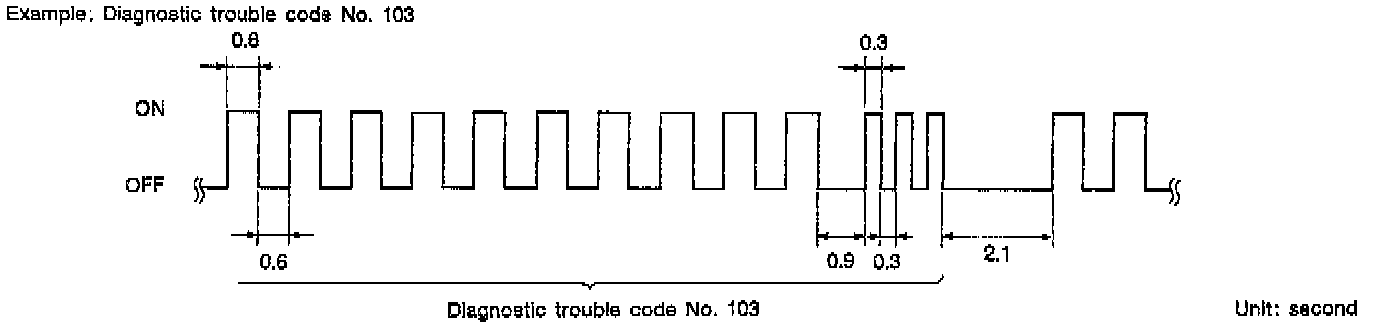
Long (0.6 second) blinking indicates the number of ten digits, and short (0.3 second) blinking indicates the number of single digits. For example, the malfunction indicator lamp blinks 10 times for 6 seconds (0.6 sec x 10 times) and then it blinks three times for about 1 second (0.3 sec x 3 times). This indicates the DTC "1 OS" and refers to the malfunction of the park/neutral position switch.
In this way, all the detected malfunctions are classified by their diagnostic trouble code numbers. The DTC "55" refers to no malfunction.
HOW TO ERASE DIAGNOSTIC TEST MODE II (Self-diagnostic results)
The diagnostic trouble code can be erased from the backup memory in the ECM when the diagnostic test mode is changed from Diagnostic Test Mode II to Diagnostic Test Mode I.
^ If the battery terminal is disconnected, the diagnostic trouble code will be lost from the backup memory within 24 hours.
Be careful not to erase the stored memory before starting trouble diagnoses.

DIAGNOSTIC TEST MODE II - FRONT OXYGEN SENSOR*1 MONITOR
In this mode, the MALFUNCTION INDICATOR LAMP displays the condition of the fuel mixture (lean or rich) which is monitored by the front oxygen sensor
To check the front oxygen sensor*1 function, start engine in Diagnostic Test Mode II. Then warm it up until engine coolant temperature indicator points to middle of gauge.
Next run engine at about 2,000 rpm for about 2 minutes under no-load conditions. Make sure that the MALFUNCTION INDICATOR LAMP comes ON more than 5 times within 10 seconds with engine running at 2,000 rpm under no-load.
1: Oxygen sensor (M/T models except for California) Heated oxygen sensor (M/T models for California and A/T models)